

Who this is for: Recruiters, recruiting coordinators and anyone who works candidates day to day. What you can see and do depends on your security role, so you may not have every action below. Ask your Journeyfront admin if something’s missing.
Your first day
1
Sign in
Accept your invitation email and set your password, or sign in with your company’s SSO. See Logging in and passwords.
2
Learn the big ideas
Five minutes on job reqs, workflows, Candidate Applications and scores makes everything else click. See How the pieces connect.
3
Find your way around
Take the tour of the top navigation and a job req’s tabs. See Finding your way around.
4
Check your job reqs
Open Job Reqs and make sure you see the job reqs you work on. If one’s missing, ask your admin to add you to its hiring team. See The Job Reqs page.
5
Save your first views
On the Candidates page, filter to the candidates you work most and click Save as New View. Your team lead may already have shared views for you: click + at the end of the tabs to add them. See Saved views.
6
Connect your calendar (if you interview)
Go to Interviews, then My Profile to connect your calendar, then My Availability to set the hours candidates can book. See Your availability and calendar.
Your day to day
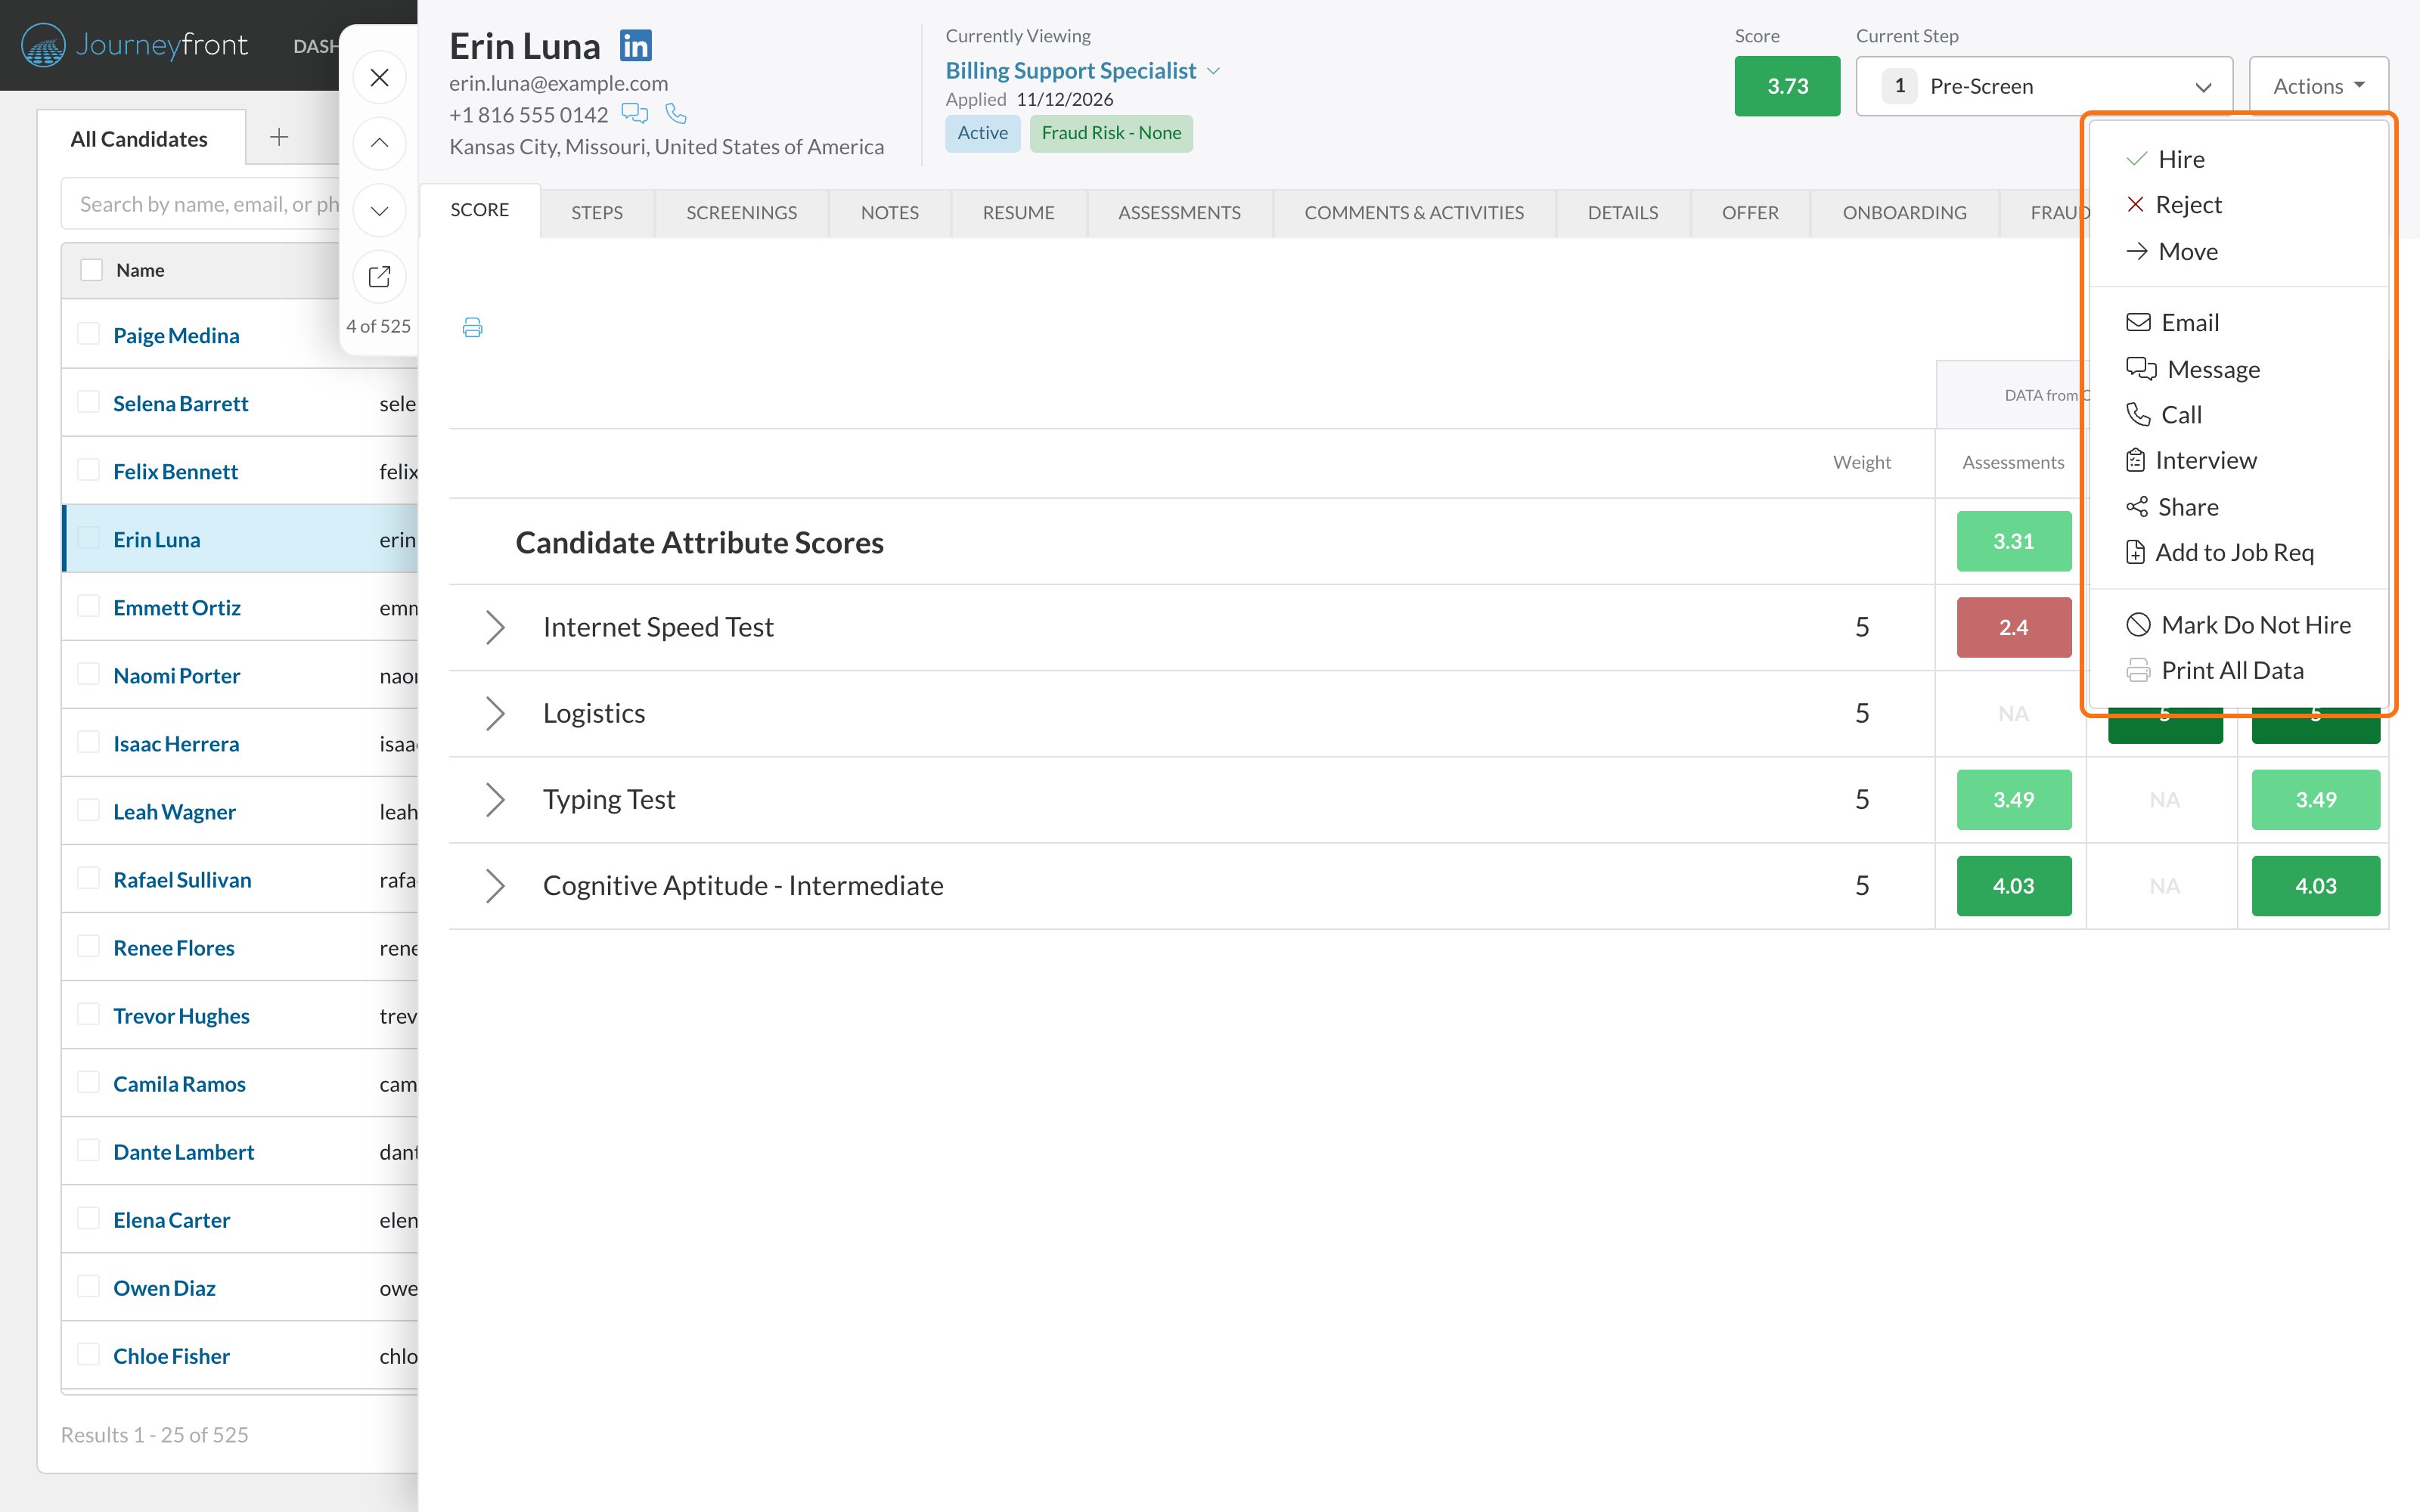
Many of these actions, such as Hire, Reject, Email, Message and Interview, are in the Actions menu at the top right of a Candidate Application.
Work smarter
FAQ
Why can't I see a job req or its candidates?
Why can't I see a job req or its candidates?
You see the job reqs you’re on the hiring team for, or every job req if your security role has All Job Req Access. Ask your admin to add you to the job req’s team. See Hiring team.
Why can't I hire, email or text candidates?
Why can't I hire, email or text candidates?
Each of those needs its own permission in your security role: Hire Candidates, Send Emails or Send Messages. See Security roles and permissions.
A candidate says they're stuck. What do I check?
A candidate says they're stuck. What do I check?
Start with their current step: candidates only see the activities in their current step, and wait for your team or an automation rule to move them on. See Assessments overview for a checklist, and Logging in and passwords if they can’t sign in.
Why don't I see the Setup tab on a job req?
Why don't I see the Setup tab on a job req?
Changing a job req’s workflow, application form and settings needs Manage Job Req Settings. You can still work with its candidates without it.
Related
How the pieces connect
How job reqs, workflows, postings, candidates and hiring classes relate.
Candidate self-scheduling
Send scheduling links so candidates book their own interview.
Schedule an interview for a candidate
Pick a time from your interviewers’ calendars and book it yourself.
Getting started for hiring managers
Share this with the hiring managers you work with.
Glossary
Every term, in plain language.
How Journeyfront uses AI
Where AI helps, and how your team stays in charge.