

Who can do this: Users with the View and Send Offers permission.Availability: Sending the offer for signature uses the E-Signatures add-on and e-signature credits. Without it, you can still create the offer, generate the documents and record the candidate’s answer. Ask your Customer Success Manager.
Before you start
The candidate’s job req needs an Offer activity in its workflow. Without one, the Offer tab says “There is no offer activity in your hiring process”. For offers to start pre-filled, point that Offer activity at an offer package. See Offer packages.The Offer tab
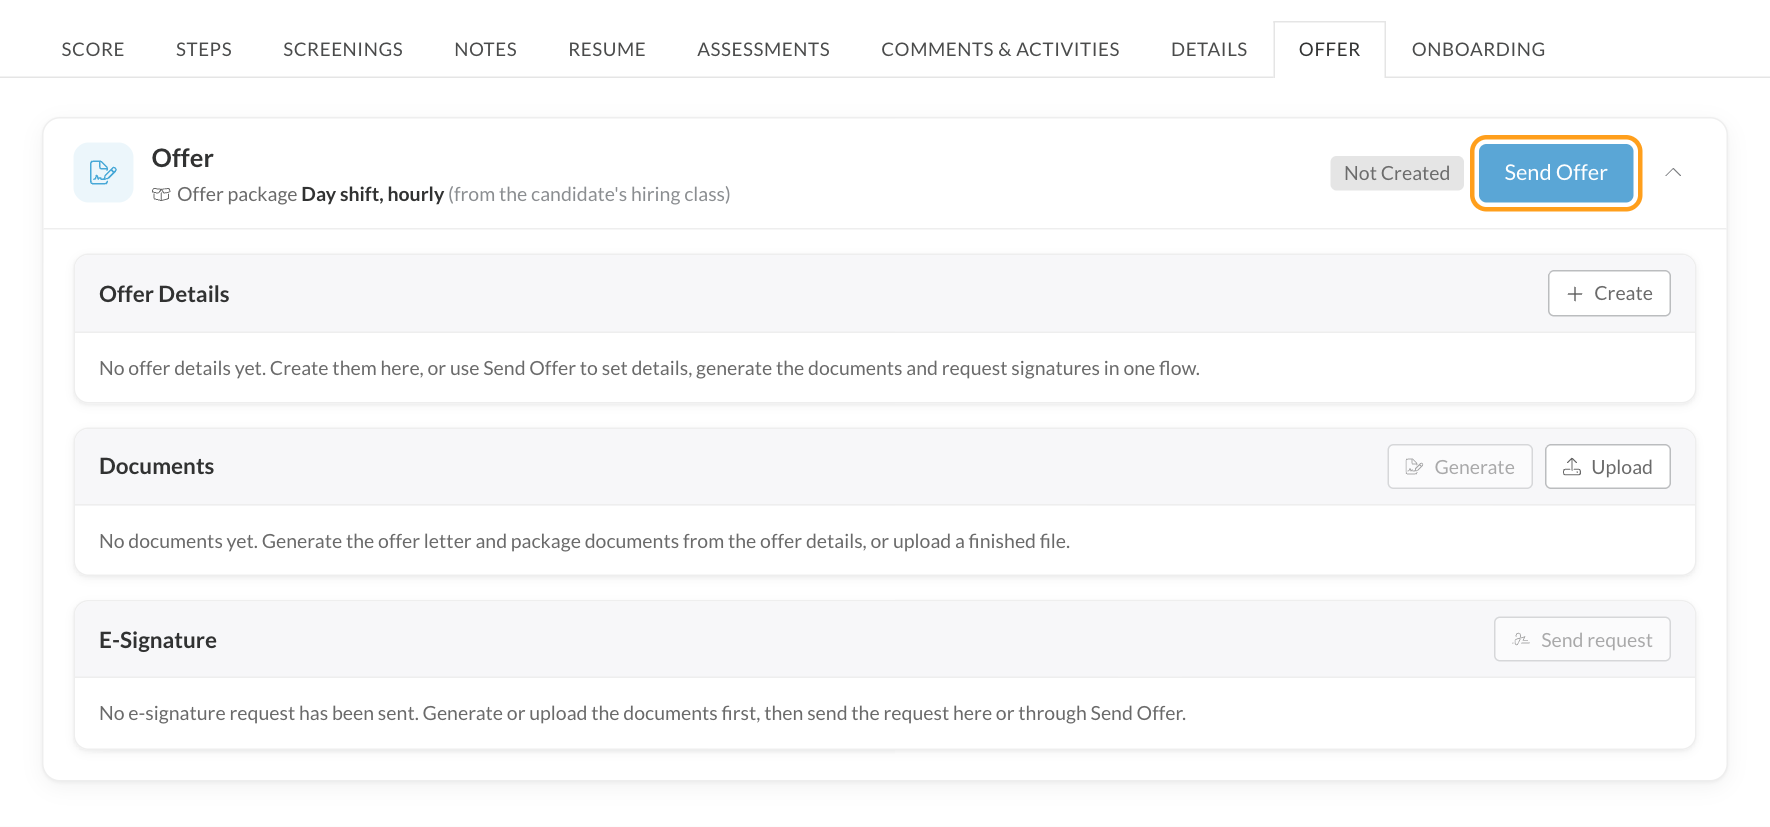
Open the Candidate Application and click the Offer tab. Each Offer activity on the job req has its own card. The card’s header shows the activity’s status and which offer package applies, for example “from the candidate’s hiring class” or “from this job’s Offer activity”. Inside the card:- Candidate response: record the candidate’s answer, once there are documents.
- Offer Details: the terms of this offer.
- Documents: the offer letter, supporting documents and signed copies.
- E-Signature: each signer’s status, reminders and the signature request.
Send an offer
1
Click Send Offer
On the Offer activity’s card, click Send Offer. The Send Offers window opens for this candidate.
2
Select Offer
Confirm the Offer Activity. If the job req has only one, it’s already selected. A summary shows the package the offer starts from, with its letter, documents and defaults.
3
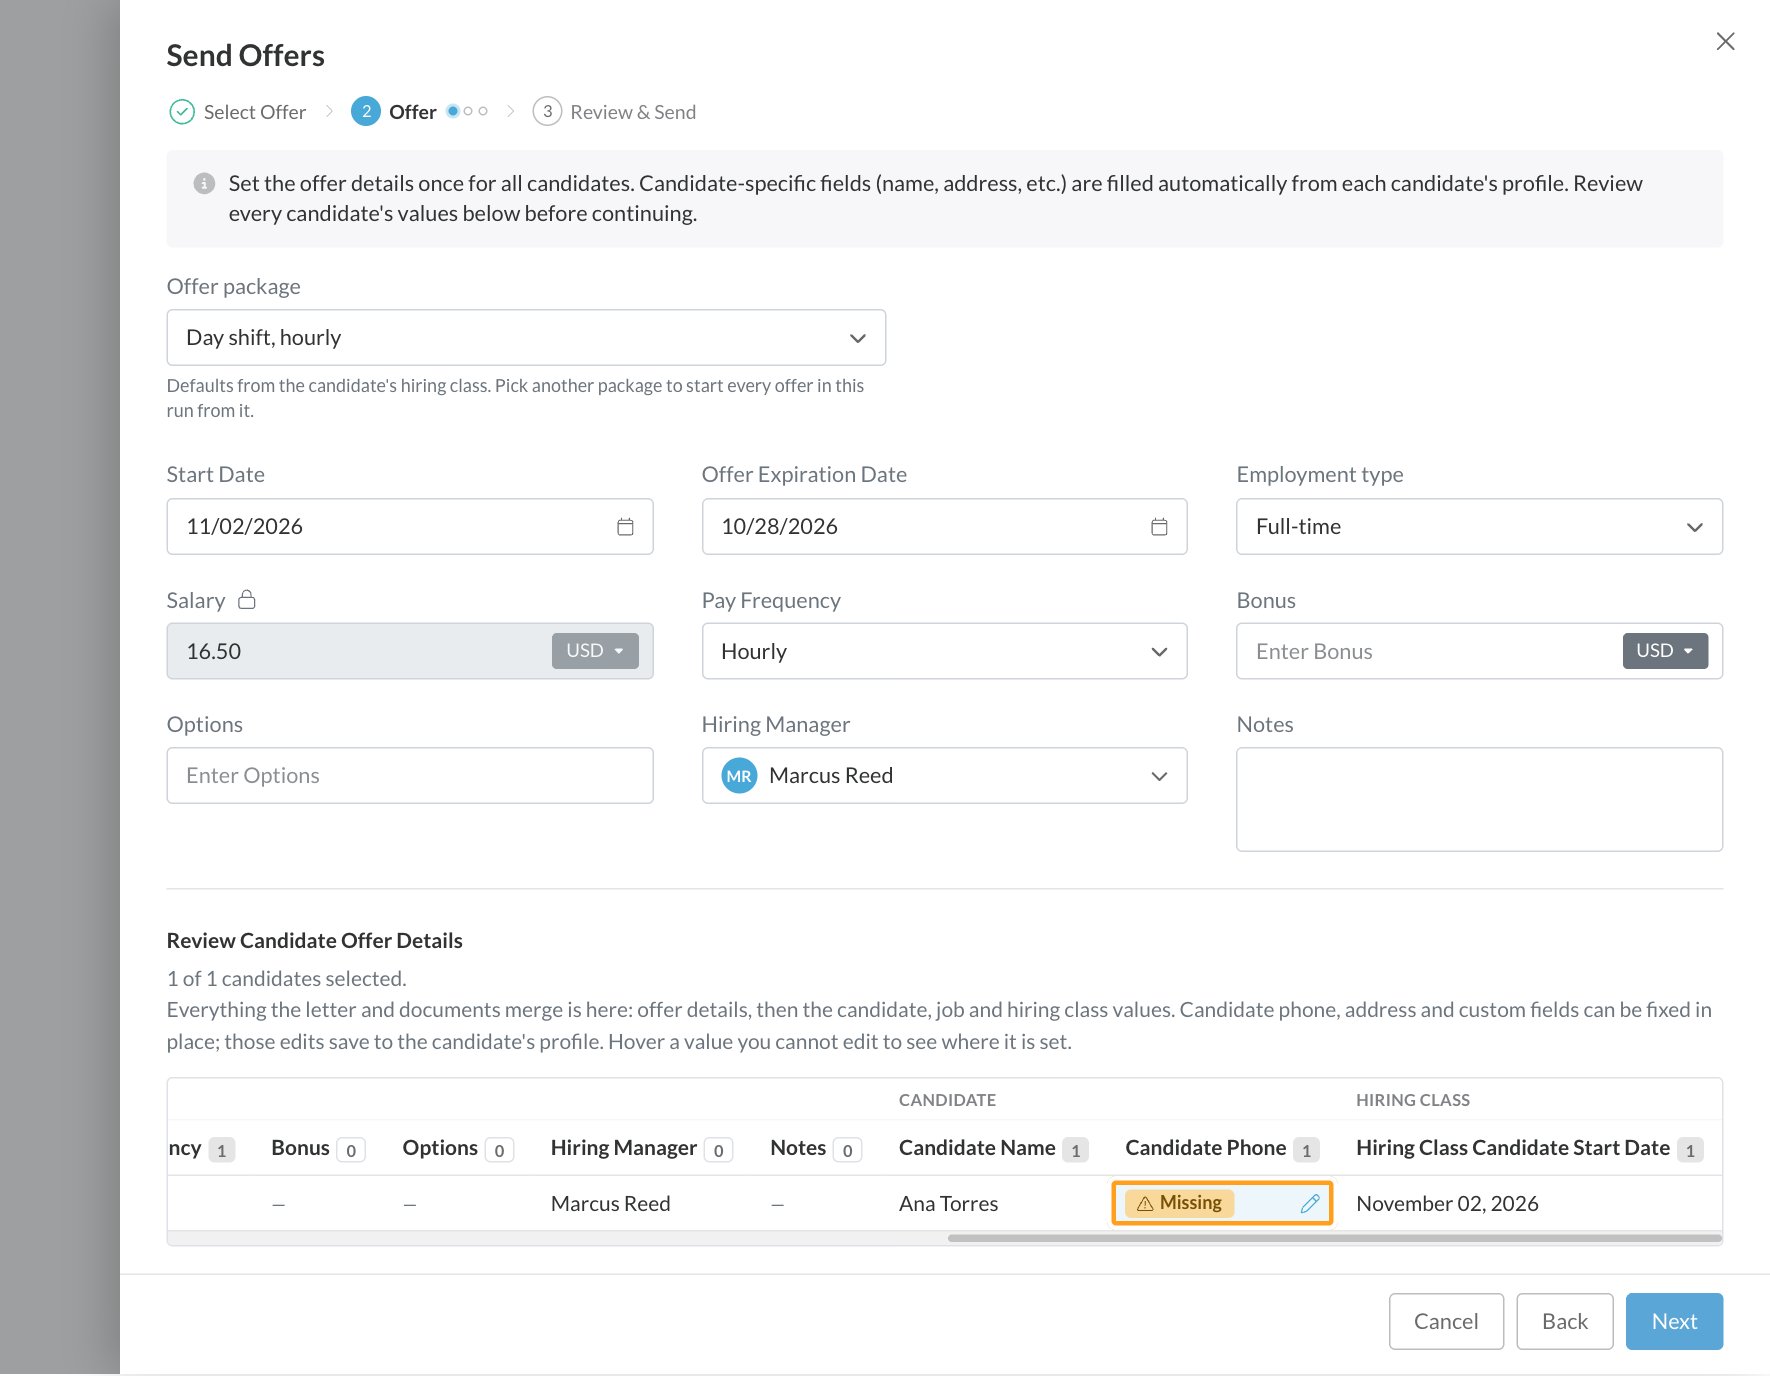
Offer
The middle of the progress bar shows your Offer activity’s name, for example Offer. The small dots next to it are its parts, and you move through them with Next:
- Offer details: package defaults are already filled in, and locked values can’t be changed. Fill in anything the package leaves open. If the Offer activity isn’t locked, you can choose a different Offer package here. Below, a table shows every value that will go into the documents, grouped by where it comes from. Missing values are flagged; you can fix the candidate’s phone, address and custom fields right there, and those changes save to the Candidate Profile.
- Documents: leave Generate Offer Letters on to create the documents. Check the offer letter and the documents from the package. Unless the activity is locked, you can add another document. Each document shows its merge keys and whether they’re all filled. To send with a missing value left empty, tick Leave these blank in the documents. Turn Generate Offer Letters off to create the offer details only, with no documents or e-signature.
- E-signature: only there when your account has the E-Signatures add-on and credits left, and the documents are being generated. Leave Send E-Signature Requests on to send the documents for signature, and review the signer, signing order, expiry and email. See E-signatures for each option.
4
Review & Send
Check the summary and click Create & Send Offer. If you turned off e-signatures, the button reads Create Offer.
Manage an offer
Offer Details
- Click Create to enter terms without running the full Send Offer flow.
- Click Edit to change any value that isn’t locked, then save.
- Click Remove to delete the terms. You’ll see what will be affected before you confirm.
Documents
The Documents section lists the offer letter and every document, each marked Signed or Unsigned. Everything unsigned goes into one e-signature envelope; signed copies are kept as received.- Generate creates the letter and package documents from the offer details. Unless the activity is locked to its package, you can pick a different letter template or add documents.
- Upload adds a file you already have. Choose Supporting document (an NDA, agreement or other file) or Offer letter (a finished letter instead of a generated one), and tick This is a signed copy if it’s already signed. Uploading your own offer letter isn’t available when the activity is locked to its package.
- Each row lets you preview, download, rename, replace or delete the file. You can’t replace or delete files while an e-signature request is out; cancel the request first. Once a signed copy is on the offer, the unsigned originals stay as the record of what was sent.
Candidate response
When the candidate signs through e-signature, the offer is accepted automatically, and a candidate who declines in the signing screen declines the offer. If you’re not using e-signatures, record their answer yourself:- Click Accept or Decline.
- Click Change to switch the answer, or Revert to clear it.
Offer statuses
FAQ
Why is the Offer tab empty?
Why is the Offer tab empty?
If it says “There is no offer activity in your hiring process”, the candidate’s job req needs an Offer activity in its workflow. If you see the card but not the offer details, your security role needs the View and Send Offers permission.
Does sending an offer move the candidate to another step?
Does sending an offer move the candidate to another step?
No. Send Offer creates the offer on the Offer activity wherever the candidate is now. To move a candidate and create the offer in one go, change their step to the step with the Offer activity and turn on Create Offer in the window that opens. See Send offers in bulk.
Where do the offer terms come from?
Where do the offer terms come from?
From the offer package that applies to the candidate: their hiring class’s package when the Offer activity allows it, otherwise the job req’s package. You complete whatever the package leaves open. See Offer packages.
Can I choose a different package or letter for one candidate?
Can I choose a different package or letter for one candidate?
Only when the Offer activity isn’t locked to its package. Locked activities show the package and don’t offer a choice.
Can I use offers without e-signatures?
Can I use offers without e-signatures?
Yes. Generate or upload the documents, share them however you like, and record the candidate’s answer with Accept or Decline.
Can a job req have more than one Offer activity?
Can a job req have more than one Offer activity?
Yes. Each one gets its own card on the Offer tab, with its own terms, documents and status.
How do I know when the candidate has signed?
How do I know when the candidate has signed?
The signer statuses on the card update as the candidate opens and signs, and the signed documents appear under Documents when everyone is done. See E-signatures.
Related
E-signatures
Signing options, tracking and what candidates see.
Send offers in bulk
The same flow for a whole group of candidates.
Offer packages
Where an offer’s letter, documents and defaults come from.
Offer fields and merge keys
How values get into your documents.