

Who can do this: Everyone who interviews candidates. Each person sets up their own calendar and availability under Interviews.
Set up My Profile
1
Open My Profile
Click Interviews (1) at the top of the app, then My Profile (2).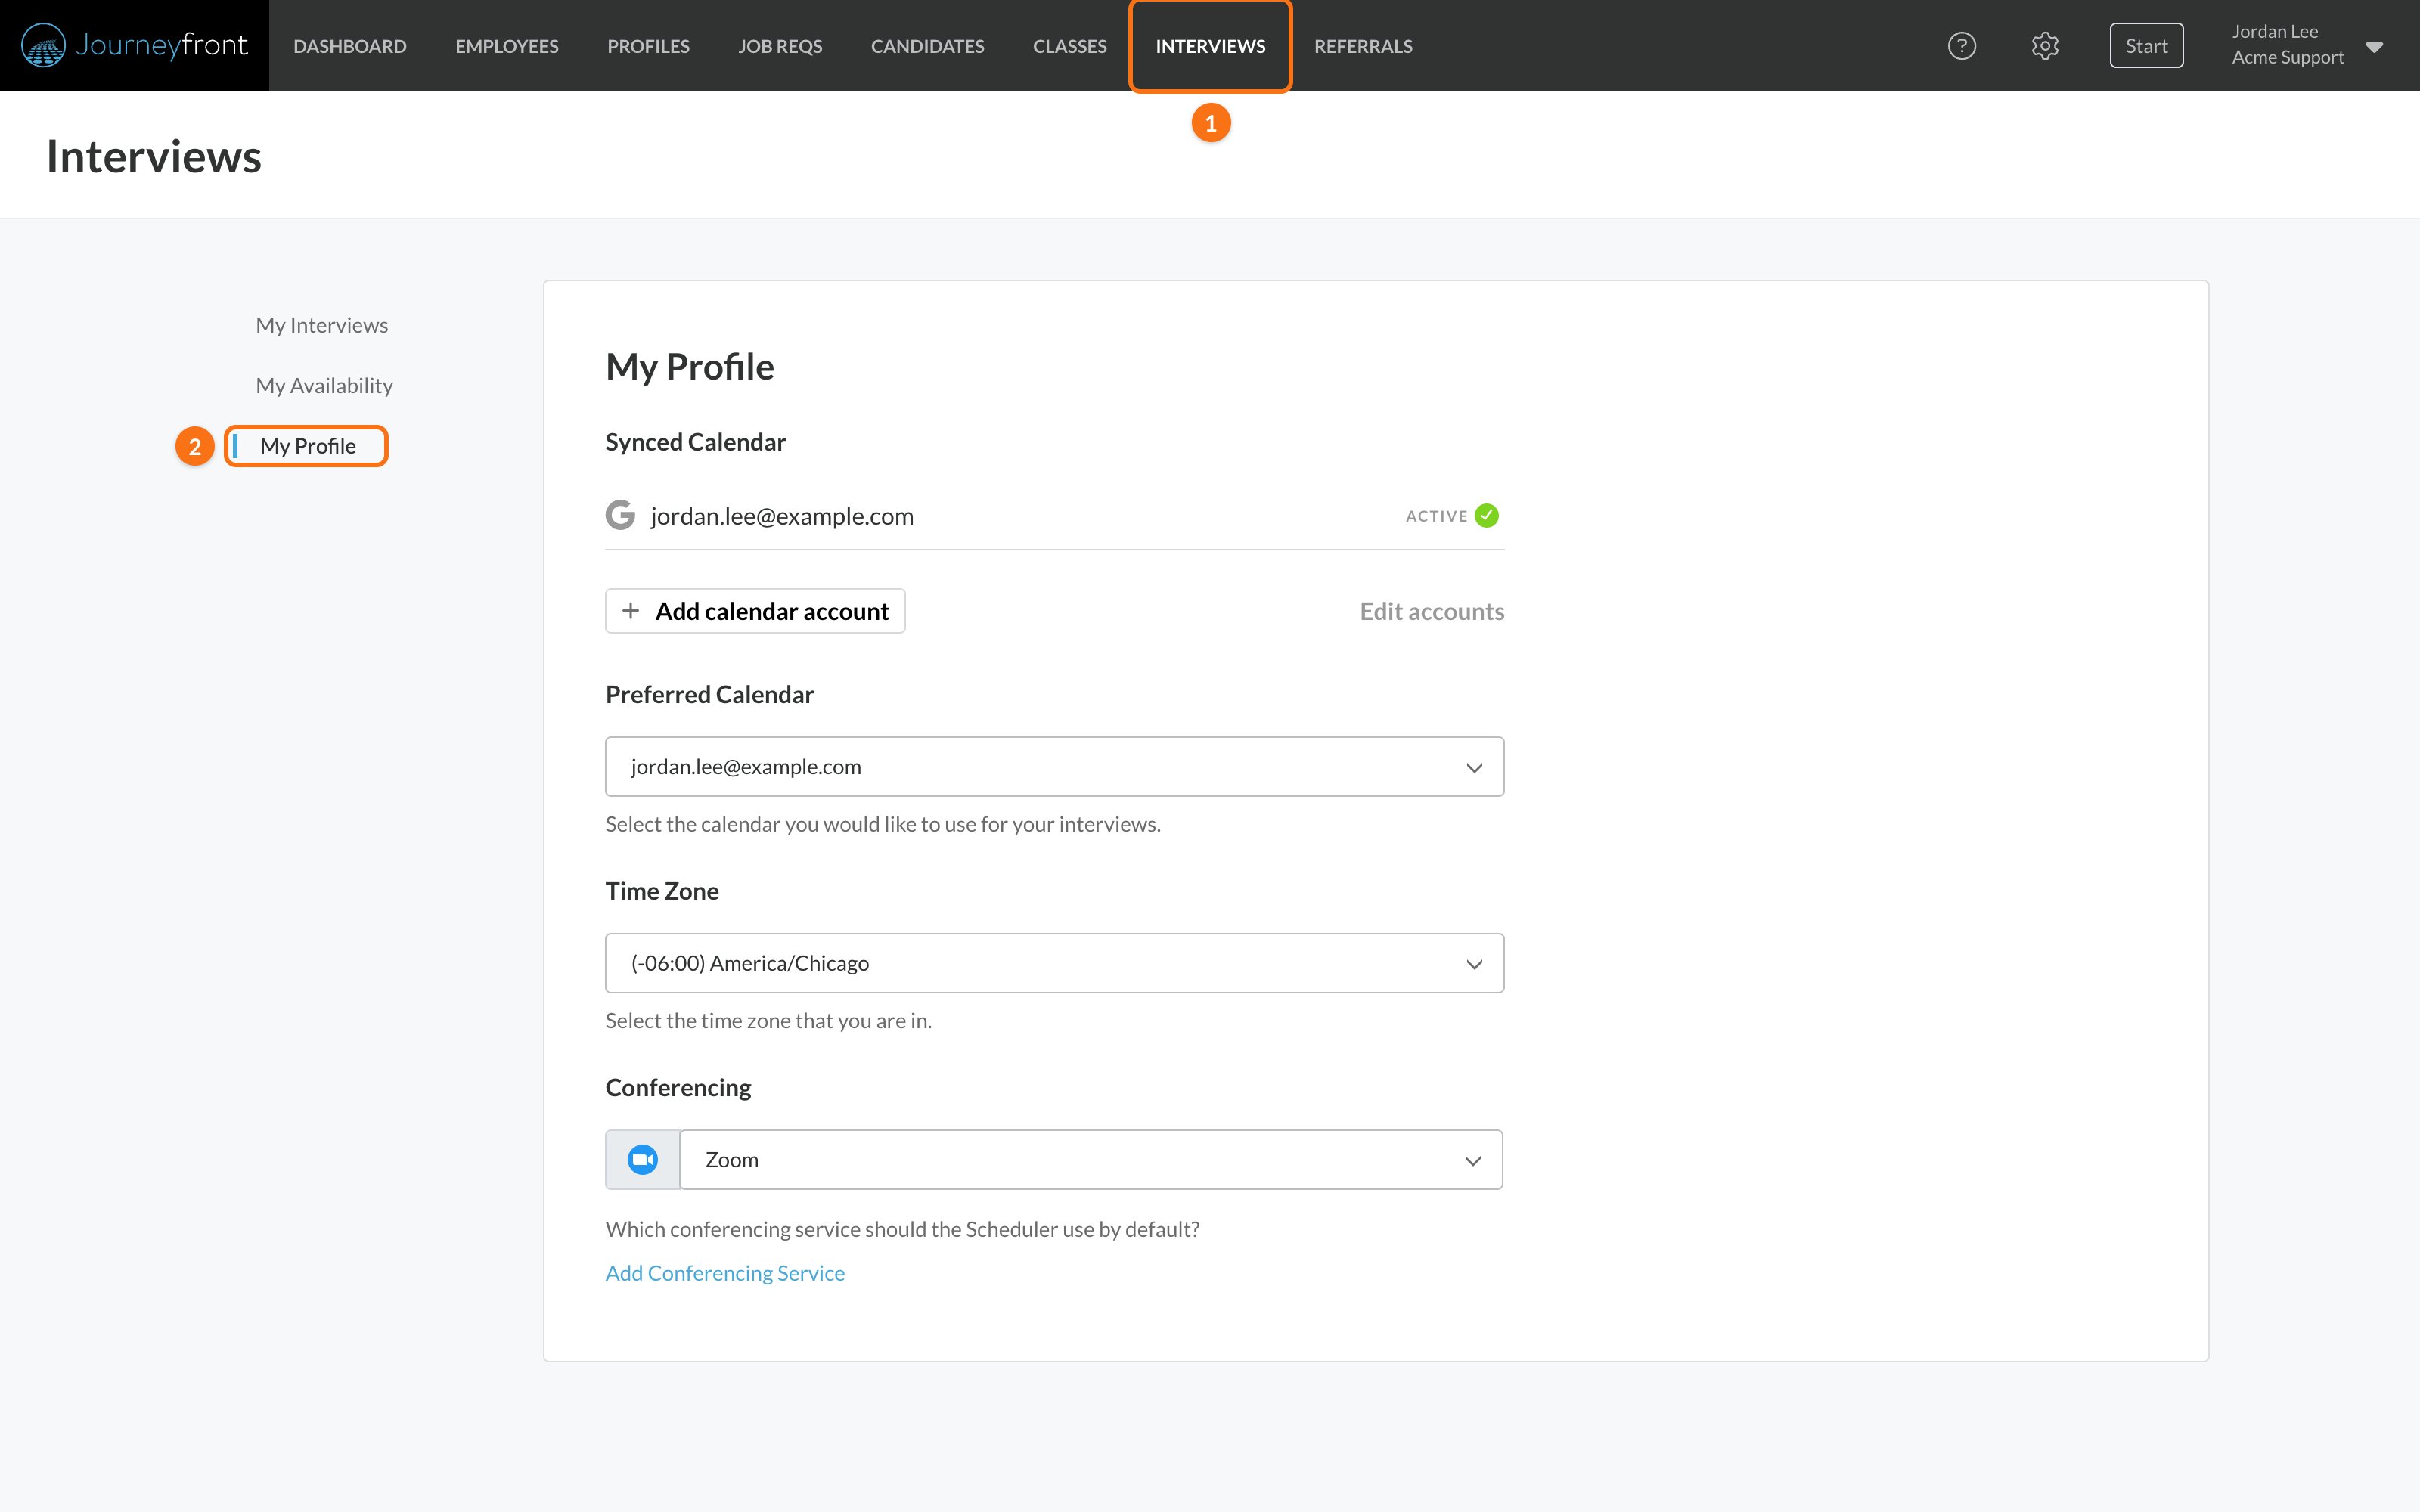
2
Connect your calendar
Under Synced Calendar, choose your calendar provider, sign in to it and allow access. Your connected account then appears under Synced Calendar. See Calendars and video for the providers you can connect.
3
Choose your Preferred Calendar
If you connected more than one calendar, pick the one interviews should be added to under Preferred Calendar. With one calendar, it’s selected for you.
4
Set your Time Zone
Choose the time zone you work in.
5
Choose your video service
Under Conferencing, pick the video service to use for your video interviews. If it isn’t in the list, click Add Conferencing Service, sign in to it and allow access, then pick it.
Set your weekly availability
1
Open My Availability
Go to Interviews, then My Availability. If you haven’t connected a calendar yet, the page asks you to do that on My Profile first.
2
Mark your interviewing hours
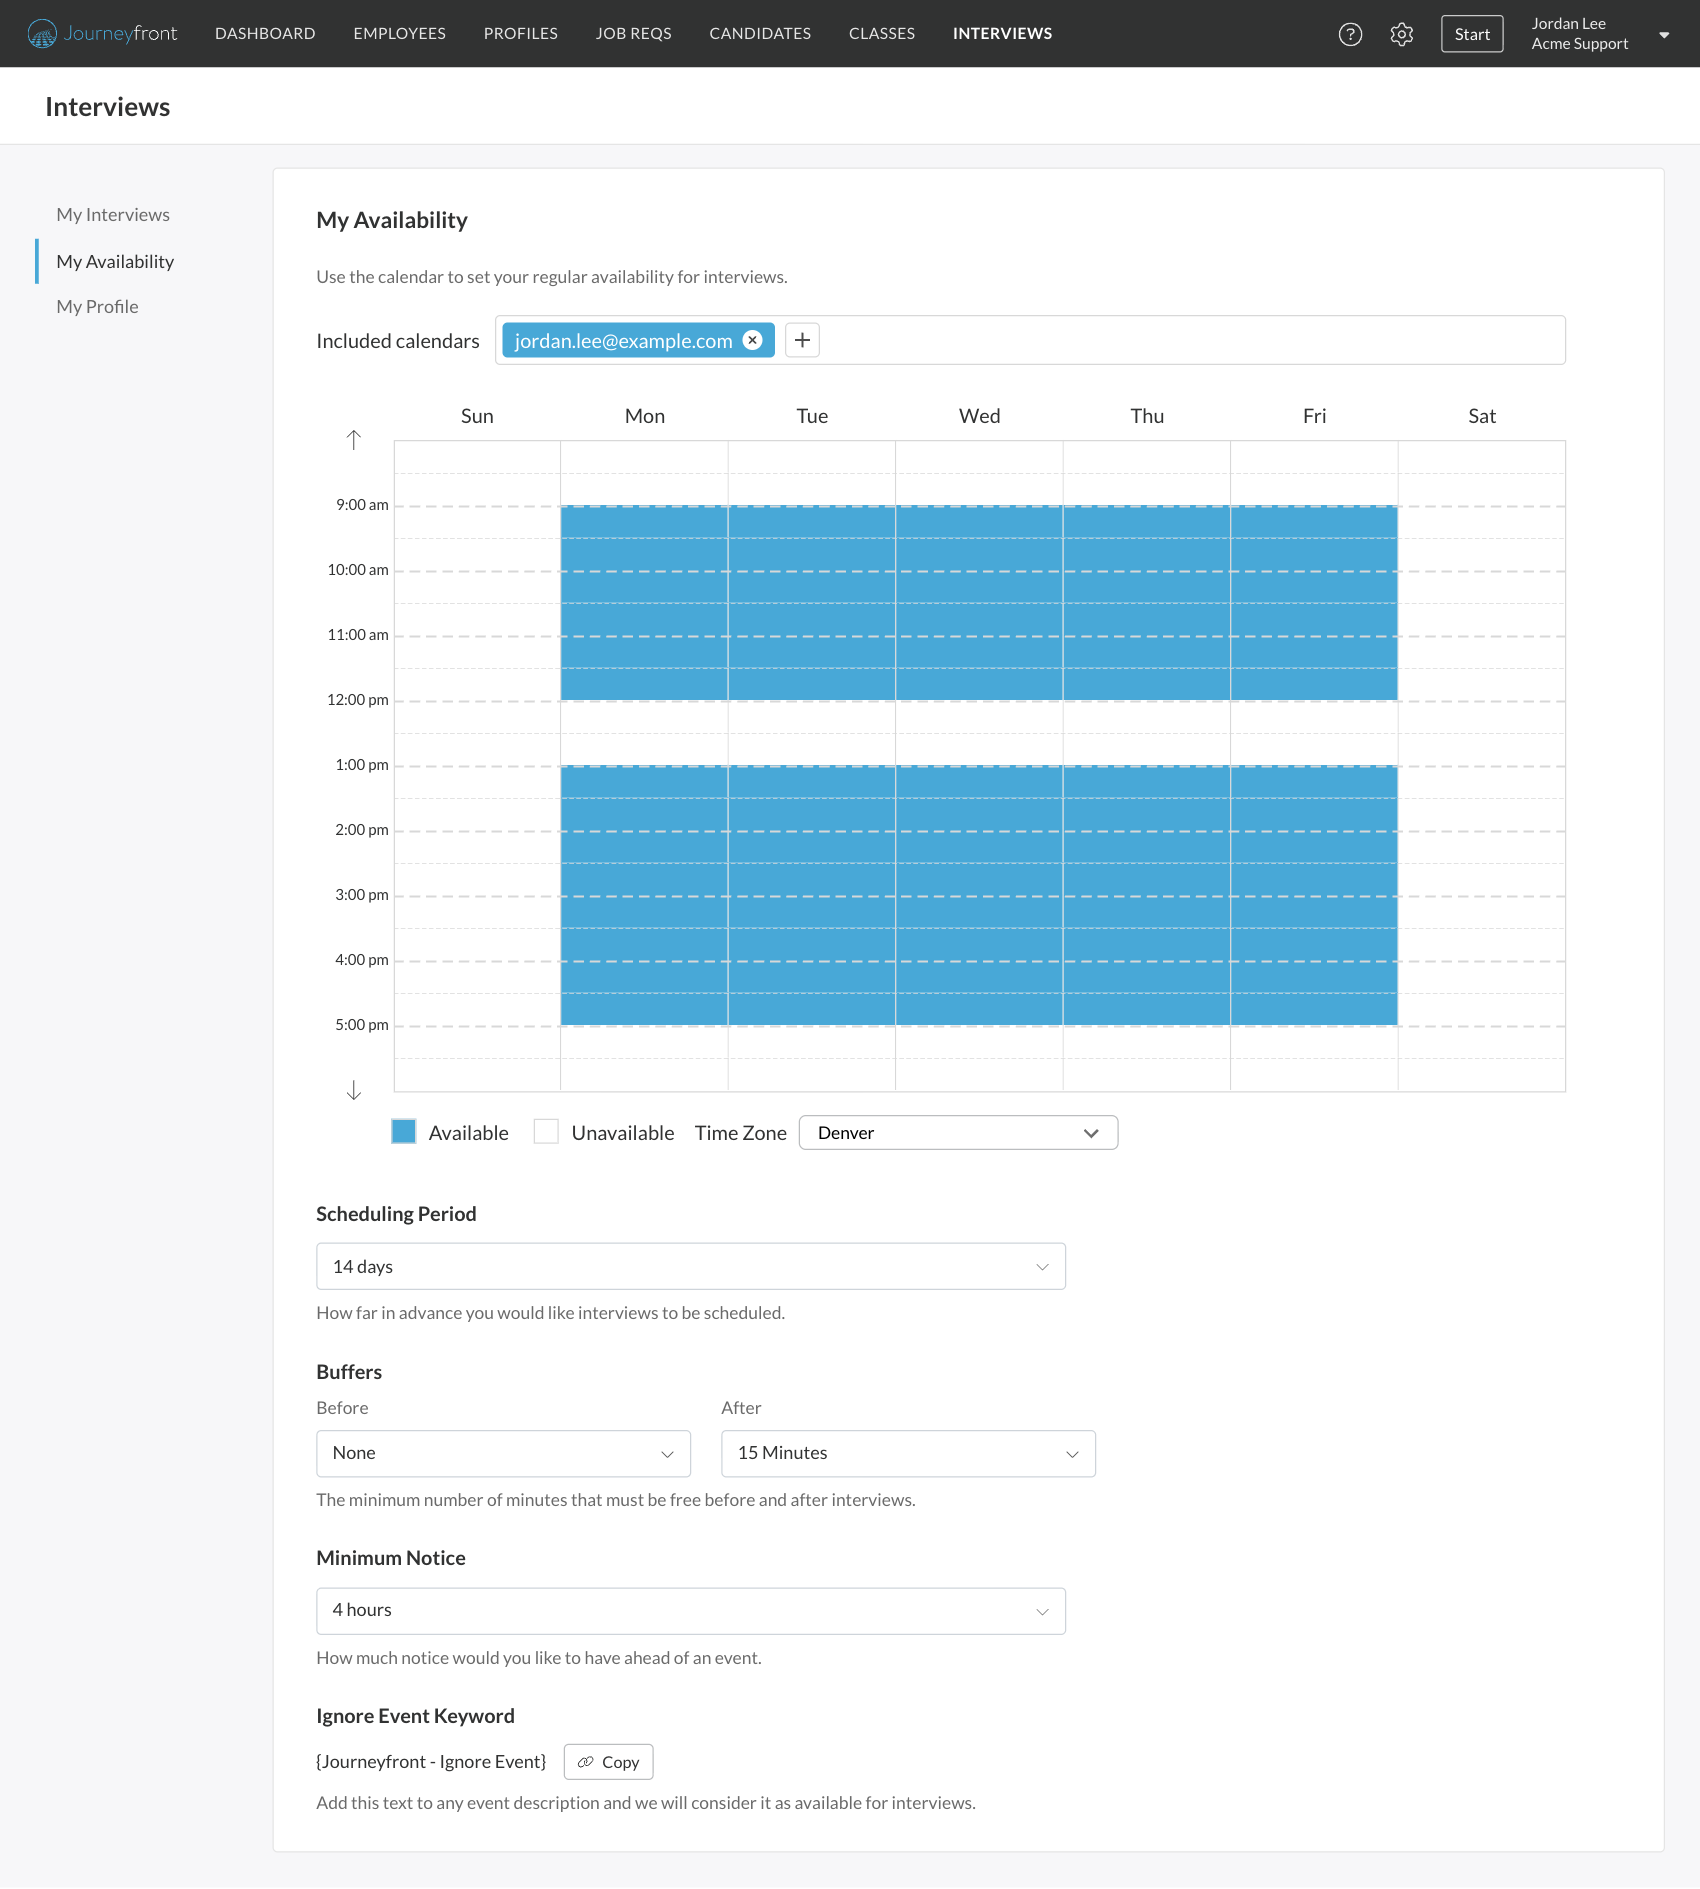
The weekly grid shows 8am to 6pm in 30-minute blocks, in your time zone from My Profile. Blue blocks are times candidates can book; white blocks are not. Click a block to switch it.
3
Save
Click Save Availability. You’ll see “Availability saved”.
Fine-tune when you can be booked
Below the grid, these settings save as soon as you change them:Ignore Event Keyword
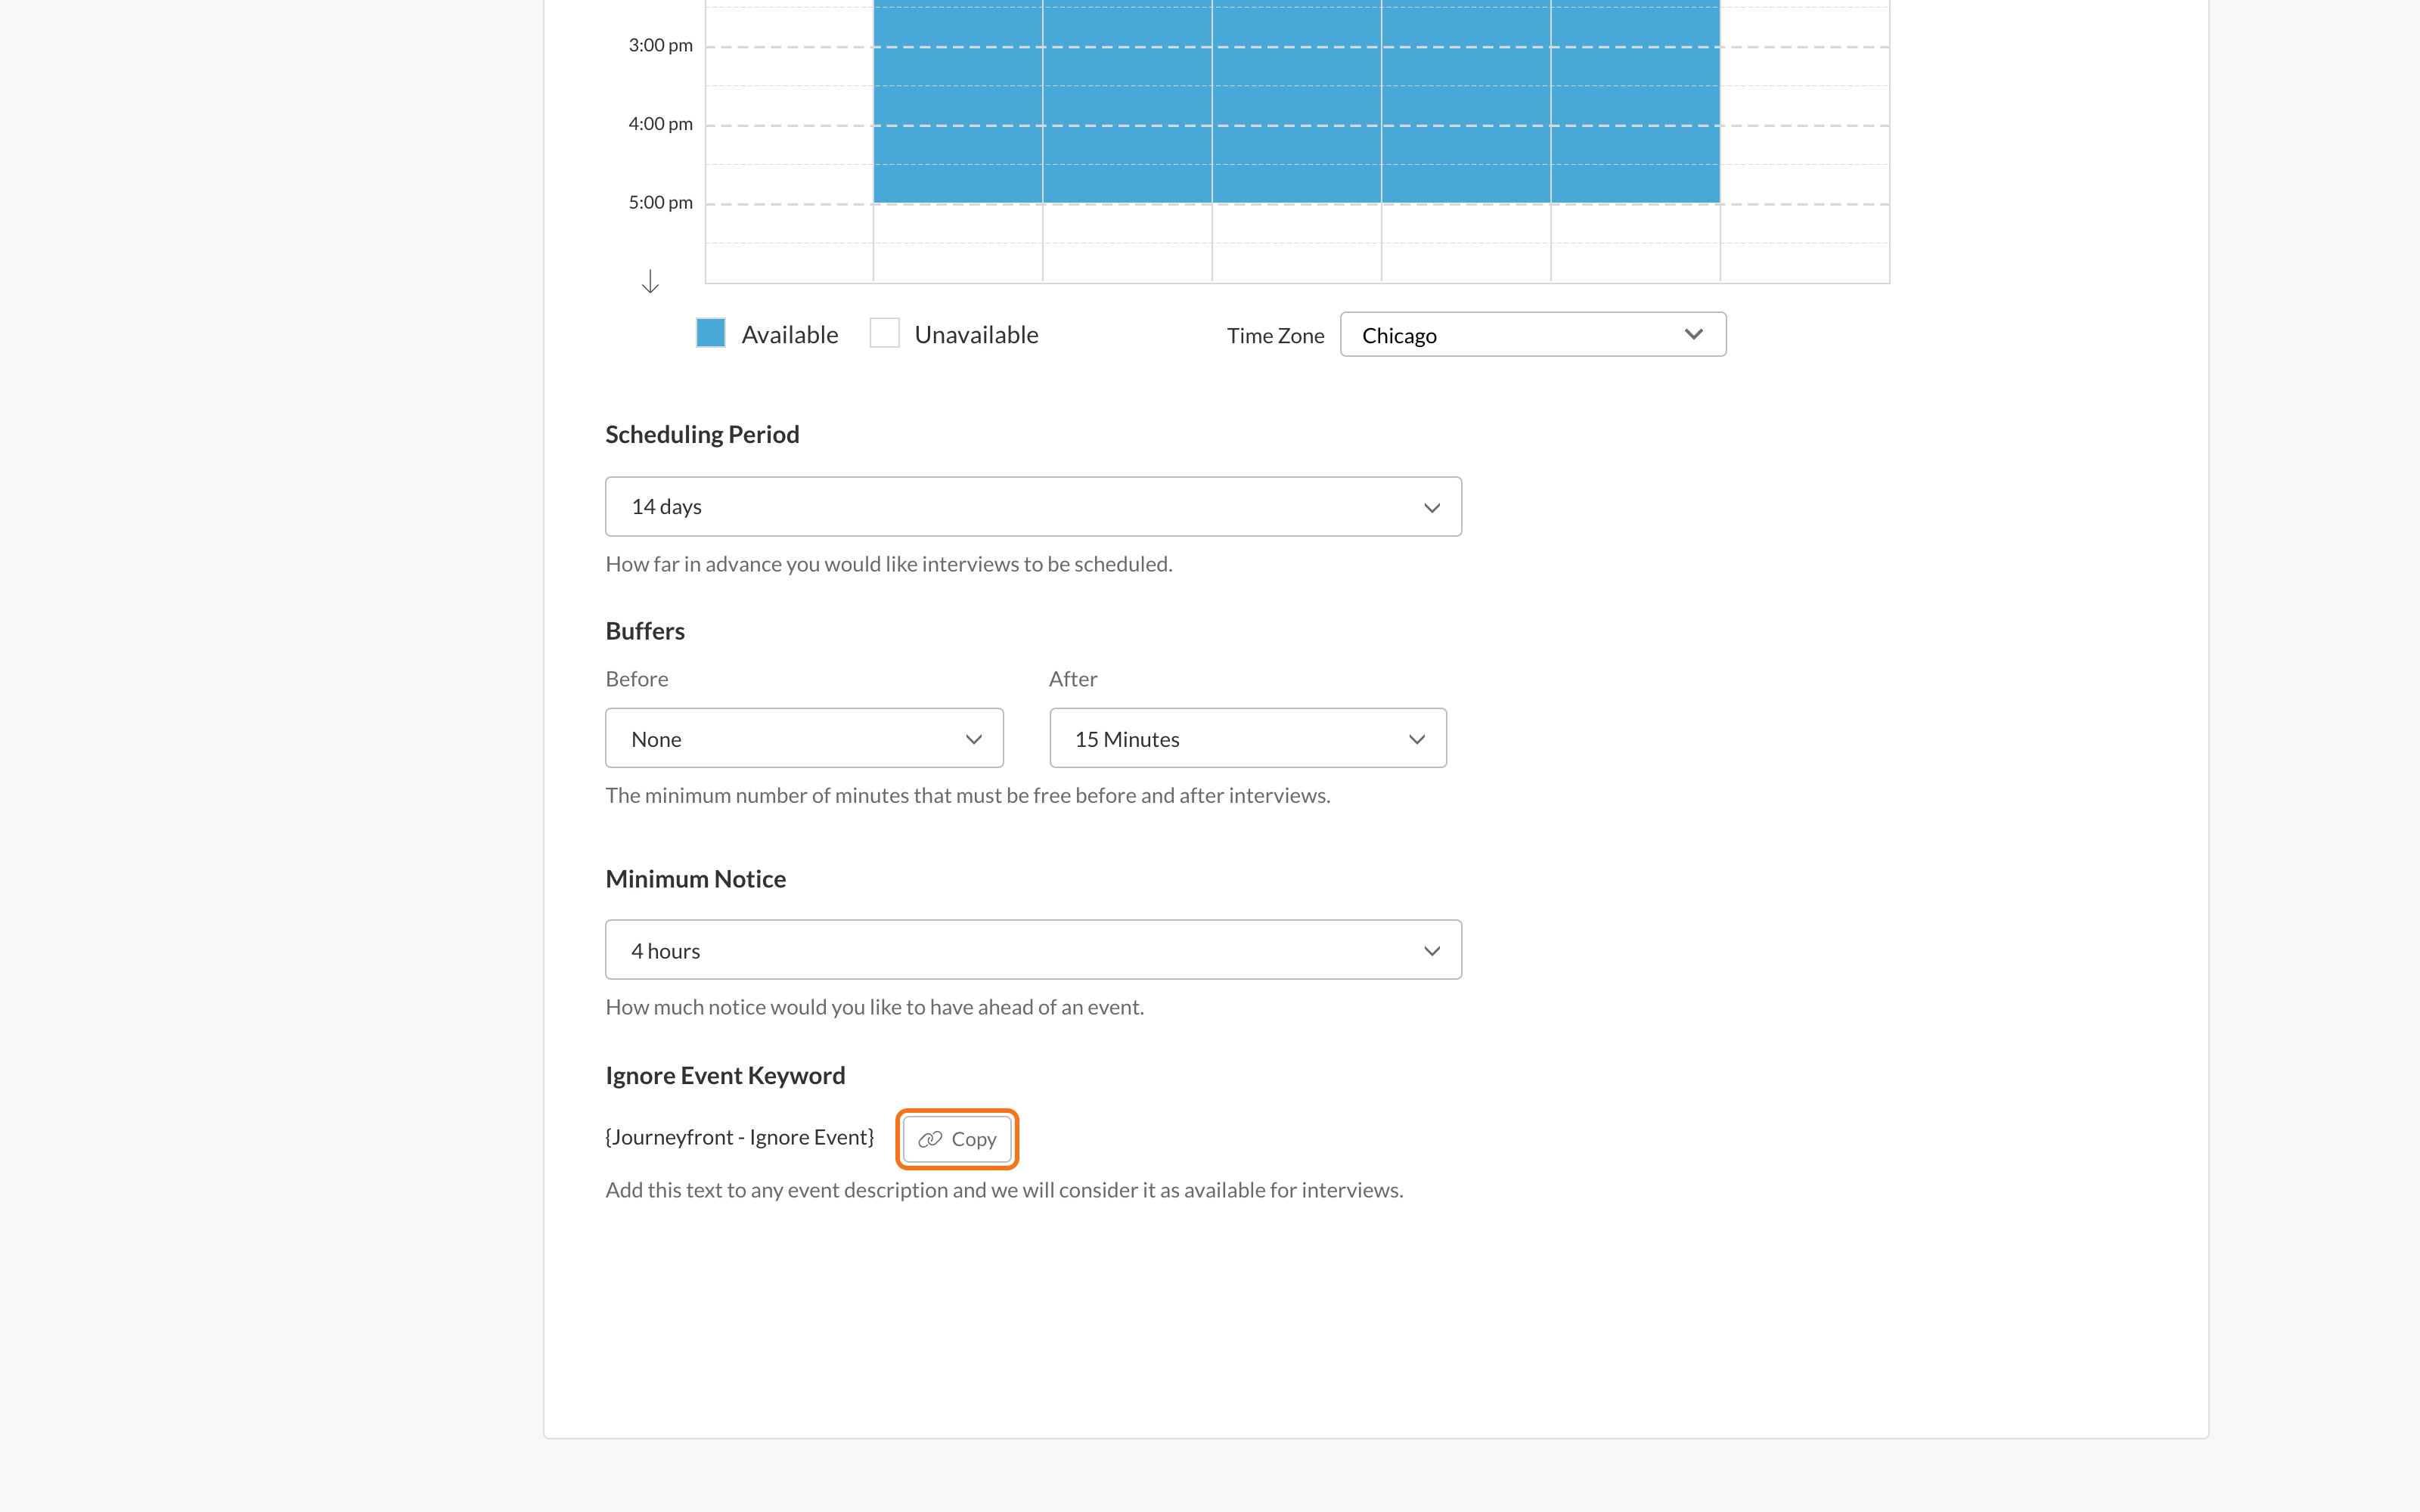
Some calendar events don’t really block you, like a recurring “admin time” placeholder. Click Copy next to Ignore Event Keyword and paste the text,{Journeyfront - Ignore Event}, into that event’s description on your calendar. Journeyfront then treats that time as available for interviews.
Best practices
Small habits keep your calendar bookable and stop double bookings, especially when you run many interviews a week.- Keep your connected calendar current. Journeyfront only knows you’re busy from your calendar. Put meetings, lunch, training and time off on it, even short ones.
- Set realistic hours in My Availability. Mark only the hours you really interview, not your whole workday. Leave time for feedback and other work, and adjust the grid when your schedule changes, such as a new shift or a regular team meeting.
- Use a buffer after interviews. 10 to 15 minutes under Buffers, After gives you time to finish feedback before the next candidate.
- Set Minimum Notice. A few hours stops candidates booking a slot that starts in minutes. For same-day hiring events, lower it for the day, then set it back.
- Use the ignore keyword for placeholder blocks. Recurring “focus time” or “admin time” holds can quietly use up your week. Add
{Journeyfront - Ignore Event}to the ones you’d give up for an interview. - Block holidays on your calendar. Add holidays and days off to your connected calendar as busy events. To close dates for everyone on one interview, like a site holiday, whoever sets up the interview can add Date exceptions to its activity hours.
- Check the Availability Preview. After you change your hours, ask whoever sets up the interview to open its Availability Preview, or open it yourself if you can, to see the times candidates will actually be offered.
- Keep your time zone right. If you travel or move, update Time Zone in My Profile so your hours line up.
Candidate self-scheduling
Date exceptions, activity hours and the Availability Preview for an interview.
How your availability is used
A time is offered to a candidate only when all of these are true:- It’s inside your blue hours in My Availability.
- Your connected calendar shows you as free, including your buffers.
- It’s within your Scheduling Period and after your Minimum Notice.
- It fits the interview’s own settings, such as its length, how many interviewers must be free together, and any activity hours set for that interview.
When someone asks you to connect your calendar
If you’re added as an interviewer before you’ve connected a calendar, whoever sets up the interview sees a note that you haven’t synced your calendar, and can click Invite to Sync Calendar. You’ll get an email asking you to connect your calendar for interviews. Follow the steps under Set up My Profile, then set your hours in My Availability.FAQ
Candidates can't book with me. What should I check?
Candidates can't book with me. What should I check?
Work through this list:
- Calendar connected? Interviews, then My Profile, should show your account under Synced Calendar.
- Hours saved? Check the blue blocks in My Availability, and that you clicked Save Availability.
- Too narrow? A short Scheduling Period, long Buffers or long Minimum Notice can leave very little open.
- Calendar full? Any busy event blocks the time unless it has the ignore keyword.
- Interview settings? Ask whoever set up the interview to check its length, the number of required interviewers and any activity hours. See Candidate self-scheduling.
Can candidates see my calendar?
Can candidates see my calendar?
No. Candidates only see the open times they can book, never your events.
How do I take a day off from interviews?
How do I take a day off from interviews?
Add the time off to your connected calendar as a busy event. Journeyfront stops offering those times. For a regular change, like no longer interviewing on Fridays, update the grid in My Availability.
I work in a different time zone from my candidates. Is that a problem?
I work in a different time zone from my candidates. Is that a problem?
No. Set your own Time Zone in My Profile. Candidates always see open times in their own time zone.
Where do booked interviews go?
Where do booked interviews go?
Onto your Preferred Calendar, and into Interviews, then My Interviews. See Conduct an interview.
Why don't I see Google Meet in the Conferencing list?
Why don't I see Google Meet in the Conferencing list?
Google Meet is offered when you’ve connected a Google calendar. For Zoom, Microsoft Teams or GoToMeeting, click Add Conferencing Service first.
Related
Calendars and video
Which calendars and video services you can connect.
Candidate self-scheduling
How candidates book from your open times.
Set up an interview activity
Interviewers, length and how they’re picked.
Conduct an interview
Open the guide and submit feedback.