

Who can do this: Anyone who can open the candidate’s job req.
Before you start
Rejection reasons come from your account’s list, so set that list up first with the reasons your team actually uses. Your admins manage it in Settings, then Custom Options, then Rejection Reasons.Rejection reasons
Set up the reasons your team chooses from when rejecting a candidate.
Reject one candidate
1
Open the Reject window
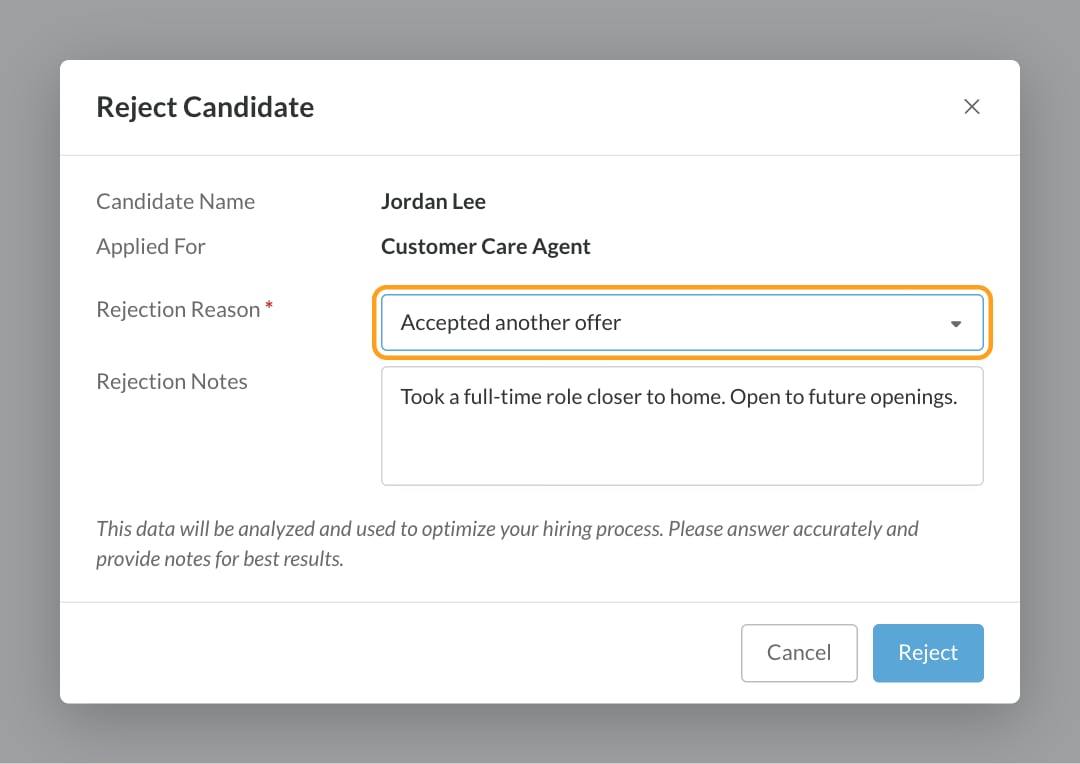
On the Candidate Application, click Actions, then Reject. The Reject Candidate window shows the candidate’s name and the job req they applied for.
2
Choose a rejection reason
Pick a Rejection Reason. Reasons are grouped by type, and you can type to search the list. It’s required.
3
Add notes (optional)
Add Rejection Notes with any detail your team should know.
4
Click Reject
The header now shows Rejected, the date and the reason.
Reject several candidates at once
1
Select the candidates
On the Candidates page or a job req’s Candidates tab, tick the boxes next to the candidates. They need to be on the same job req.
2
Click Reject
Reject is in the actions bar above the list. The Reject Candidates window lists everyone you selected.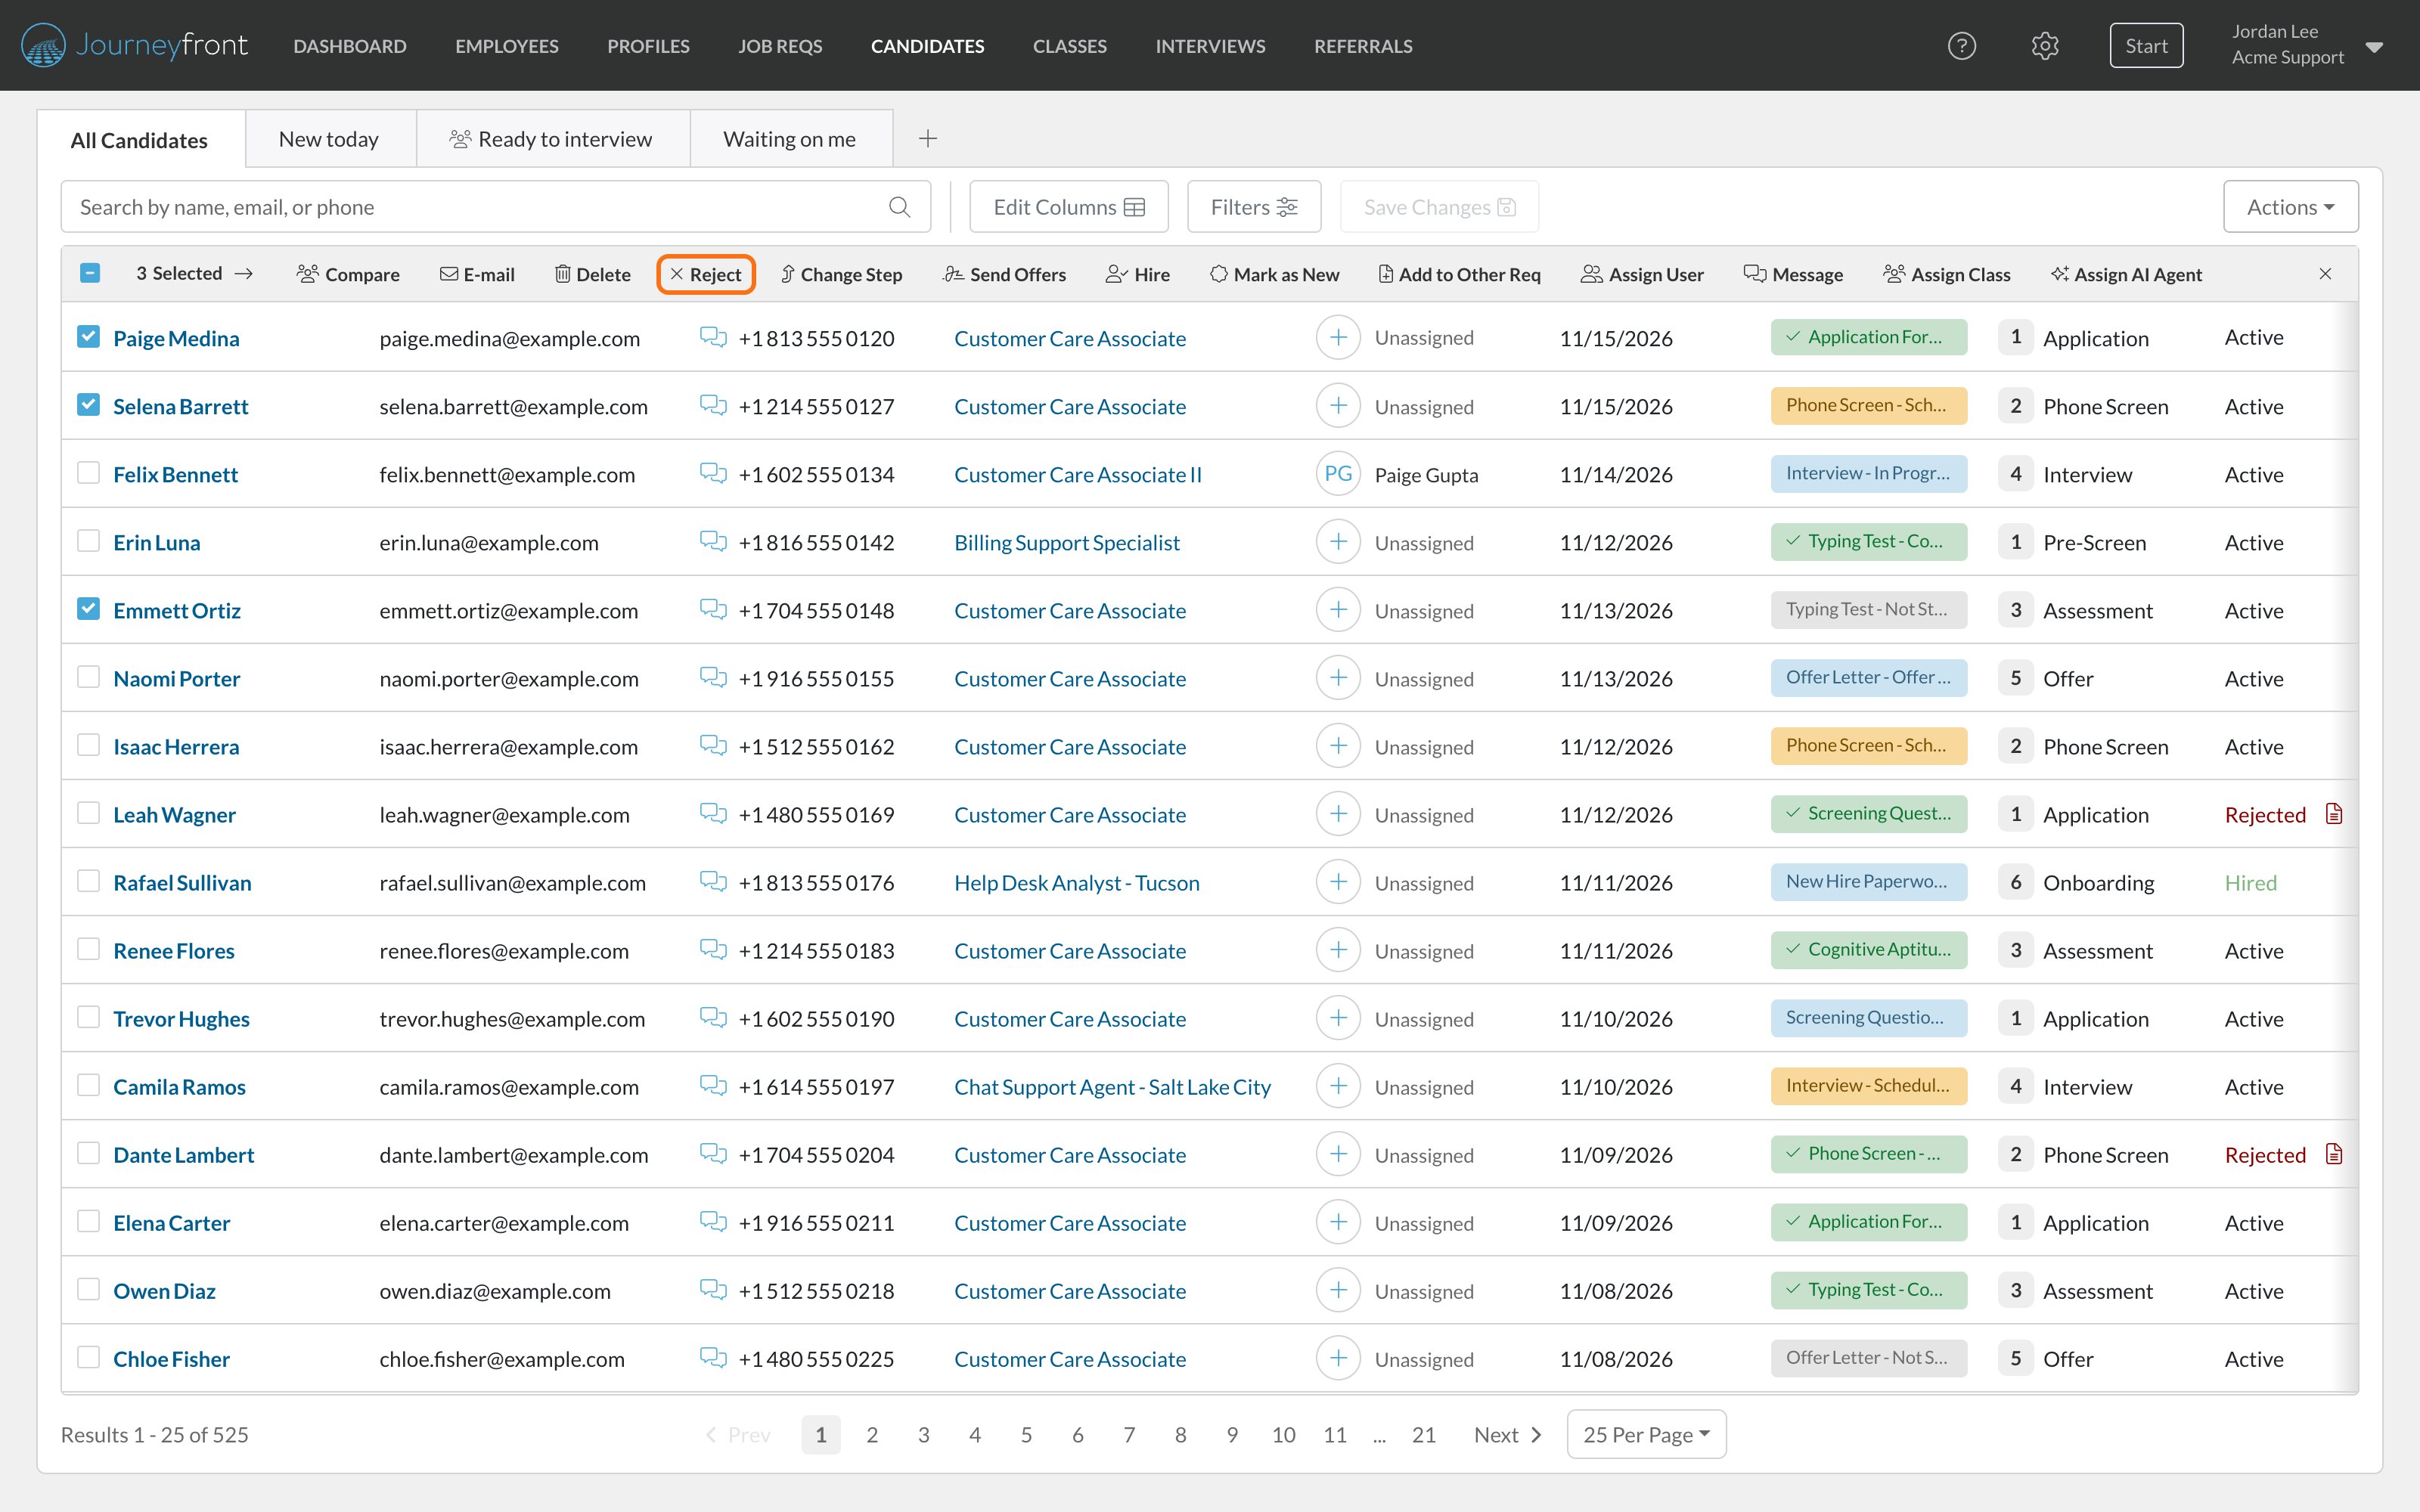
3
Choose a reason and click Reject
The reason and notes apply to everyone in the group.
Rejection reasons
Reasons are grouped by type, so your reports can separate, for example, candidates you turned down from candidates who withdrew. Your admins manage the list in Settings, then Custom Options, then Rejection Reasons. See Rejection reasons. If the reason you need isn’t there, click Add Rejection Reason at the bottom of the list in the Reject window. Type the reason, pick its type and click Save. It’s added to your account’s list for everyone.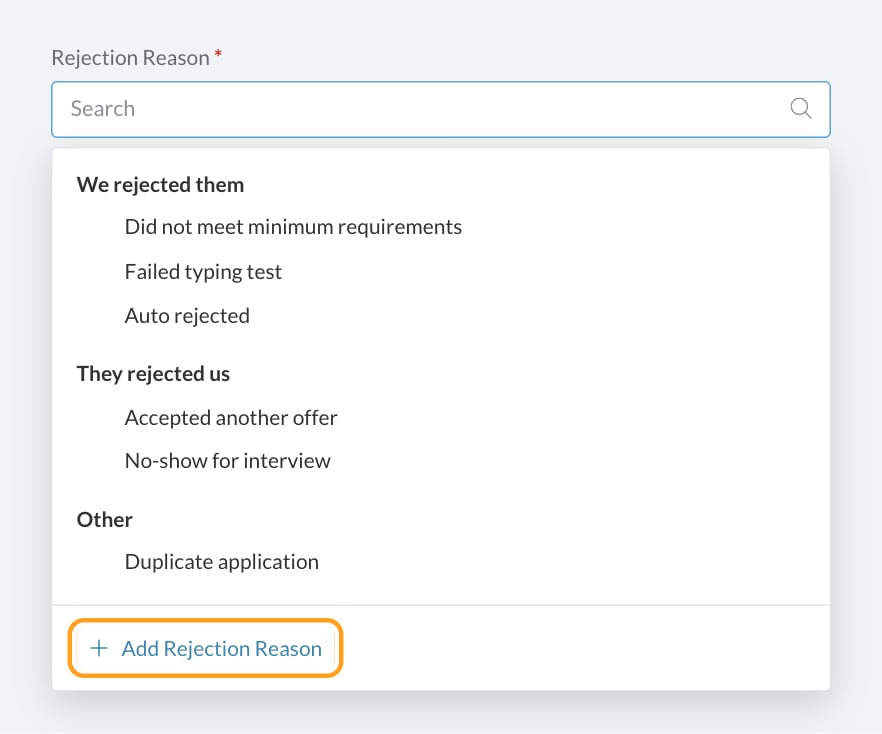
Change the reason or notes
On a rejected Candidate Application, click the edit icon next to Rejected in the header. The Reject window opens with the current reason and notes. Change them and click Reject to save.Let candidates know
Rejecting a candidate doesn’t send them anything. To tell them:- Email them yourself. Use Actions, then Email on the Candidate Application, or E-mail for a group. Save your rejection wording as an email template so it’s ready each time. See Email candidates and Email templates.
- Email them automatically. Set up an automation rule with the Candidate is Rejected trigger and a Send Email to Candidate action. Add a delay of a day or so if you’d rather the email didn’t arrive the moment you reject. See Automation rules.
Automatic rejections
Candidates can also be rejected without anyone clicking Reject:- Knockout answers. A candidate who picks a knockout option on a screening question is rejected with the reason Auto rejected. See Screening questions.
- Automation rules. A rule with the Reject candidate action rejects candidates who match its conditions, with the reason you chose.
Un-reject a candidate
1
Choose Un-reject
On the rejected Candidate Application, click Actions, then Un-reject.
2
Confirm
The Undo Candidate Rejection? window asks you to confirm. Click Confirm.
FAQ
Why don't I see Reject in the actions bar?
Why don't I see Reject in the actions bar?
Everyone you select needs to be on the same job req. Add the Job Req column to spot candidates from other job reqs, or work from the job req’s Candidates tab.
Can I reject without choosing a reason?
Can I reject without choosing a reason?
No. A reason is required. If none fits, add one with Add Rejection Reason, or ask your admin to add it to your account’s list.
Does rejecting email the candidate?
Does rejecting email the candidate?
No. Send an email yourself, or set up an automation rule to send one. See Let candidates know.
Can I un-reject several candidates at once?
Can I un-reject several candidates at once?
No. Un-reject them one at a time from each Candidate Application.
Is a rejected candidate removed from Journeyfront?
Is a rejected candidate removed from Journeyfront?
No. Their Candidate Application stays on the job req with the Rejected status, and you can filter for them by Status or Rejection Reasons. To remove an application completely, see Delete in Bulk actions.
Does rejecting a candidate affect their other applications?
Does rejecting a candidate affect their other applications?
No. Each Candidate Application has its own status. To flag someone your company shouldn’t hire for any role, use Do Not Hire.
Related
Rejection reasons
Set up the reasons your team chooses from.
Automation rules
Reject or notify candidates automatically.
Bulk actions
Everything you can do to a group of candidates.
Do Not Hire
Flag someone your company shouldn’t hire again.