

Who can do this: Admins with the Company Settings Access permission manage both lists. Anyone rejecting a candidate can also add a rejection reason from the Reject window.
Every reason belongs to one reason type, so your reports can split, for example, candidates you turned down from candidates who turned you down.
Custom Options also has Move Reasons, the reasons your team picks when moving a candidate to another job req. See Set up move reasons.
Rejection reasons
Go to Settings, then Custom Options, then Rejection Reasons. The list shows each Rejection Reason and its Reason Type. Click a column heading to sort by it.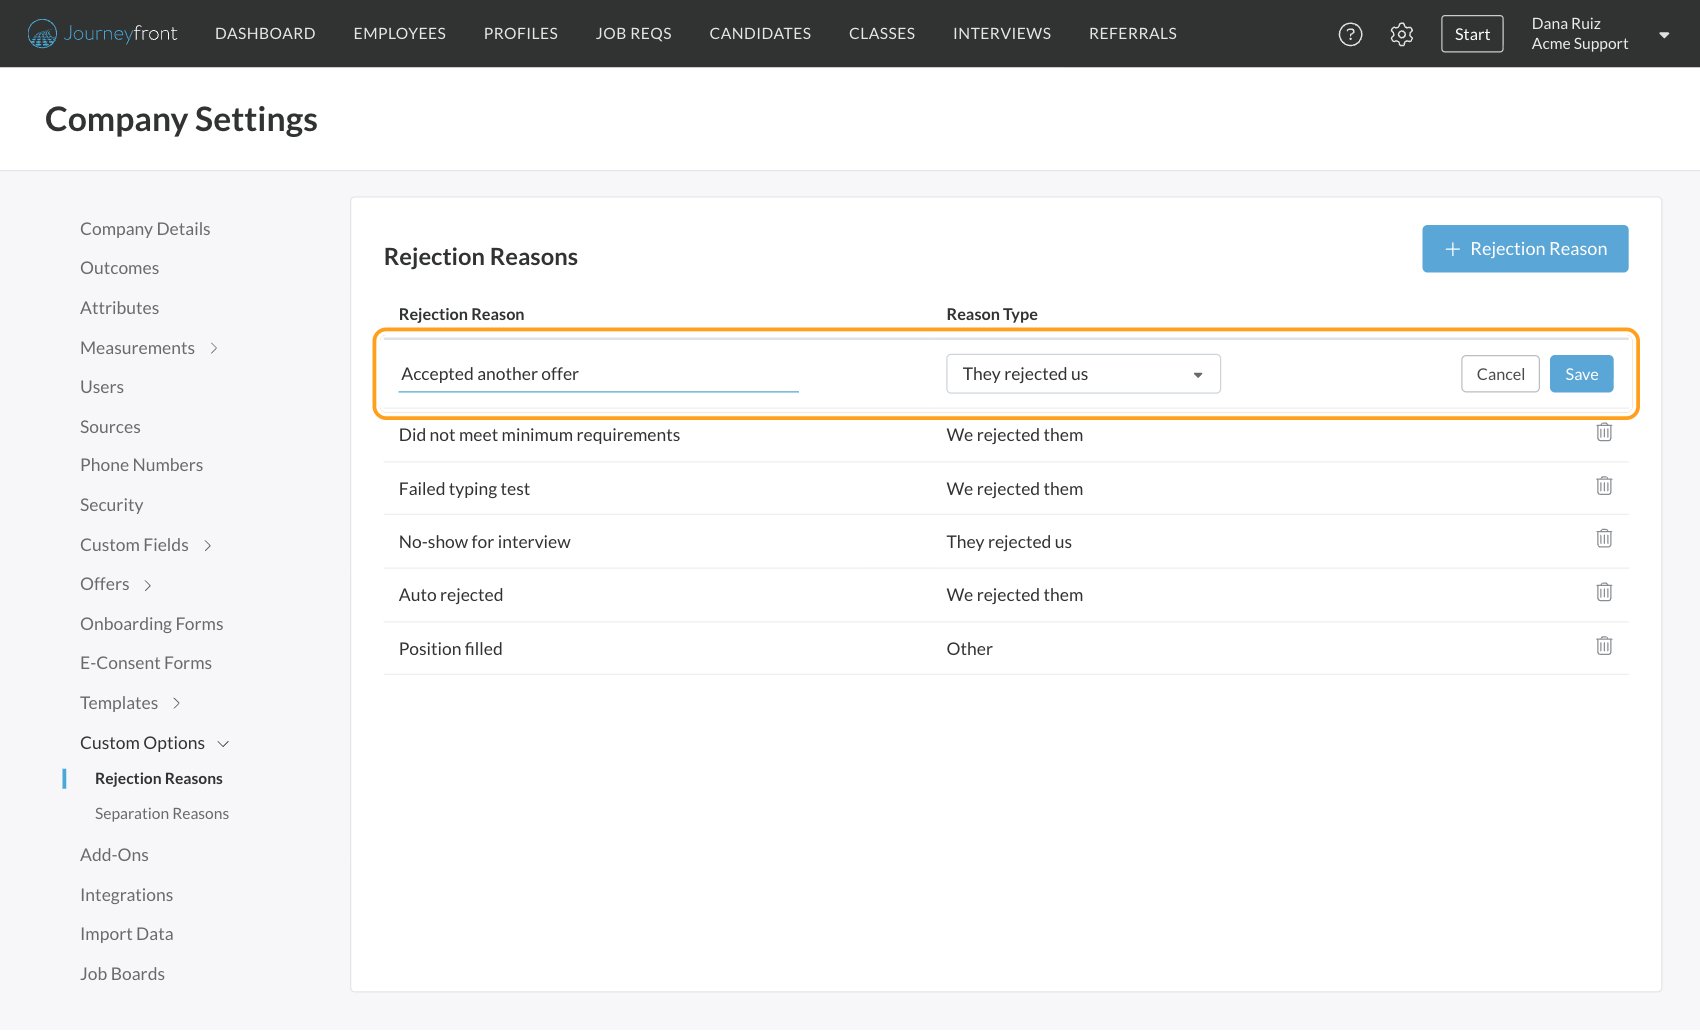
Add a rejection reason
1
Click + Rejection Reason
A new row appears at the top of the list.
2
Name it and pick a type
Type the reason, then pick a Reason Type.
3
Click Save
The reason is available in the Reject window straight away.
Edit a rejection reason
Click the reason’s name or type in the list. The row becomes editable; make your change and click Save, or Cancel to leave it as it was. Renaming a reason renames it everywhere, including on candidates who were already rejected with it. Use that to fix a typo or tidy a name. If the meaning really changes, add a new reason instead, so older rejections keep reporting correctly.Delete a rejection reason
1
Click the trash icon
The Delete Rejection Reason window shows the reason you’re deleting.
2
Choose a replacement
Pick the reason that candidates who currently have this one should get instead. You have to choose one.
3
Click Delete
The reason disappears from the list, and those candidates now show the replacement.
The Auto rejected reason
Candidates who pick a knockout answer on a screening question are rejected with the reason Auto rejected. If it’s not on your list, Journeyfront adds it the first time it’s needed. If you rename or delete it, a new Auto rejected reason is added the next time a knockout answer rejects someone, so it’s best to leave it as it is. See Screening questions.Where rejection reasons are used
- Rejecting a candidate, one at a time or in bulk. The Reject window groups reasons by type and lets you search them. See Reject candidates.
- Automation rules, where the Reject candidate action uses the reason you pick. See Automation rules.
- The Candidates page, where you can filter by Rejection Reasons. See The Candidates page.
Separation reasons
Separation reasons record why an employee left. Go to Settings, then Custom Options, then Separation Reasons. The list shows each Separation Reason and its Reason Type: Voluntary, Involuntary or Other. Adding, editing and deleting work the same way as for rejection reasons:- Add: click + Separation Reason, type the reason, pick a Reason Type and click Save.
- Edit: click the reason’s name or type, make your change and click Save.
- Delete: click the trash icon. In the Delete Separation Reason window, pick the reason that records using this one should get instead, and click Delete.
Where separation reasons are used
- An employee’s record: on the Job Info tab, untick Employee currently works here, set the End Date, and pick the Reason for Separation. The reason is required once the employee no longer works there. Add a Separation Note for detail. See Employee records.
- Turnover reporting: dashboards show each former employee’s separation reason, and let you filter turnover by reason type and reason. See Turnover and performance.
- Employee imports: the employee data template has a
separation_namecolumn for the reason. Use the reason’s name exactly as it appears on your list. See Importing data.
FAQ
Can a recruiter add a rejection reason without admin access?
Can a recruiter add a rejection reason without admin access?
Yes. In the Reject window, Add Rejection Reason at the bottom of the list adds a reason, with its type, to your account’s list. Admins can tidy it up later in Settings, then Custom Options.
What happens to rejected candidates when I delete their reason?
What happens to rejected candidates when I delete their reason?
They get the replacement reason you picked in the Delete Rejection Reason window. Their rejection itself doesn’t change.
Does changing a reason's name change past rejections?
Does changing a reason's name change past rejections?
Yes. A rename shows on every candidate who has that reason. To keep old and new meanings apart in your reports, add a new reason instead.
Does editing the reasons list email anyone or run automations?
Does editing the reasons list email anyone or run automations?
No. Changing the lists in Settings doesn’t change any candidate’s status or send anything.
Why is there an Auto rejected reason I didn't add?
Why is there an Auto rejected reason I didn't add?
Journeyfront adds it automatically the first time a candidate is rejected by a knockout answer. See The Auto rejected reason.
Can I change the reason types?
Can I change the reason types?
No. The reason types are the same for every account. Name your reasons so they fit one of them clearly.
Related
Reject candidates
Reject one or many candidates with a reason.
Automation rules
Reject candidates automatically with a chosen reason.
Employee records
Record when an employee leaves and why.
Turnover and performance
See why and when people leave.