

Who can do this: Admins whose security role has both Company Settings Access and Import Data. Importing candidates into a job req only needs access to that job req.
What you can import
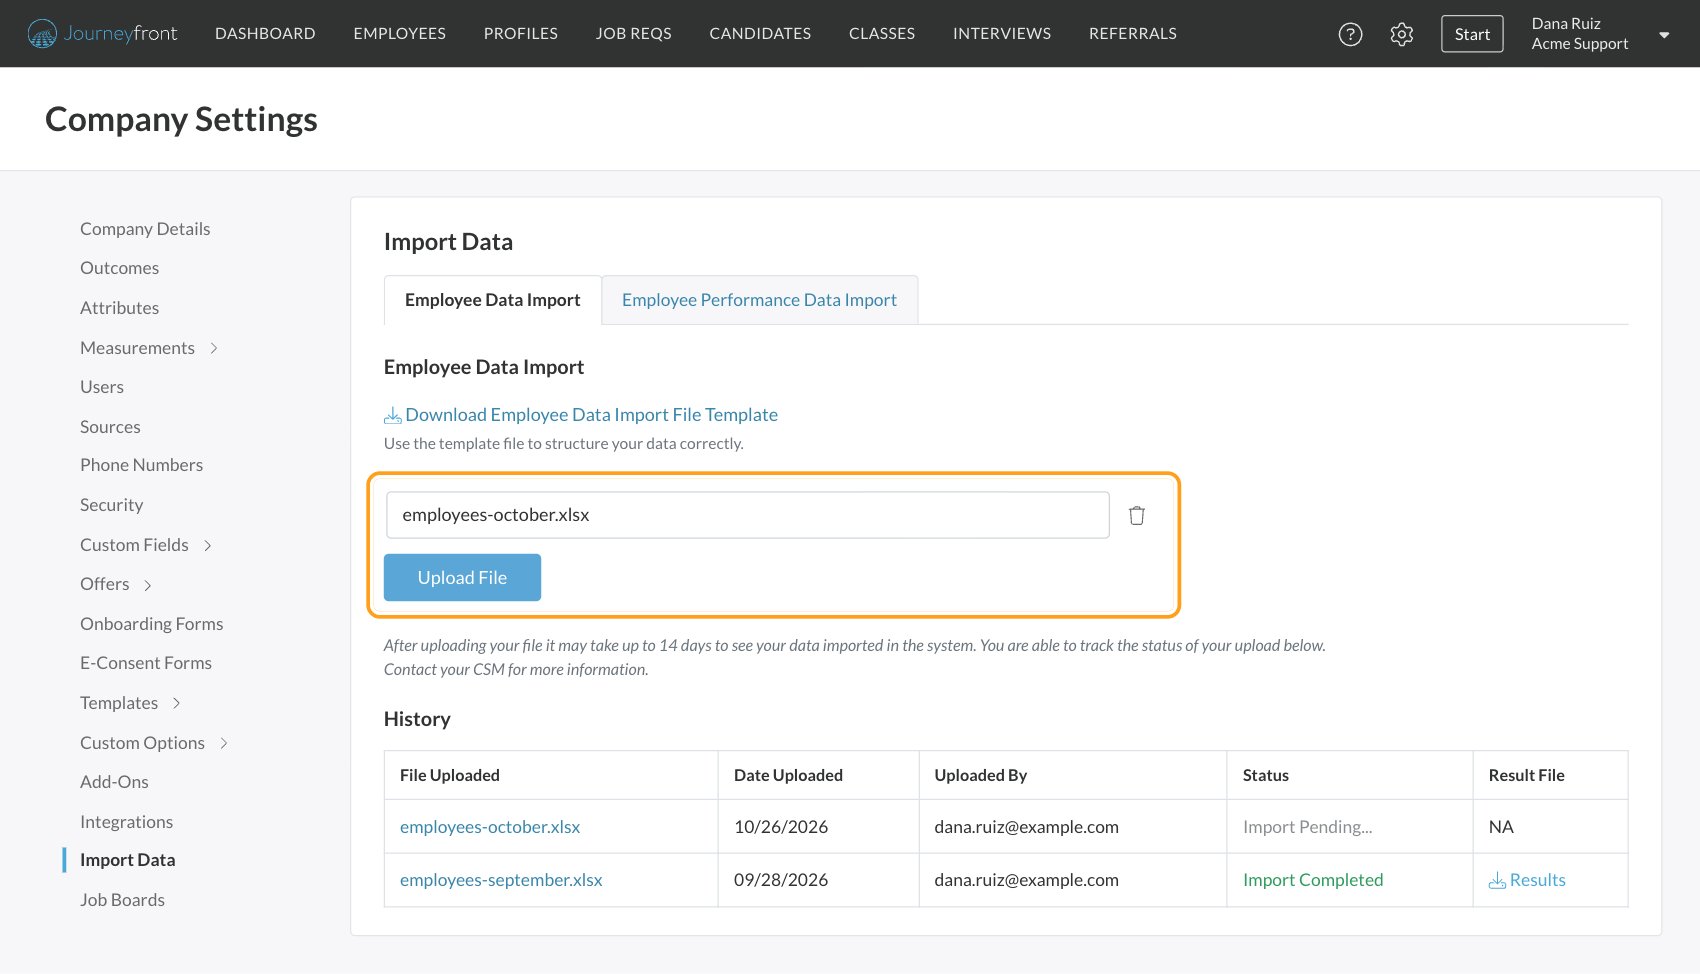
Import Data has two tabs, each with its own template:Upload a file
1
Open Import Data
Go to Settings, then Import Data, and pick the Employee Data Import or Employee Performance Data Import tab.
2
Download the template
Click Download Employee Data Import File Template (or the performance one). Use the template’s columns, one row per employee or review.
3
Choose your file
Click Select file and pick your file. It can be a .csv, .xlsx or .xls file.
4
Click Upload File
Your file appears at the top of History with the status Import Pending….
The employee data template
The Employee Data Import template has these columns:
For
separation_name, use a reason from your separation reasons list. See Rejection and separation reasons. Employee job fields are set up in Settings, then Custom Fields. See Custom fields.
The performance data template
The Employee Performance Data Import template has one row per review, with the employee (first_name, last_name, email, hire_date), the job (job_id), the reviewer and review (evaluator_email, eval_date, period_name, period_year), and then a set of columns for each performance question: account_question_id, attribute_id, score and note, numbered 1, 2 and so on.
The ID columns refer to the job and performance questions set up in Journeyfront. Ask your Customer Success Manager for the IDs to use. See Performance reviews.
Check your uploads
The History table on each tab lists every upload:
If an upload says Import Failed, download the Results file to see what went wrong, fix your file and upload it again. Your Customer Success Manager can help if it isn’t clear.
Daily imports from your HR system
Some accounts have employee data imported automatically every day, straight from their HR system. If yours does, a Daily Importer section below History lists each day’s run with its status. Click View Results to see what happened to each employee. This needs to be set up for your account; ask your Customer Success Manager.Import candidates into a job req
Candidates aren’t imported in Settings. Import them into the job req they’re applying to:- Open the job req and click Actions, then Import Candidates.
- Click Download Example File for the columns:
email,first_name,last_name, plus optional columns such asphoneandsource. - Drag in your .csv or .xlsx file, choose whether to tick Send new candidates invite email, and click Import.
- Check the results: how many were imported, how many were duplicates and how many had invalid data. Click Download Import Results for the details, then Done.
FAQ
How long does an import take?
How long does an import take?
It can take up to 14 days for an upload to be imported. The Status column shows Import Pending… until then. Ask your Customer Success Manager if you need it sooner.
Can I import candidates here?
Can I import candidates here?
No. Import Data only takes employee and performance data. Import candidates from a job req’s Actions menu. See Import candidates.
Can I import candidates into several job reqs at once?
Can I import candidates into several job reqs at once?
No. Each candidate import goes into one job req. Run a separate import from each job req.
Can I undo an import?
Can I undo an import?
Not from this page. If something was imported wrong, ask your Customer Success Manager how best to correct it before you upload again.
What file types can I upload?
What file types can I upload?
.csv, .xlsx and .xls files. Start from the template so the column names match.
Related
Import candidates
Import a list of candidates into a job req.
Employee records
Where imported employees show up.
Rejection and separation reasons
The separation reasons your employee import uses.
Turnover and performance
Reports built on your employee data.