

Who can do this: Anyone who can open the job req: its hiring team, and users whose security role has All Job Req Access.Availability: You can import candidates while the job req is Active.
Import a list of candidates
1
Open the Import Candidate window
Open the job req, click Actions, then Import Candidates.
2
Get the example file
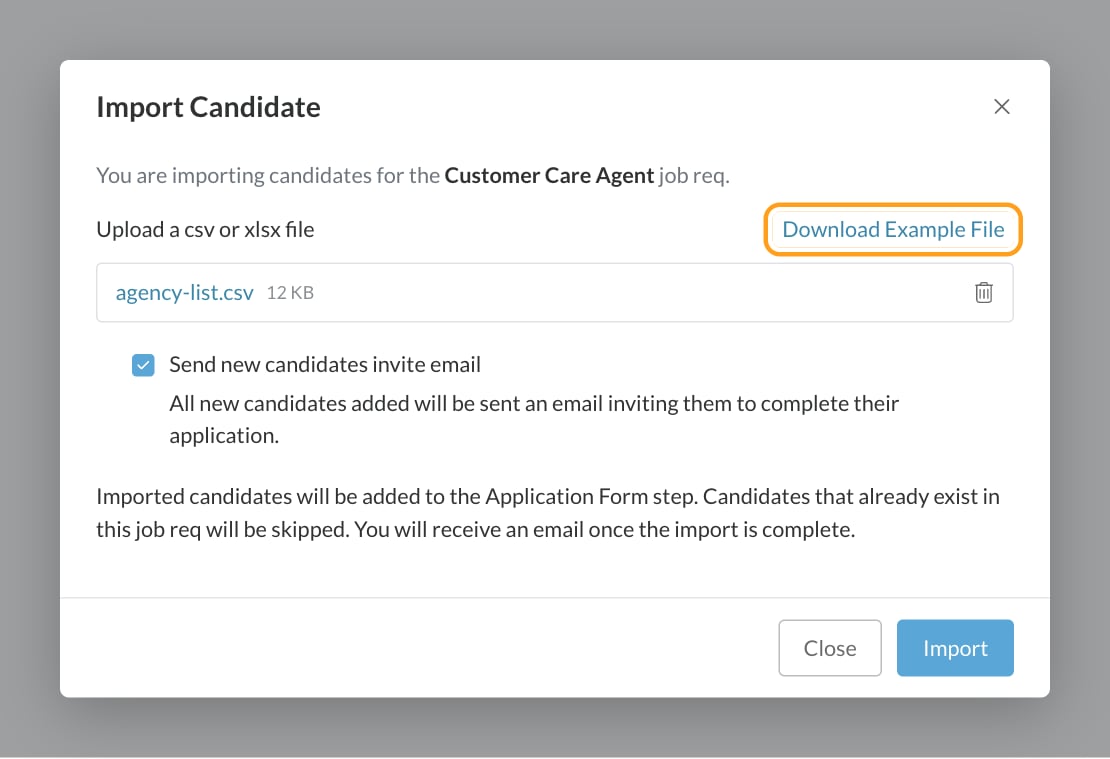
Click Download Example File for a CSV with the right column headers.
3
Fill in your file
Add one candidate per row. Save it as a CSV or Excel (.xlsx) file. See Columns below.
4
Upload it
Drag the file into the window, or click to select it.
5
Choose whether to email them
Tick Send new candidates invite email to email everyone in the file a link to complete their application.
6
Click Import
Journeyfront processes the file. You can wait for the results or close the window; you’ll get an email with the results either way.
Columns
Column headers aren’t case sensitive, and columns can be in any order.
For custom fields, a Multiple Choice value must match one of the field’s options, and a Number value can only contain digits. See Custom fields.
If someone in your file is already in Journeyfront under the same email, they’re added to the job req with the name and phone number they already have. The file doesn’t change them.
Check the results
When the import finishes, the window shows Your Import is Complete (or Your Import Failed if no rows were imported), with:- Total candidates successfully imported
- Candidates not imported because they are duplicates, and the file lines they were on
- Candidates not imported due to an invalid data format, and the file lines they were on
Fix rows that didn’t import
If the whole file fails, check that it’s a CSV or .xlsx file and that it has the
email, first_name and last_name columns.
Importing employees
To bring in employees rather than candidates, admins use Settings, then Import Data. It has its own templates for employee data and employee performance data. See Importing data.Importing data
Import employees and their performance data from Settings, then Import Data.
FAQ
Why can't I find Import Candidates?
Why can't I find Import Candidates?
It’s in the job req’s Actions menu, not on the Candidates page. Closed and archived job reqs don’t show it, and an Inactive job req shows a message that you can’t import candidates. Activate the job req first. See Job req statuses.
Do imported candidates get an email?
Do imported candidates get an email?
Only if you tick Send new candidates invite email before you import. Otherwise nothing is sent, and you can reach out however you like.
Can I import candidates into several job reqs at once?
Can I import candidates into several job reqs at once?
No. Each import goes into one job req. Run a separate import from each job req.
Can I undo an import?
Can I undo an import?
There’s no undo. To remove imported candidates, select them on the job req’s Candidates tab and use Delete, if your security role allows it. See Bulk actions.
Related
Add candidates
Add one person yourself and email them an invitation.
Magic links
See which channels bring in your candidates.
Custom fields
Set up the personal and application fields you import into.
Importing data
Bring in employee and performance data.