

Who can do this: Anyone on your team who can open the candidate or employee can set or remove the flag.
Flag a candidate or employee
1
Open the record
Open the person’s Candidate Application, Candidate Profile or employee profile.
2
Choose Mark Do Not Hire
Click Actions, then Mark Do Not Hire.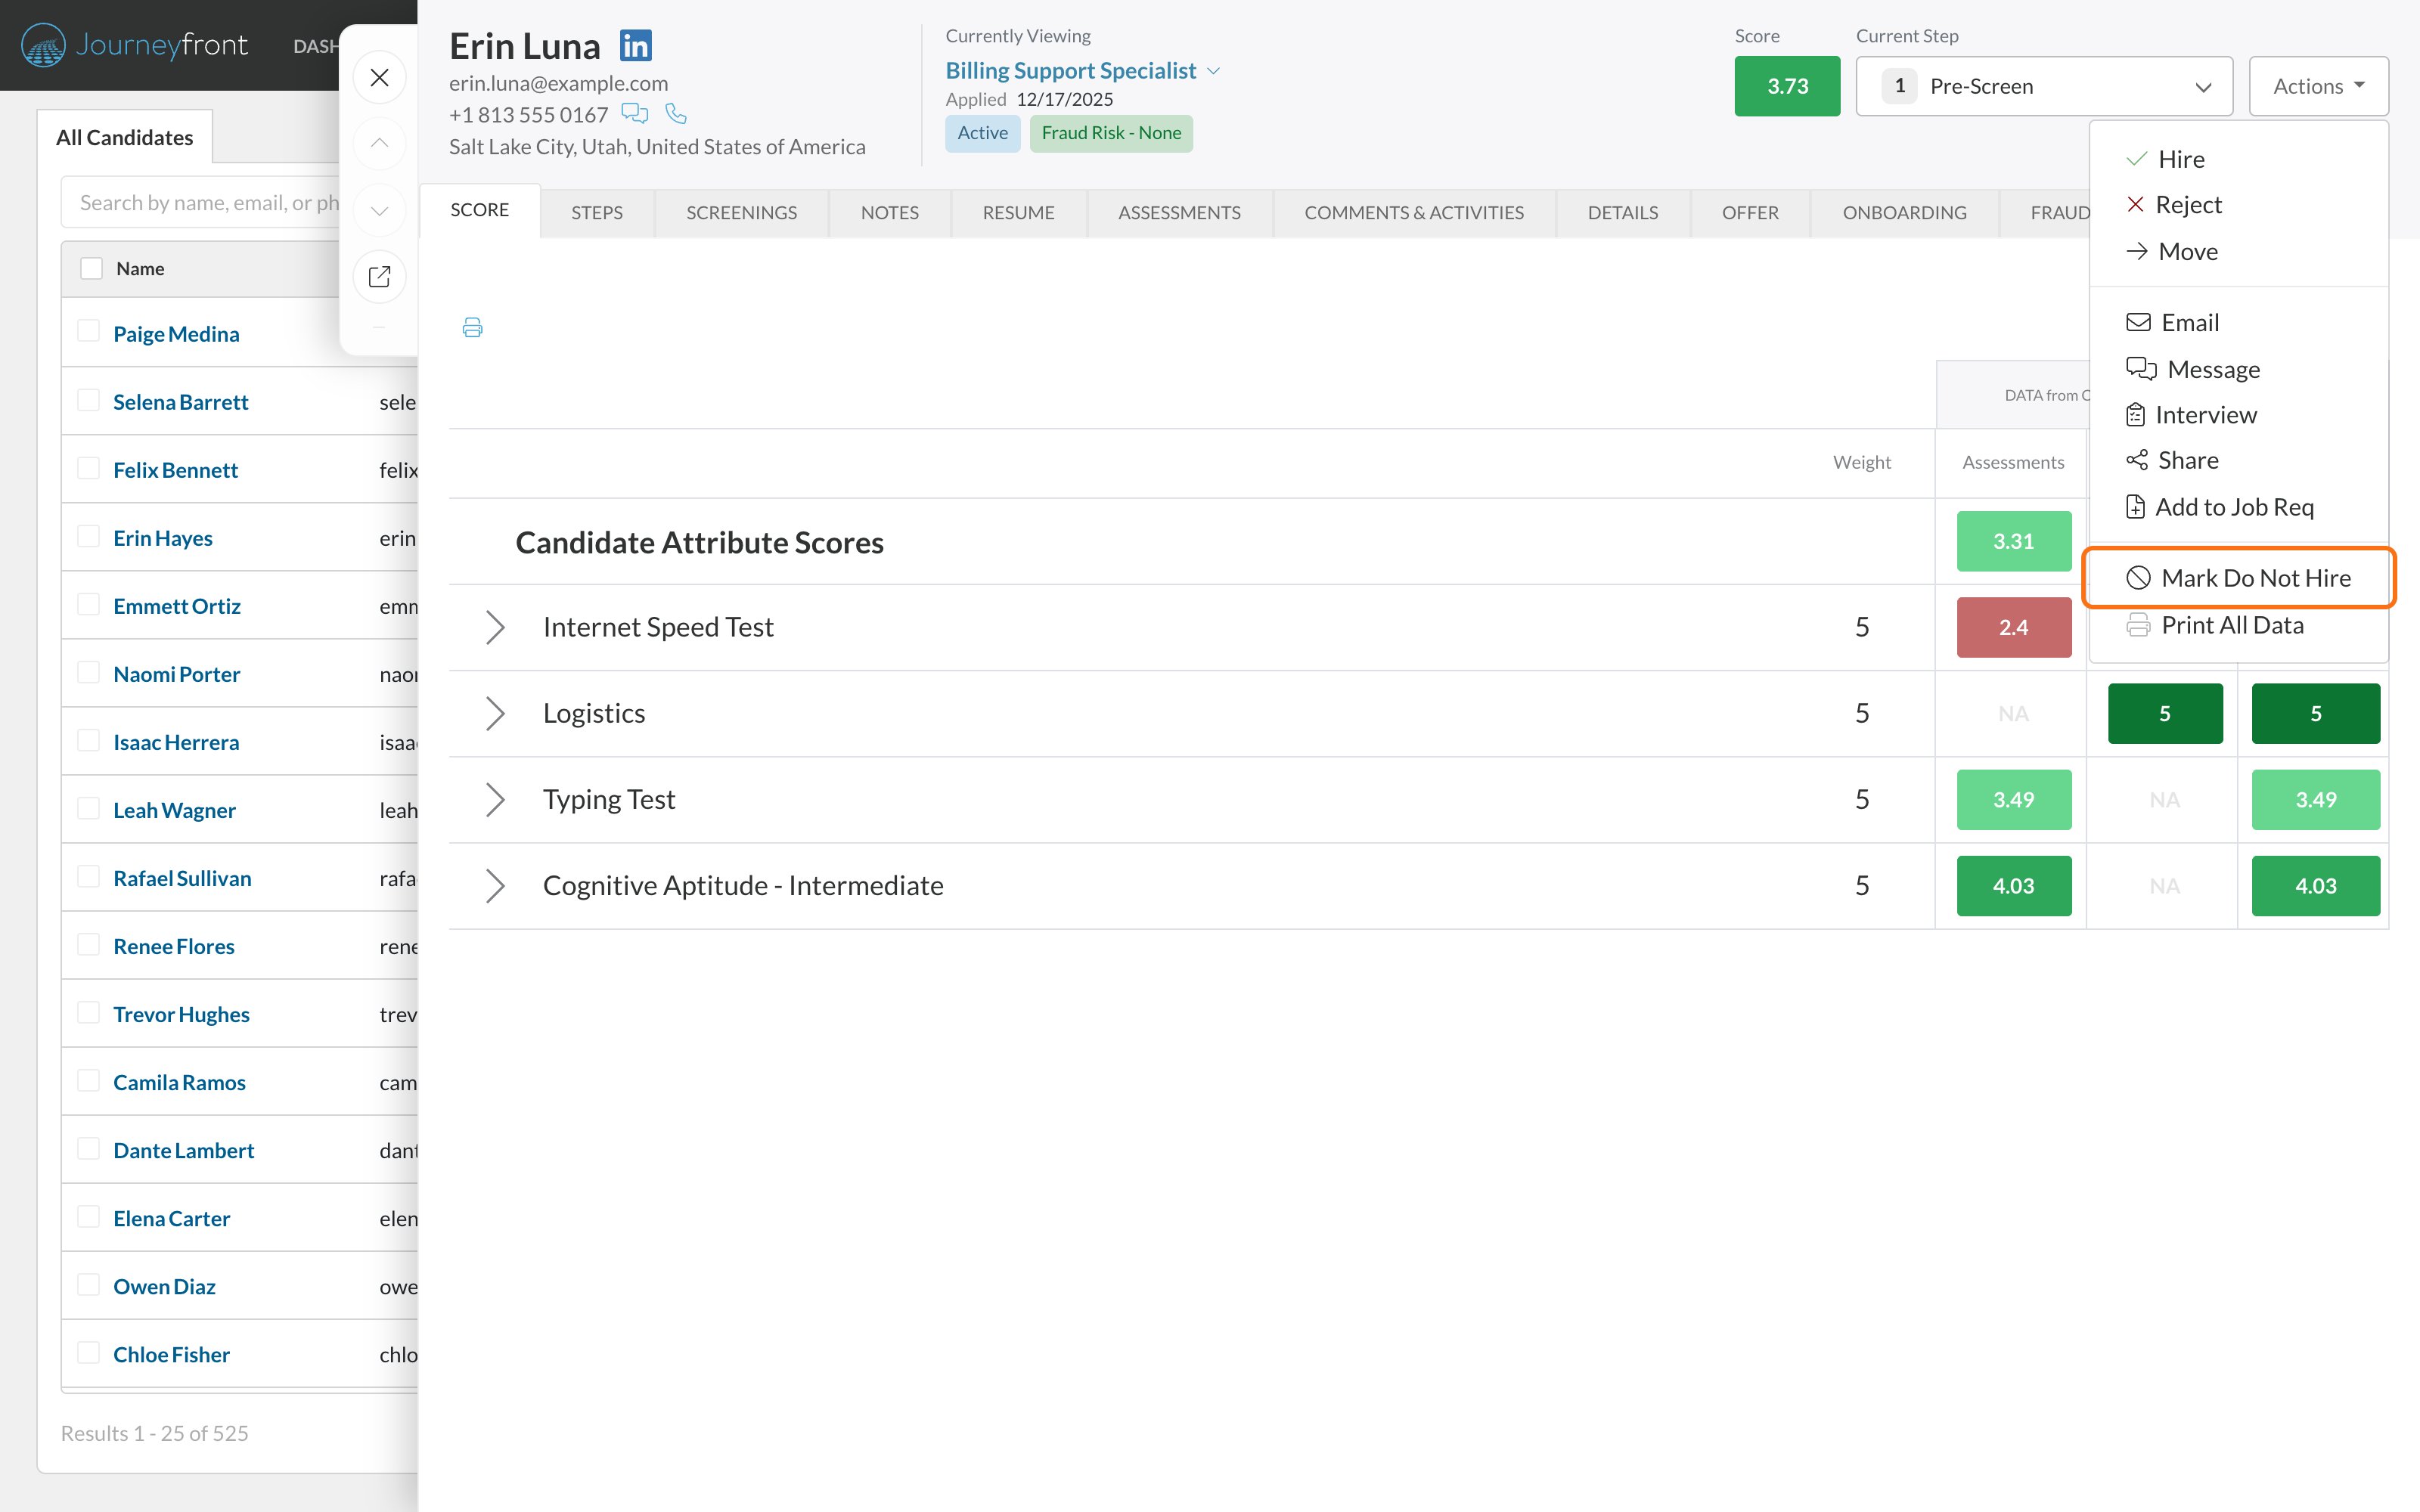
3
Add a reason and confirm
Enter a Reason if you’d like, then click Confirm.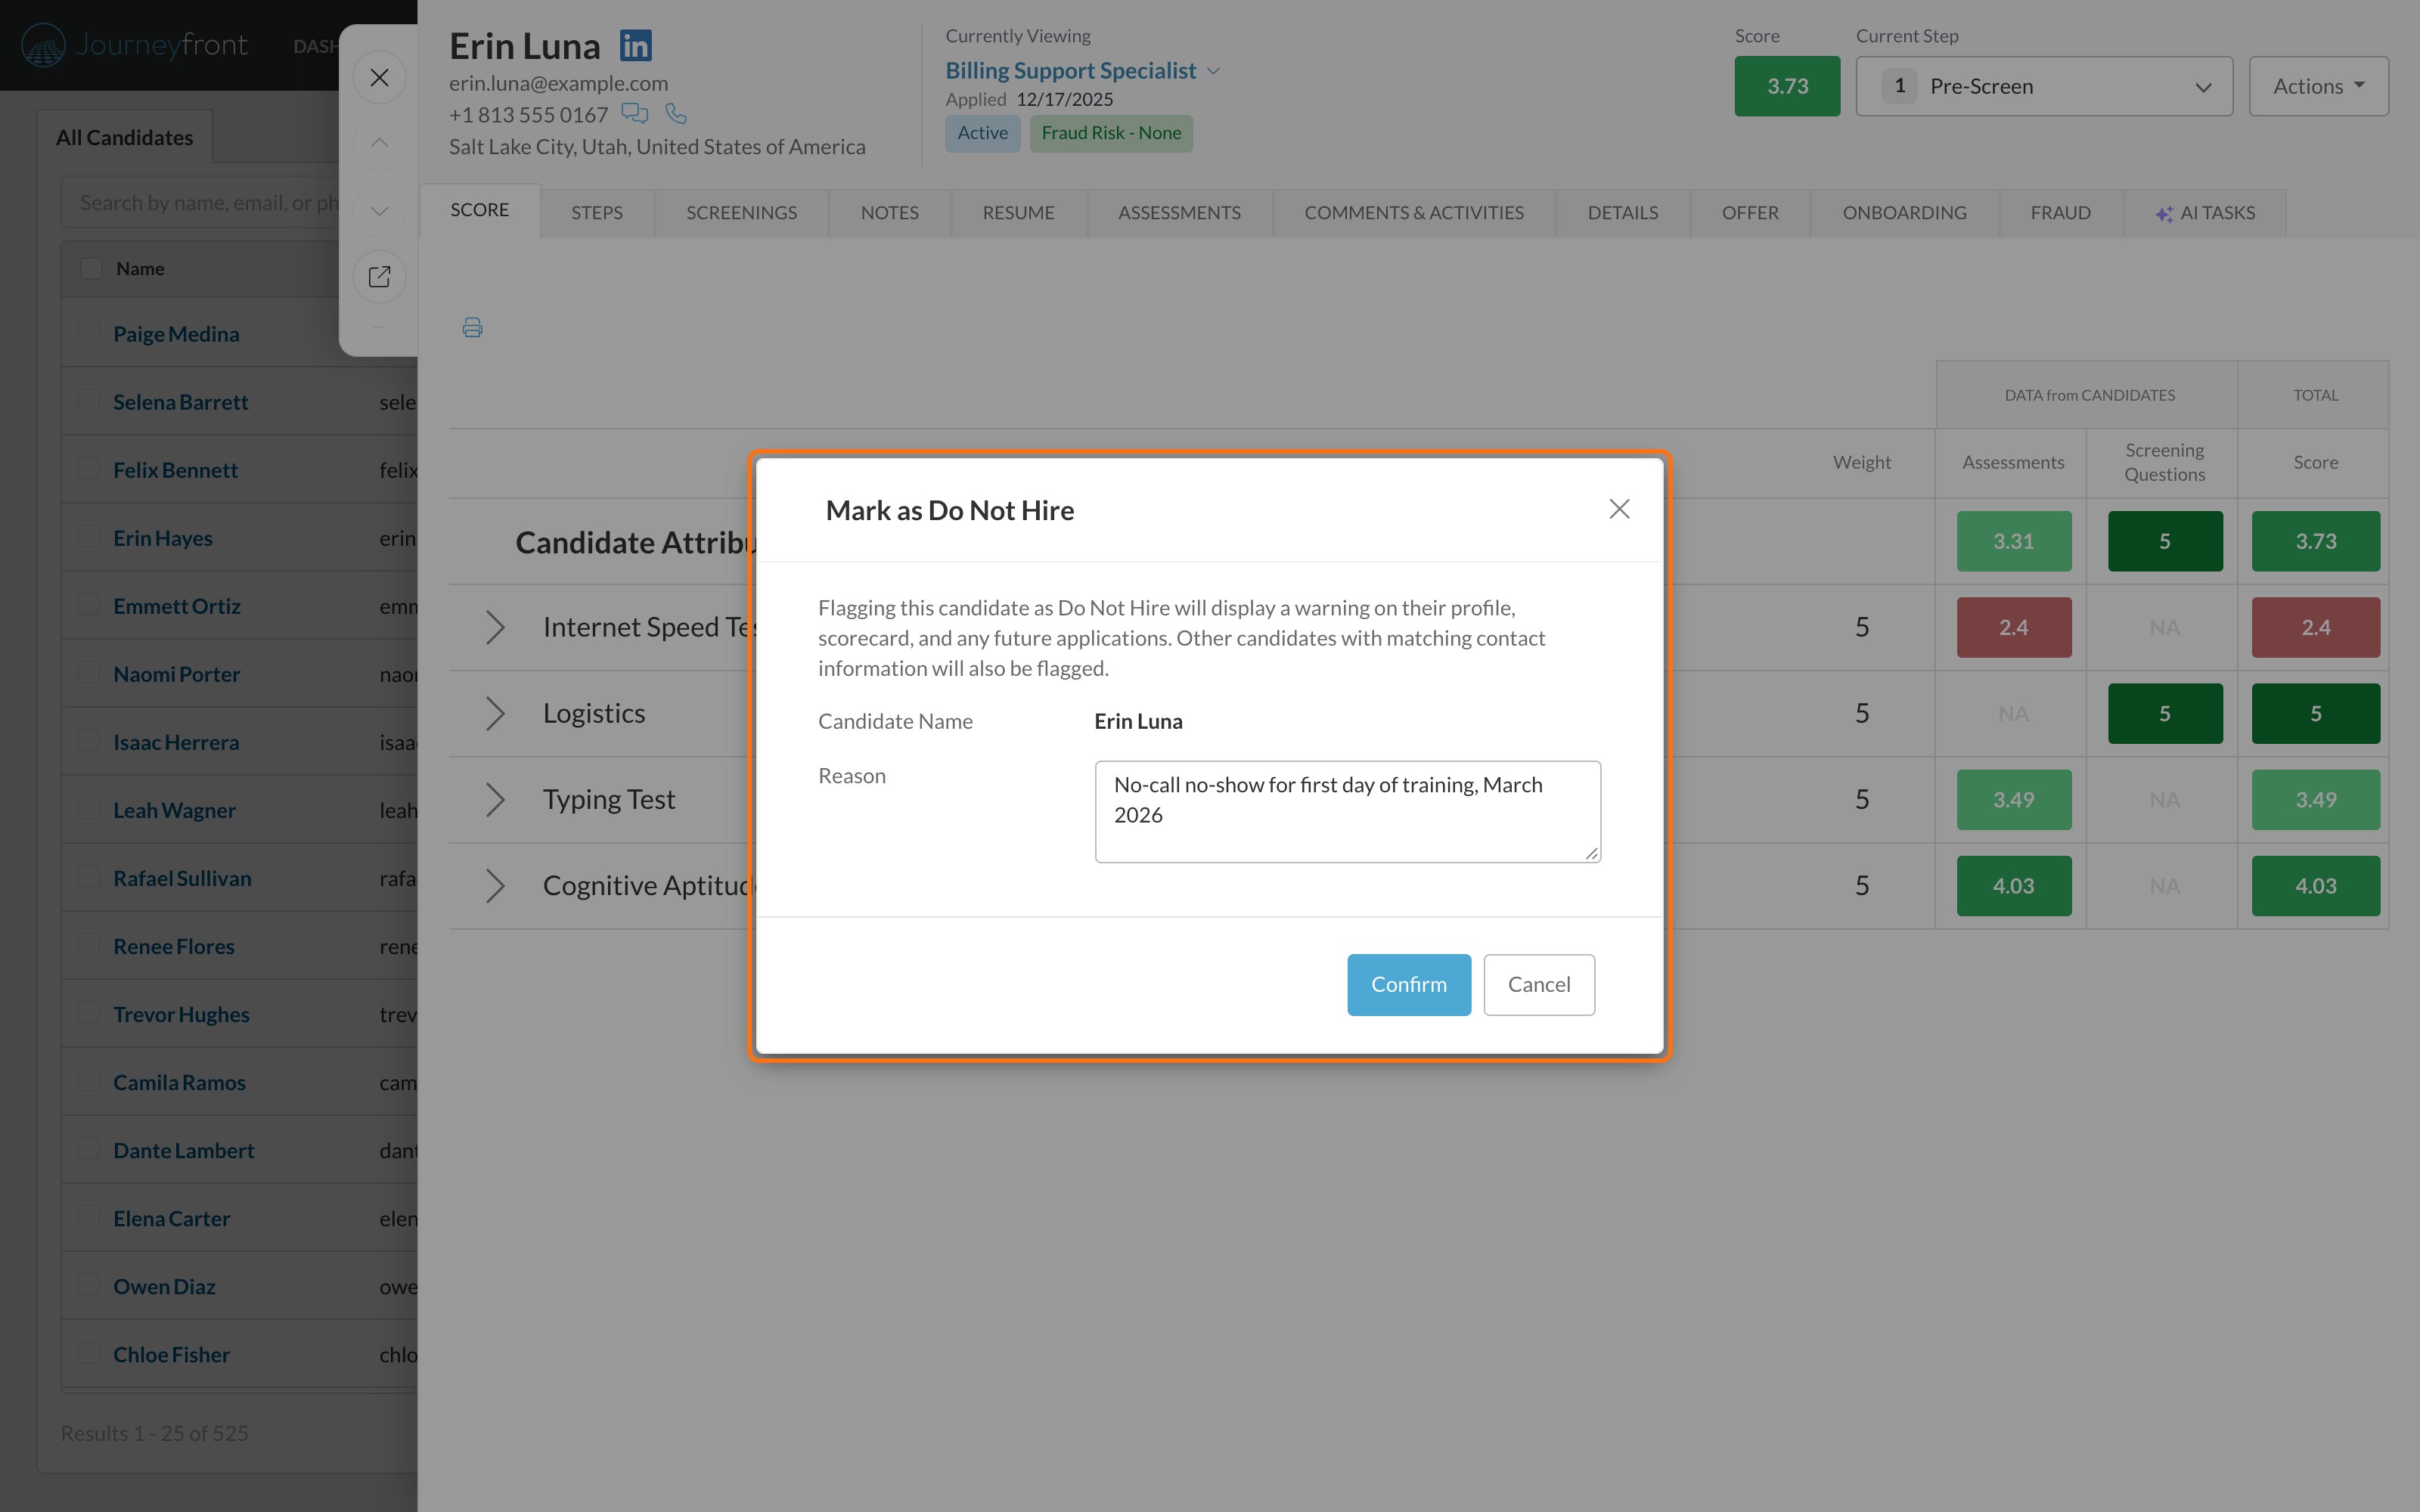
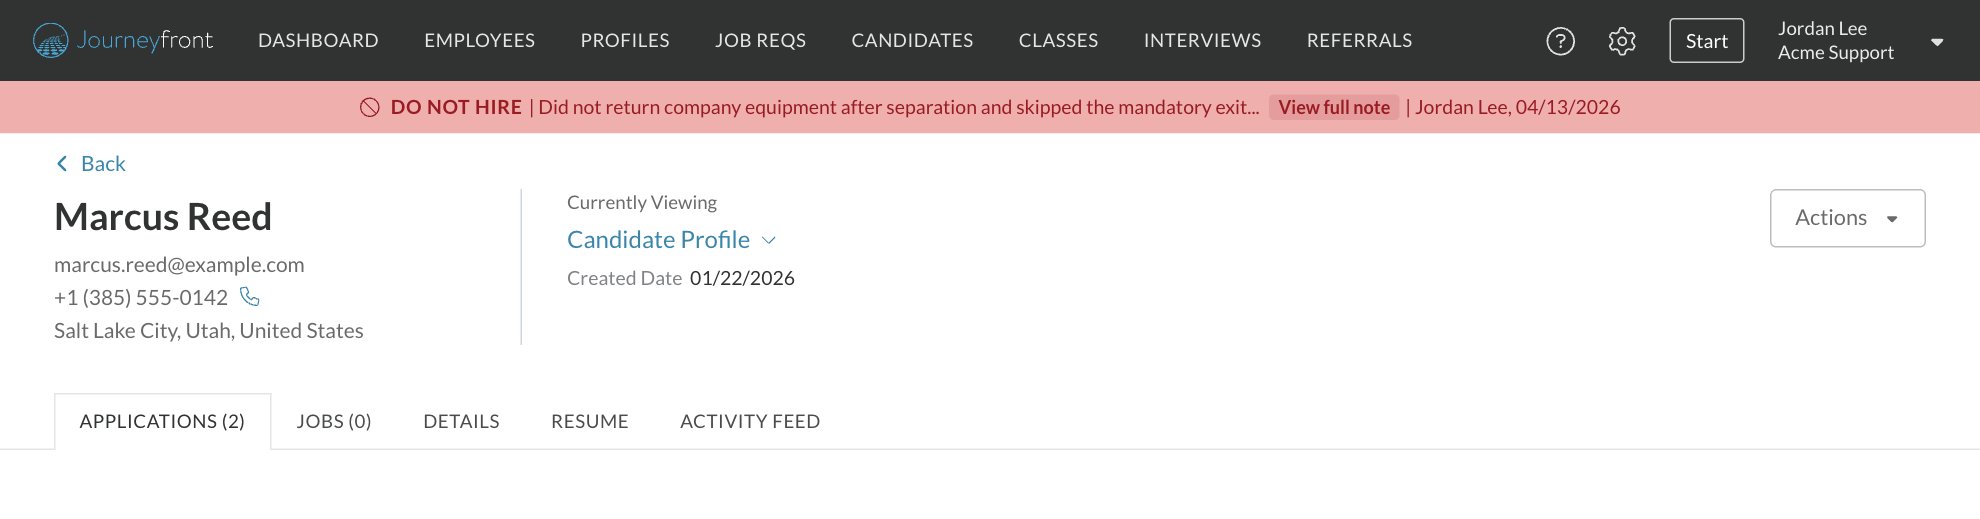
- Shows a red Do Not Hire banner at the top of the person’s records, with the reason, who set the flag and when.
- Saves the person’s email addresses and phone number so it can recognize them if they apply again.
- Records the change in their activity history.
Remove the flag
Open any of the person’s records and click Actions, then Remove Do Not Hire. Click Remove Flag to confirm. The banner disappears, the saved email addresses and phone number are cleared, and the removal is recorded in the activity history.Catch people who reapply
When you flag someone, Journeyfront saves their primary email, their secondary email (if they have one) and their phone number. When anyone in your account applies with one of those details, their banner shows which detail matched (email or phone number), links to the person you flagged, and shows who flagged them and when. The reason appears in the hire warning. Because both email addresses are saved, a former employee whose main email was changed to a work address is still recognized if they reapply from their personal email.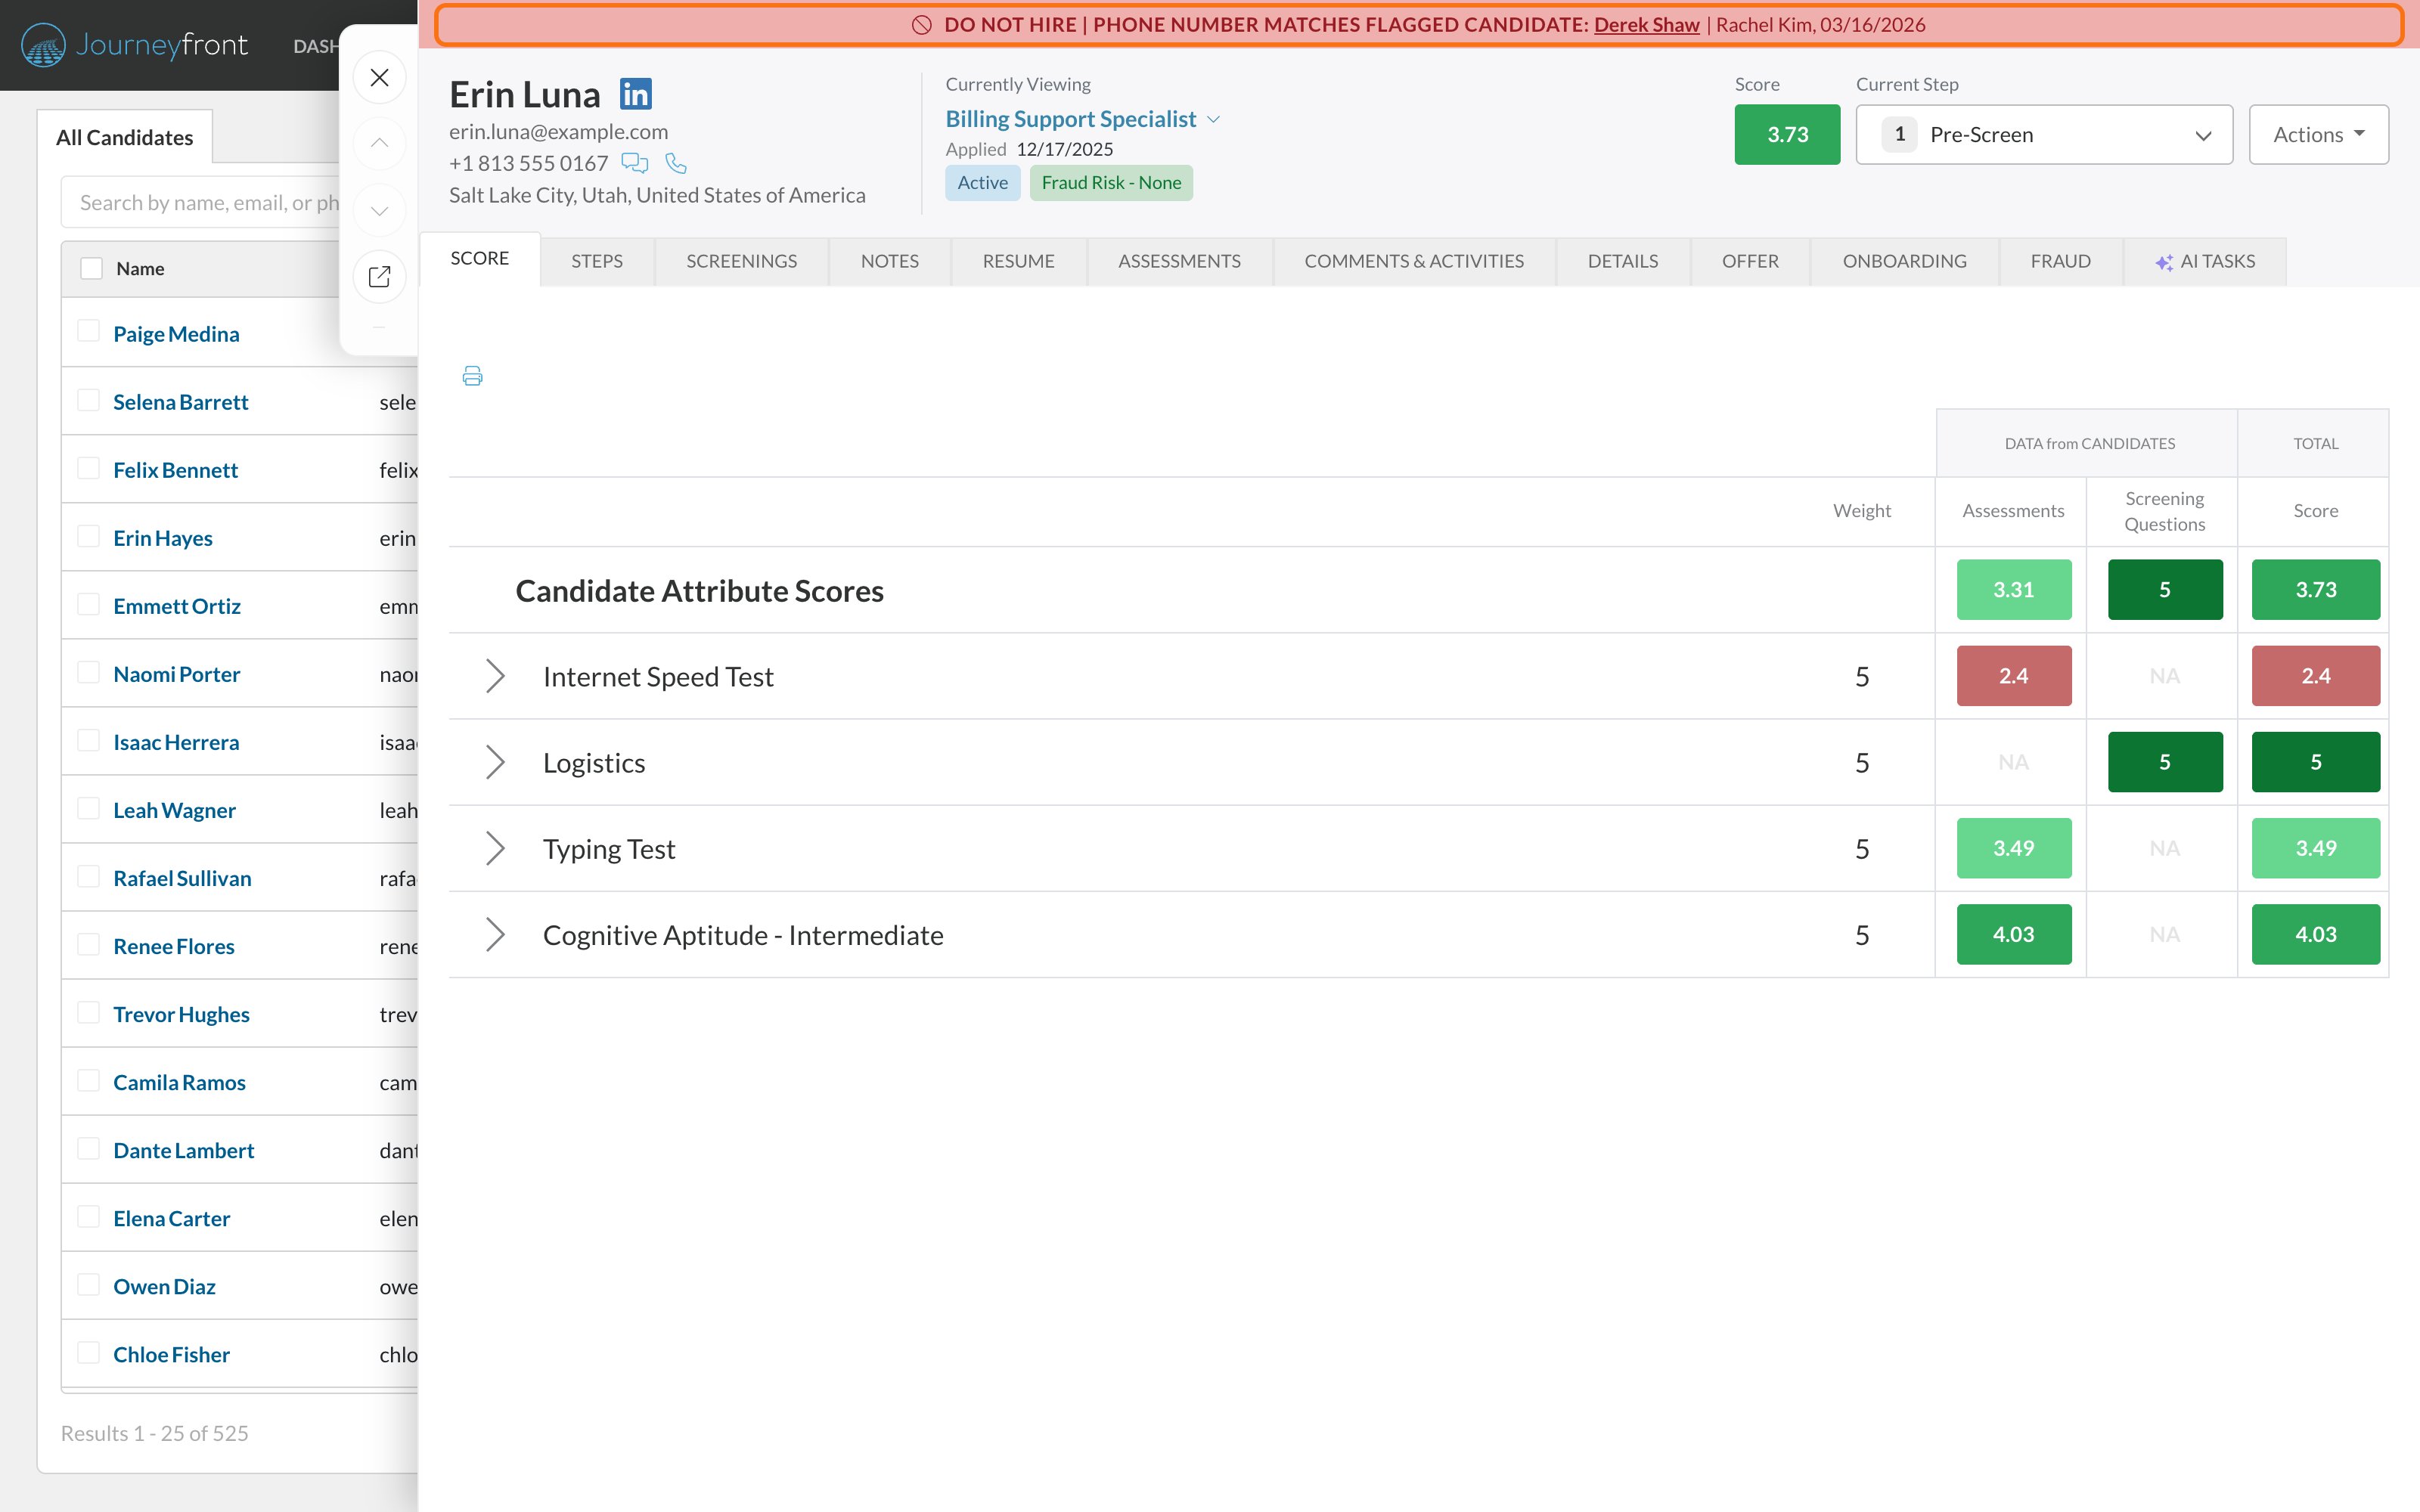
The hire warning
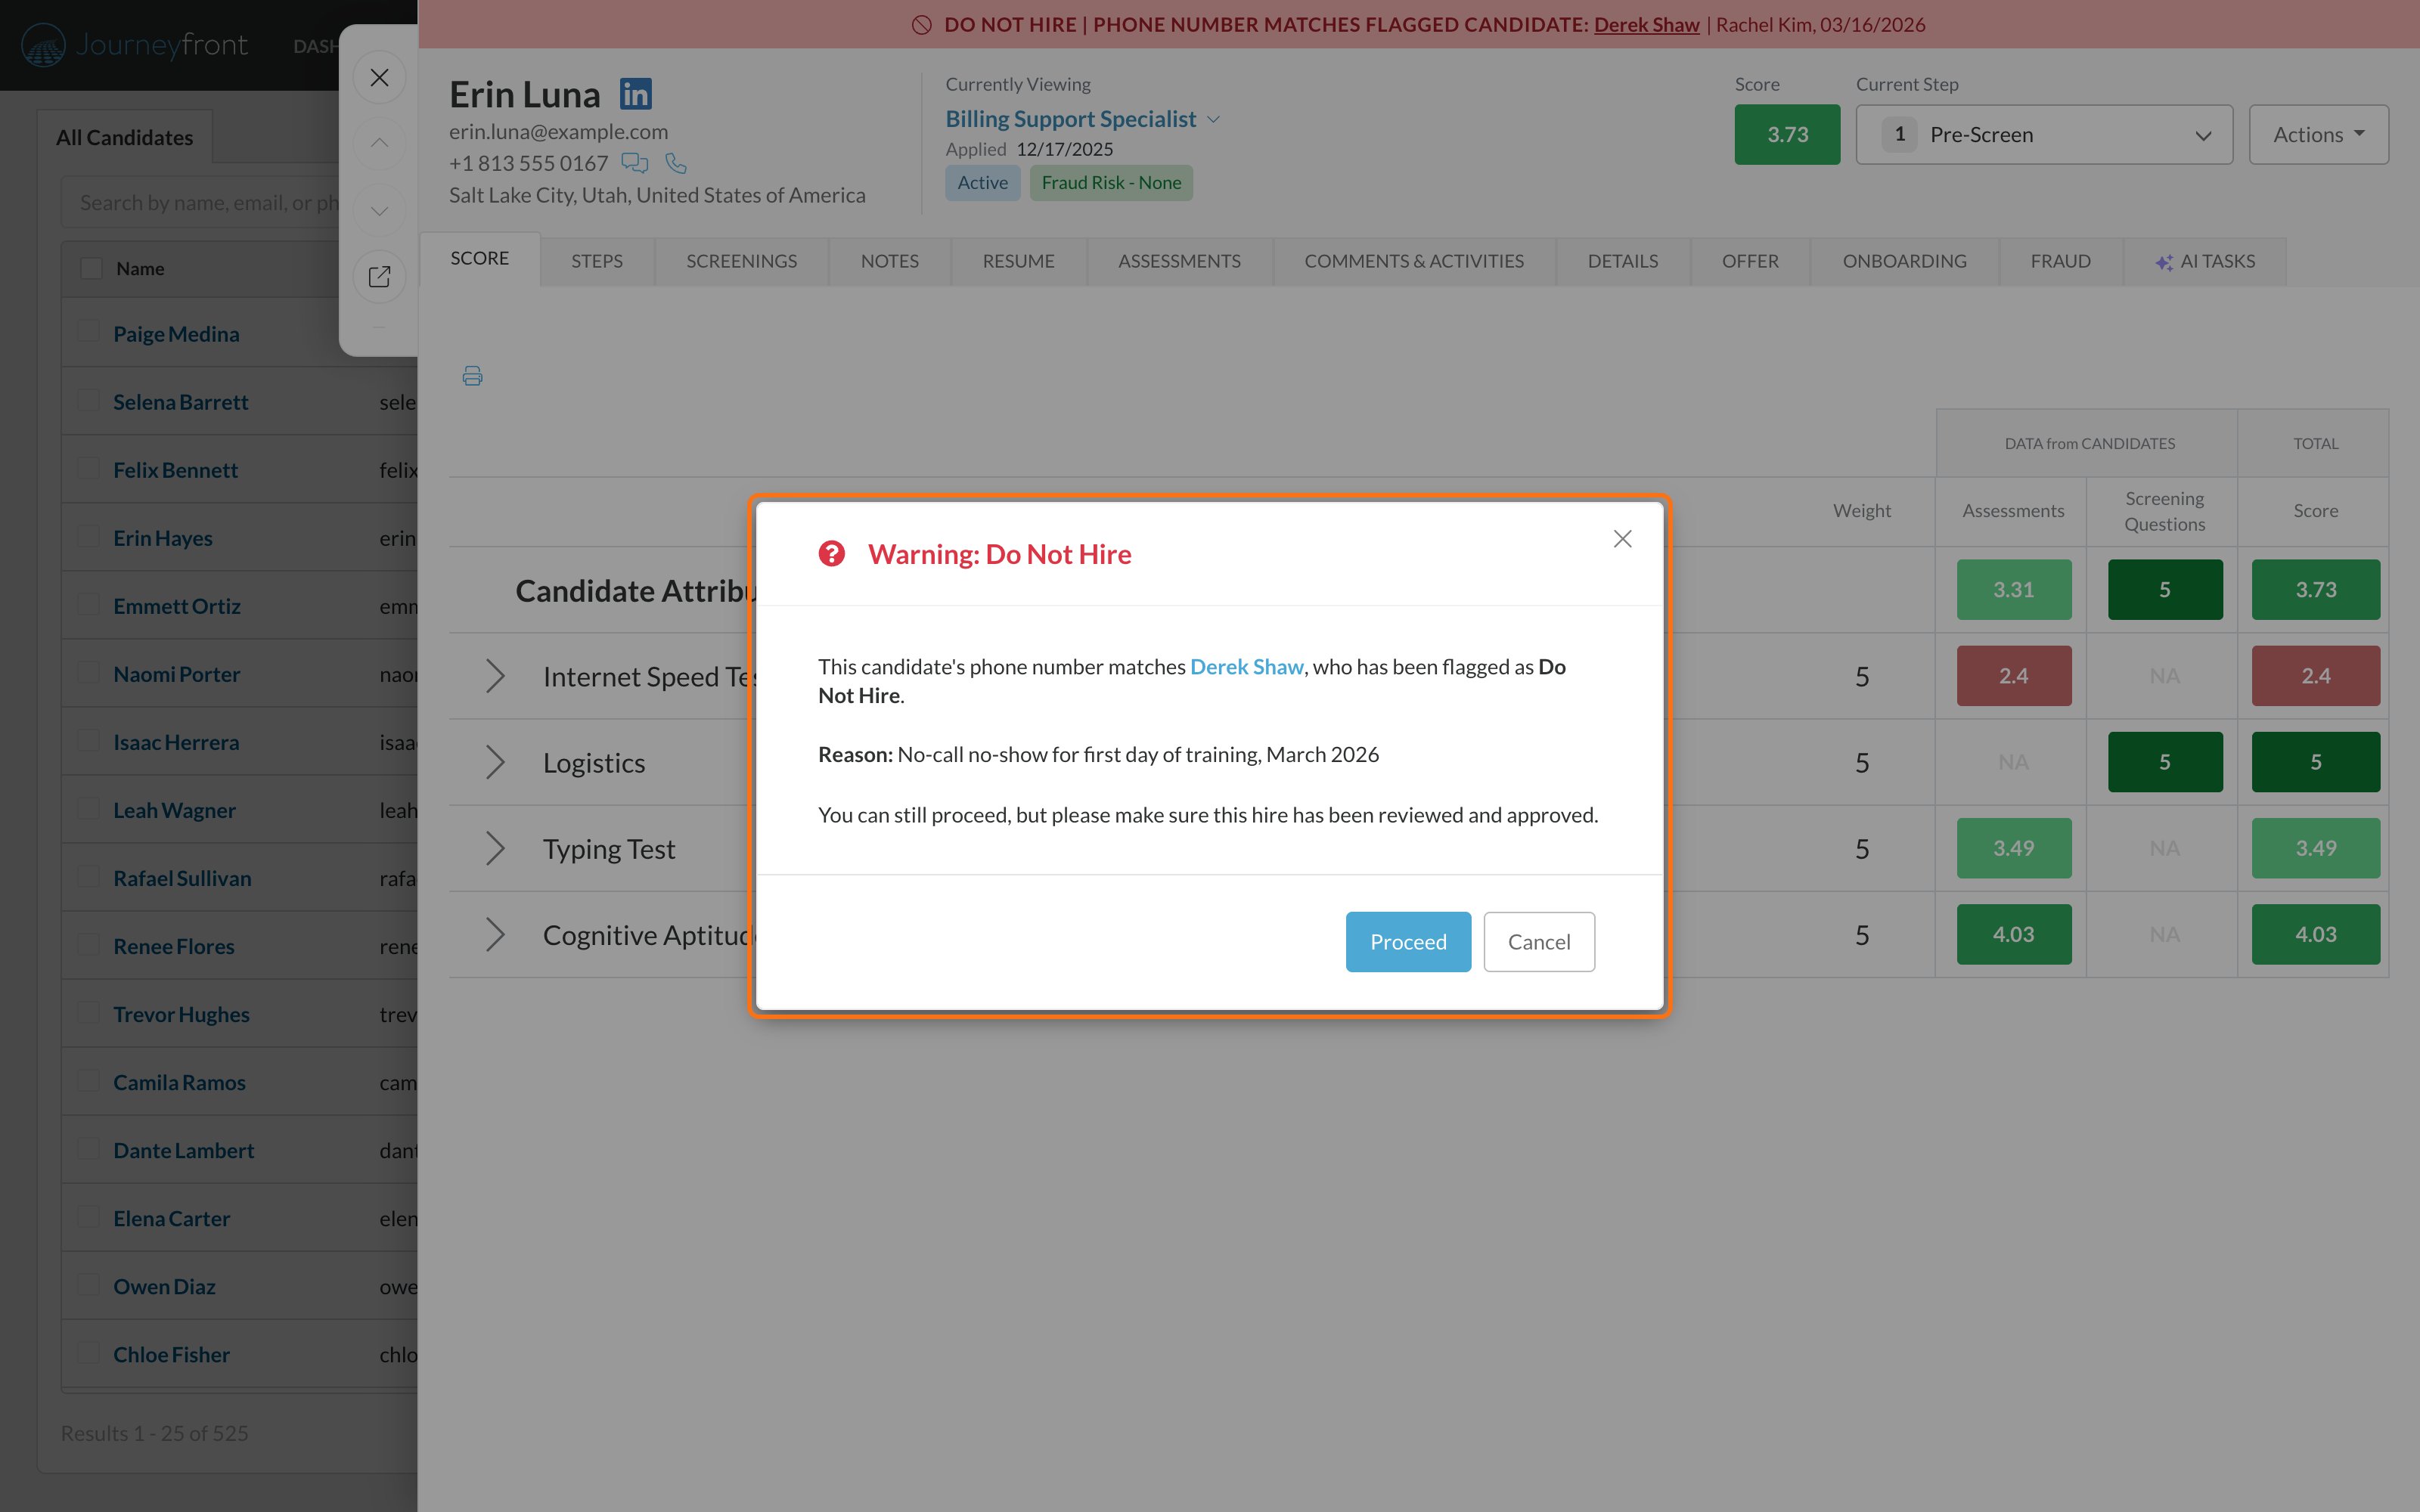
When you click Hire on the Candidate Application of someone who is flagged, or who matches a flagged person, a Warning: Do Not Hire message appears before the hire starts. It shows the reason and links to the matching record. Click Proceed to continue with the hire or Cancel to stop. The warning makes sure the hire is reviewed; it doesn’t block it.The warning appears only when you hire from a Candidate Application. Hiring several candidates at once from a candidate list doesn’t show it, so check the Do Not Hire column first.
Find flagged people on the Candidates page
On the Candidates page, or a job req’s Candidates tab, click Edit Columns to add the Do Not Hire and Do Not Hire Reason columns, or filter by Do Not Hire. The filter includes people you flagged directly and people whose contact details match someone you flagged.Import flags in bulk
When you import candidates into a job req (Actions, then Import Candidates), your file can include two optional columns. See Import candidates.
Each flagged row saves the person’s contact details for matching and adds an activity entry under the name of the person who ran the import. If someone is already flagged, or their contact details already match a flagged person, the import leaves things as they are. Files without these columns import exactly as before.
Activity history
Every flag and removal is recorded. You’ll find it on the Candidate Application’s Comments & Activities tab and the Candidate Profile’s Activity Feed tab. Each entry shows the action (Marked Do Not Hire or Do Not Hire Removed), who made the change (for an import, the person who ran it), and the reason when one was given.FAQ
Does the flag stop someone from applying?
Does the flag stop someone from applying?
No. Flagged people can still apply. Your team sees the banner on their records and a warning if anyone tries to hire them.
Is a reason required?
Is a reason required?
No, but it’s strongly recommended. The reason is what tells the rest of your team why the person was flagged.
Can the flag be removed?
Can the flag be removed?
Yes. Anyone who can set the flag can remove it with Actions, then Remove Do Not Hire. The removal is recorded in the activity history.
Does the flag carry across job reqs?
Does the flag carry across job reqs?
Yes. The flag is on the person, so it shows on every Candidate Application they have in your account.
What if the person's email was changed to a work email?
What if the person's email was changed to a work email?
Journeyfront saves both the primary and the secondary email when you set the flag. If their personal email was moved to the secondary email field, it’s still used to recognize them.
Can candidates see that they're flagged?
Can candidates see that they're flagged?
No. The flag, the banner and the reason are only visible to your team.
Can I flag many people at once?
Can I flag many people at once?
Yes. Add a
do_not_hire column to your CSV import file, with an optional do_not_hire_reason column. See Import flags in bulk.Related
Fraud flags
Spot applications that need a closer look.
How the pieces connect
How job reqs, workflows, postings, candidates and hiring classes relate.