

Who can do this: The Employees page needs the All Employee Access permission. People without it can still open the employees in the job profiles they have access to, from Profiles. Emailing employees needs Send Emails, and the Job Performance tab needs Performance Access.
How employees get into Journeyfront
The Employees page
Click Employees in the top navigation. The page lists every employee in your account, with a count at the top (“Showing 1,240 employees”).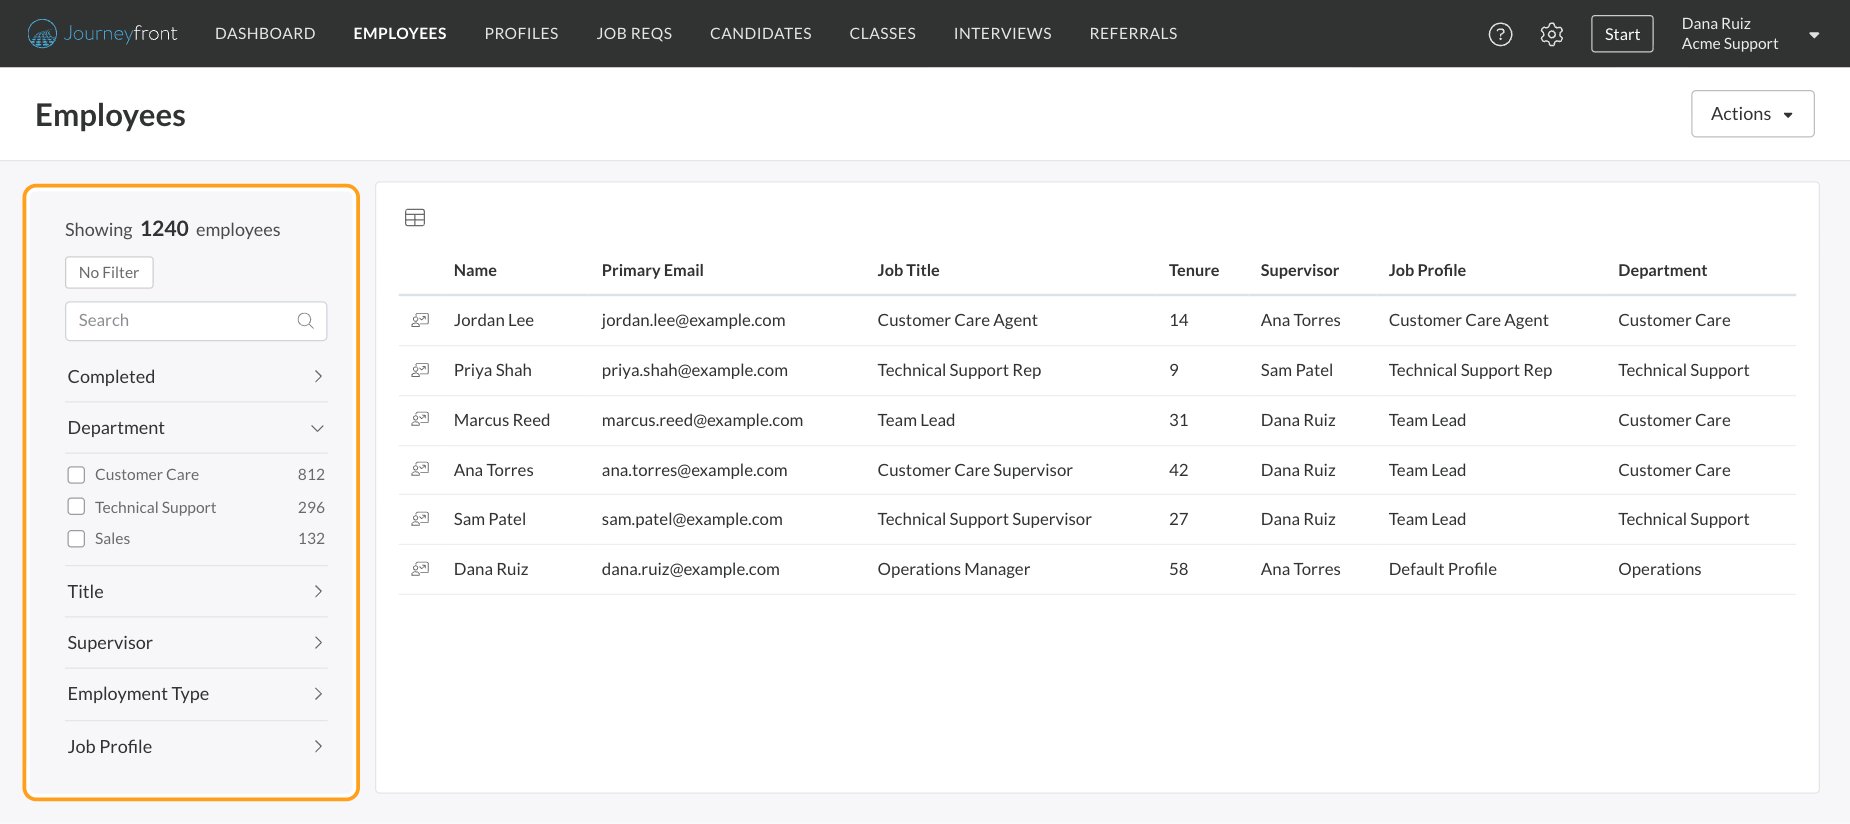
Search and filter
- Search finds employees by name, email, job title, department, supervisor, employment type or job profile.
- Filters on the left narrow the list. Open a group and tick the values you want; each value shows how many employees have it. The groups are Completed (how much of their job profile’s assessments they’ve finished), Department, Title, Supervisor, Employment Type and Job Profile.
- Ticked filters stack, and each one shows as a chip above the search box. Click the x on a chip to remove it.
Choose your columns
Click the table icon above the list. In Choose which fields you want to see, tick the columns you want under Personal Fields and Job Fields, then click Save. Reset to default brings back the standard set. The list starts with Name, Primary Email, Job Title, Tenure (in months), Supervisor, Department and Job Profile. You can add columns such as Email (secondary), Date of Birth, Percentage Complete, Start Date, End Date, Employment Type, Supervisor Email, Created Date and Last Performance Date. Click a column heading to sort by it.Export the list
Click Actions, then Export Data, then Export. Journeyfront downloads a CSV file of your employees, with their details, their job information and your employee job fields. To export the employees of one job profile only, export from the profile instead. See Job profiles.Open an employee’s record
Click an employee’s name or any other value in their row. The record opens with their name, email, phone number and location at the top.- Currently Viewing shows the job you’re looking at, with its start date, its end date if they’ve left, and an Active or Inactive label. Open it to jump to the person’s Candidate Profile, one of their Candidate Applications, or another of their jobs.
- Actions has Email, and Mark Do Not Hire (or Remove Do Not Hire). See Do Not Hire.
Edit personal details
On the Personal Info tab, change what you need. Cancel and Save appear at the bottom once you change something. Click Save; you’ll see “Saved Successfully”. Your account’s personal fields appear on the right under Personal Custom Fields. They’re the same fields that show on the person’s Candidate Profile. See Custom fields.Edit job details
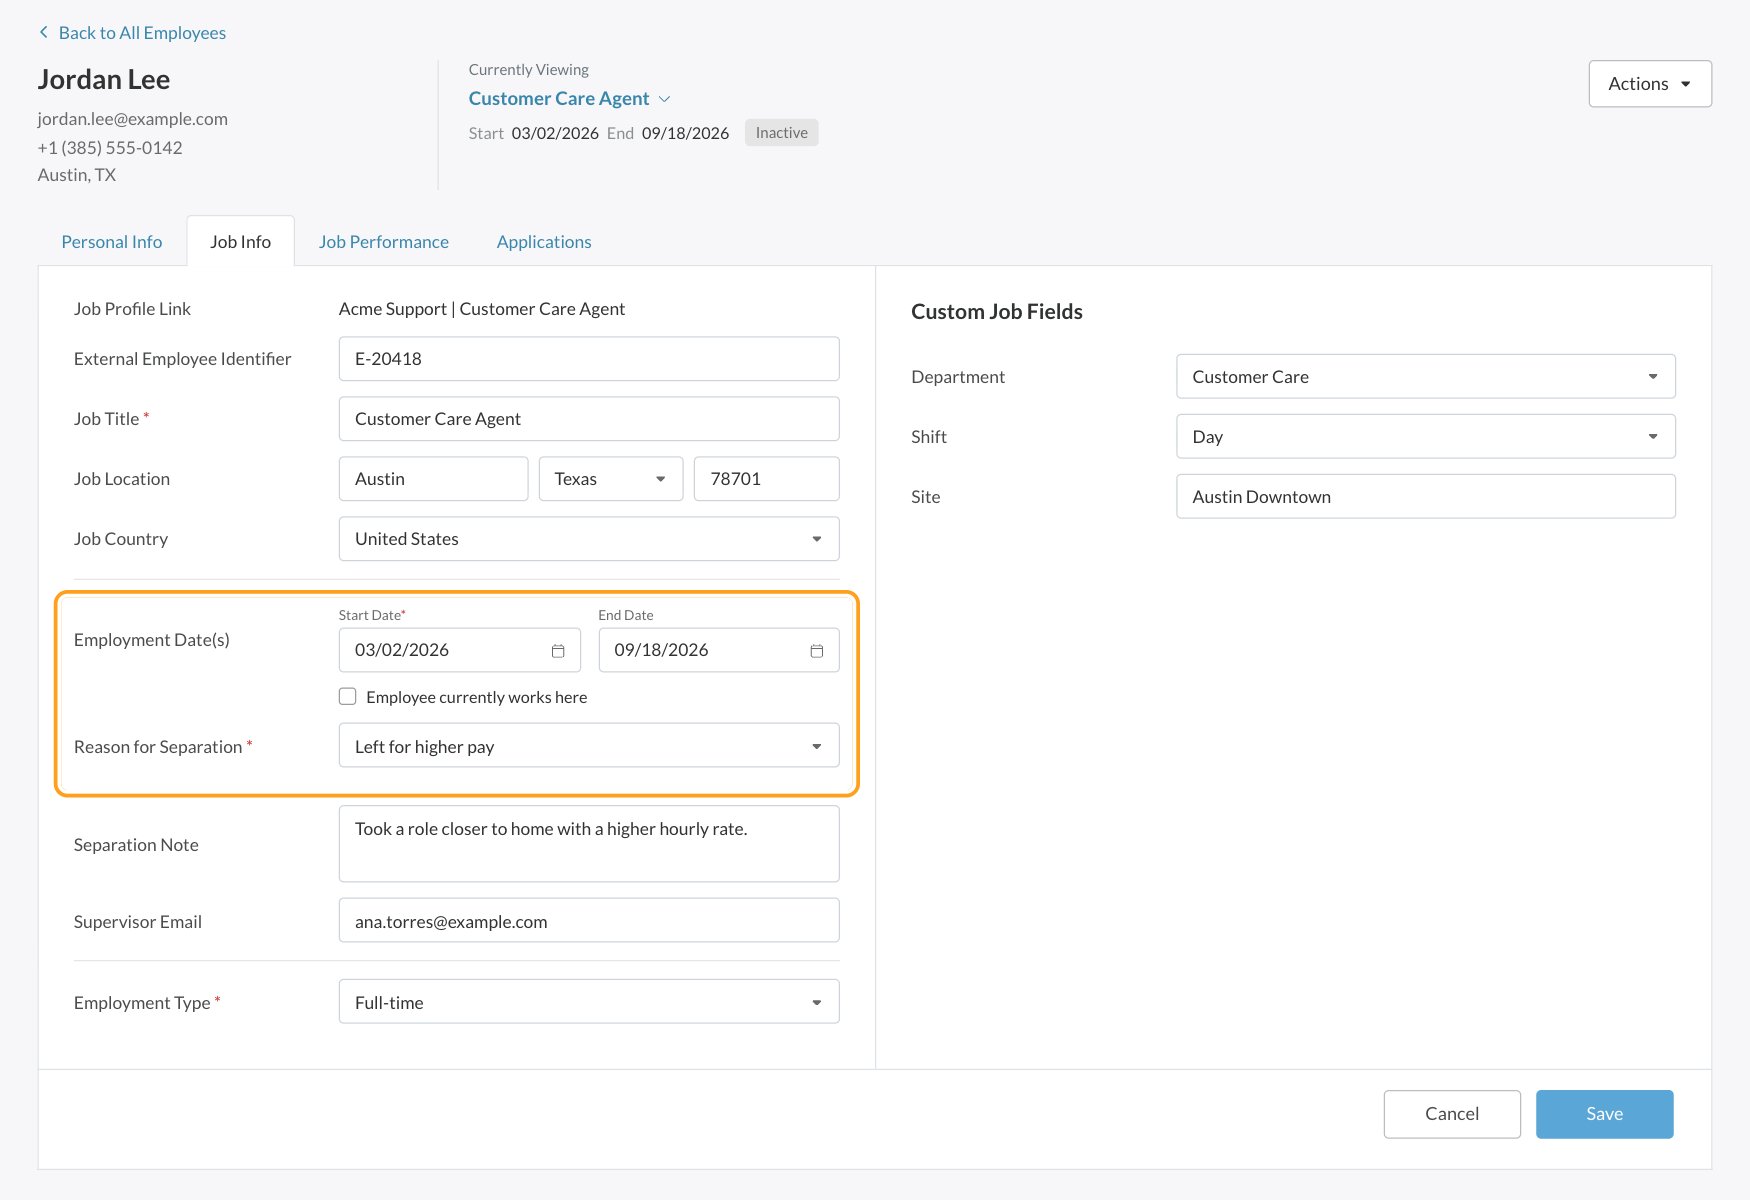
The Job Info tab holds this job’s details:
Your account’s employee job fields appear on the right under Custom Job Fields. Change what you need and click Save.
Change an employee’s supervisor
On the Job Info tab, enter the new supervisor’s email in Supervisor Email and click Save. The Supervisor column and filter on the Employees page use it. Supervisor Email records who the employee reports to. It doesn’t change who can see the employee in Journeyfront: that comes from each person’s security role and the job profiles they have access to. See Security roles and permissions.Record that an employee left
1
Open the Job Info tab
Open the employee’s record and click Job Info.
2
Untick Employee currently works here
The End Date becomes required.
3
Enter the end date and reason
Enter the End Date (it has to be after the start date) and pick a Reason for Separation. Add a Separation Note if you want more detail.
4
Click Save
The record now shows the end date and Inactive.
Email employees
- One employee: open their record and click Actions, then Email.
- Several employees: open their job profile’s Employees tab, tick the employees, and click the envelope icon above the list.
FAQ
Why can't I see the Job Performance tab?
Why can't I see the Job Performance tab?
It needs Performance Access in your security role.
Can I bring an employee back after they left?
Can I bring an employee back after they left?
Yes. On the Job Info tab, tick Employee currently works here again and click Save.
Why can't I change some fields?
Why can't I change some fields?
Job Profile Link is read only; move the employee from their job profile to change it. If your account syncs employees from your HR system, the next sync can also overwrite values that came from it, so change those in your HR system.
Where did someone's application go after they were hired?
Where did someone's application go after they were hired?
It’s still there. Open the employee’s Applications tab, or use Currently Viewing to jump to it.
Why is my Separation Reasons list empty?
Why is my Separation Reasons list empty?
Your admins haven’t added any yet. They’re set in Settings, then Custom Options, then Separation Reasons. See Rejection and separation reasons.
Related
Job profiles
Group employees by role and measure what success looks like.
Performance reviews
Score how employees are doing.
Importing data
Upload employee and performance data in bulk.
Turnover and performance
See who stays, who leaves and why.