

Who can do this: Users with the Manage Job Req Settings permission add the background check activity to a workflow. Anyone who can open a Candidate Application can order a check and see its status. Opening the full report also needs access in your Checkr account.Availability: An admin needs to connect your Checkr account first. See Checkr.
Add a background check to a workflow
1
Open the workflow editor
Open the job req and go to Setup, then Workflow. Click Create New Version (or Edit Draft if there’s already a draft).
2
Add the activity
In the building blocks on the left, find Checkr Background Check at the bottom of the list. Drag it into the step where background checks should happen, such as an onboarding step.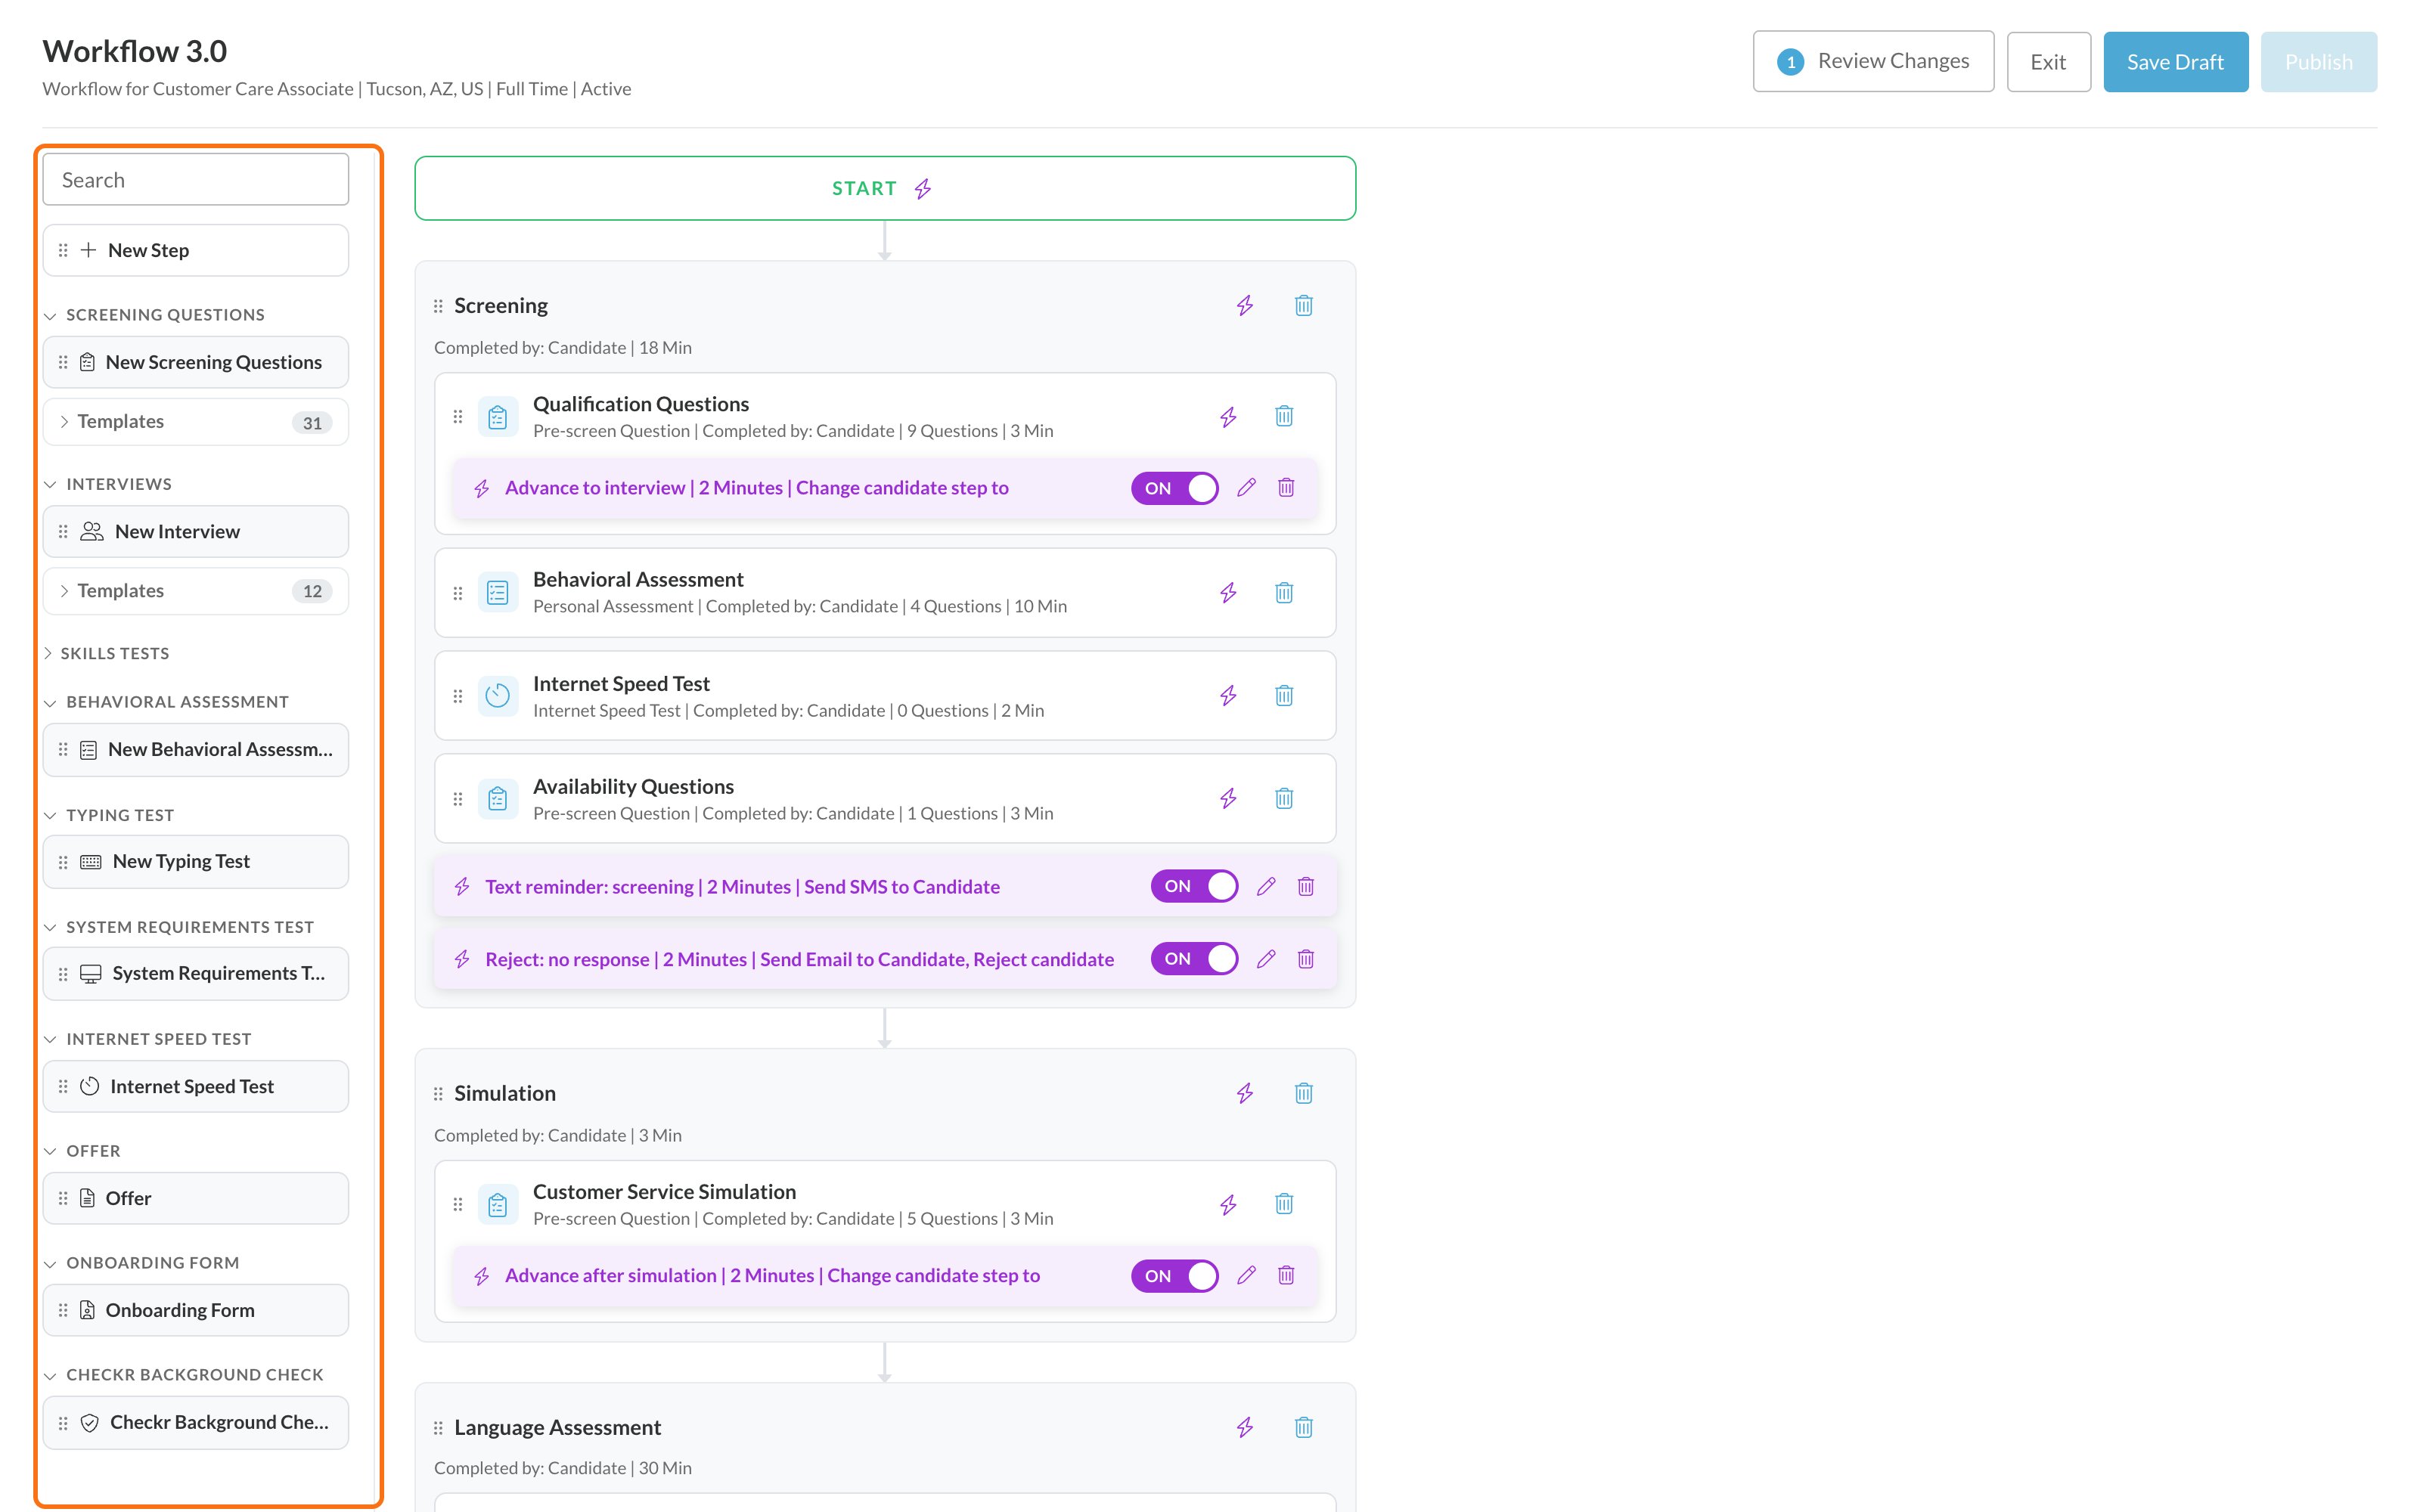
3
Save and publish
Click Save Draft, then Publish when you’re ready. See Publish workflow changes.
Order a background check
1
Open the Onboarding tab
Open the Candidate Application and select the Onboarding tab. The Background section lists the job req’s background check activities.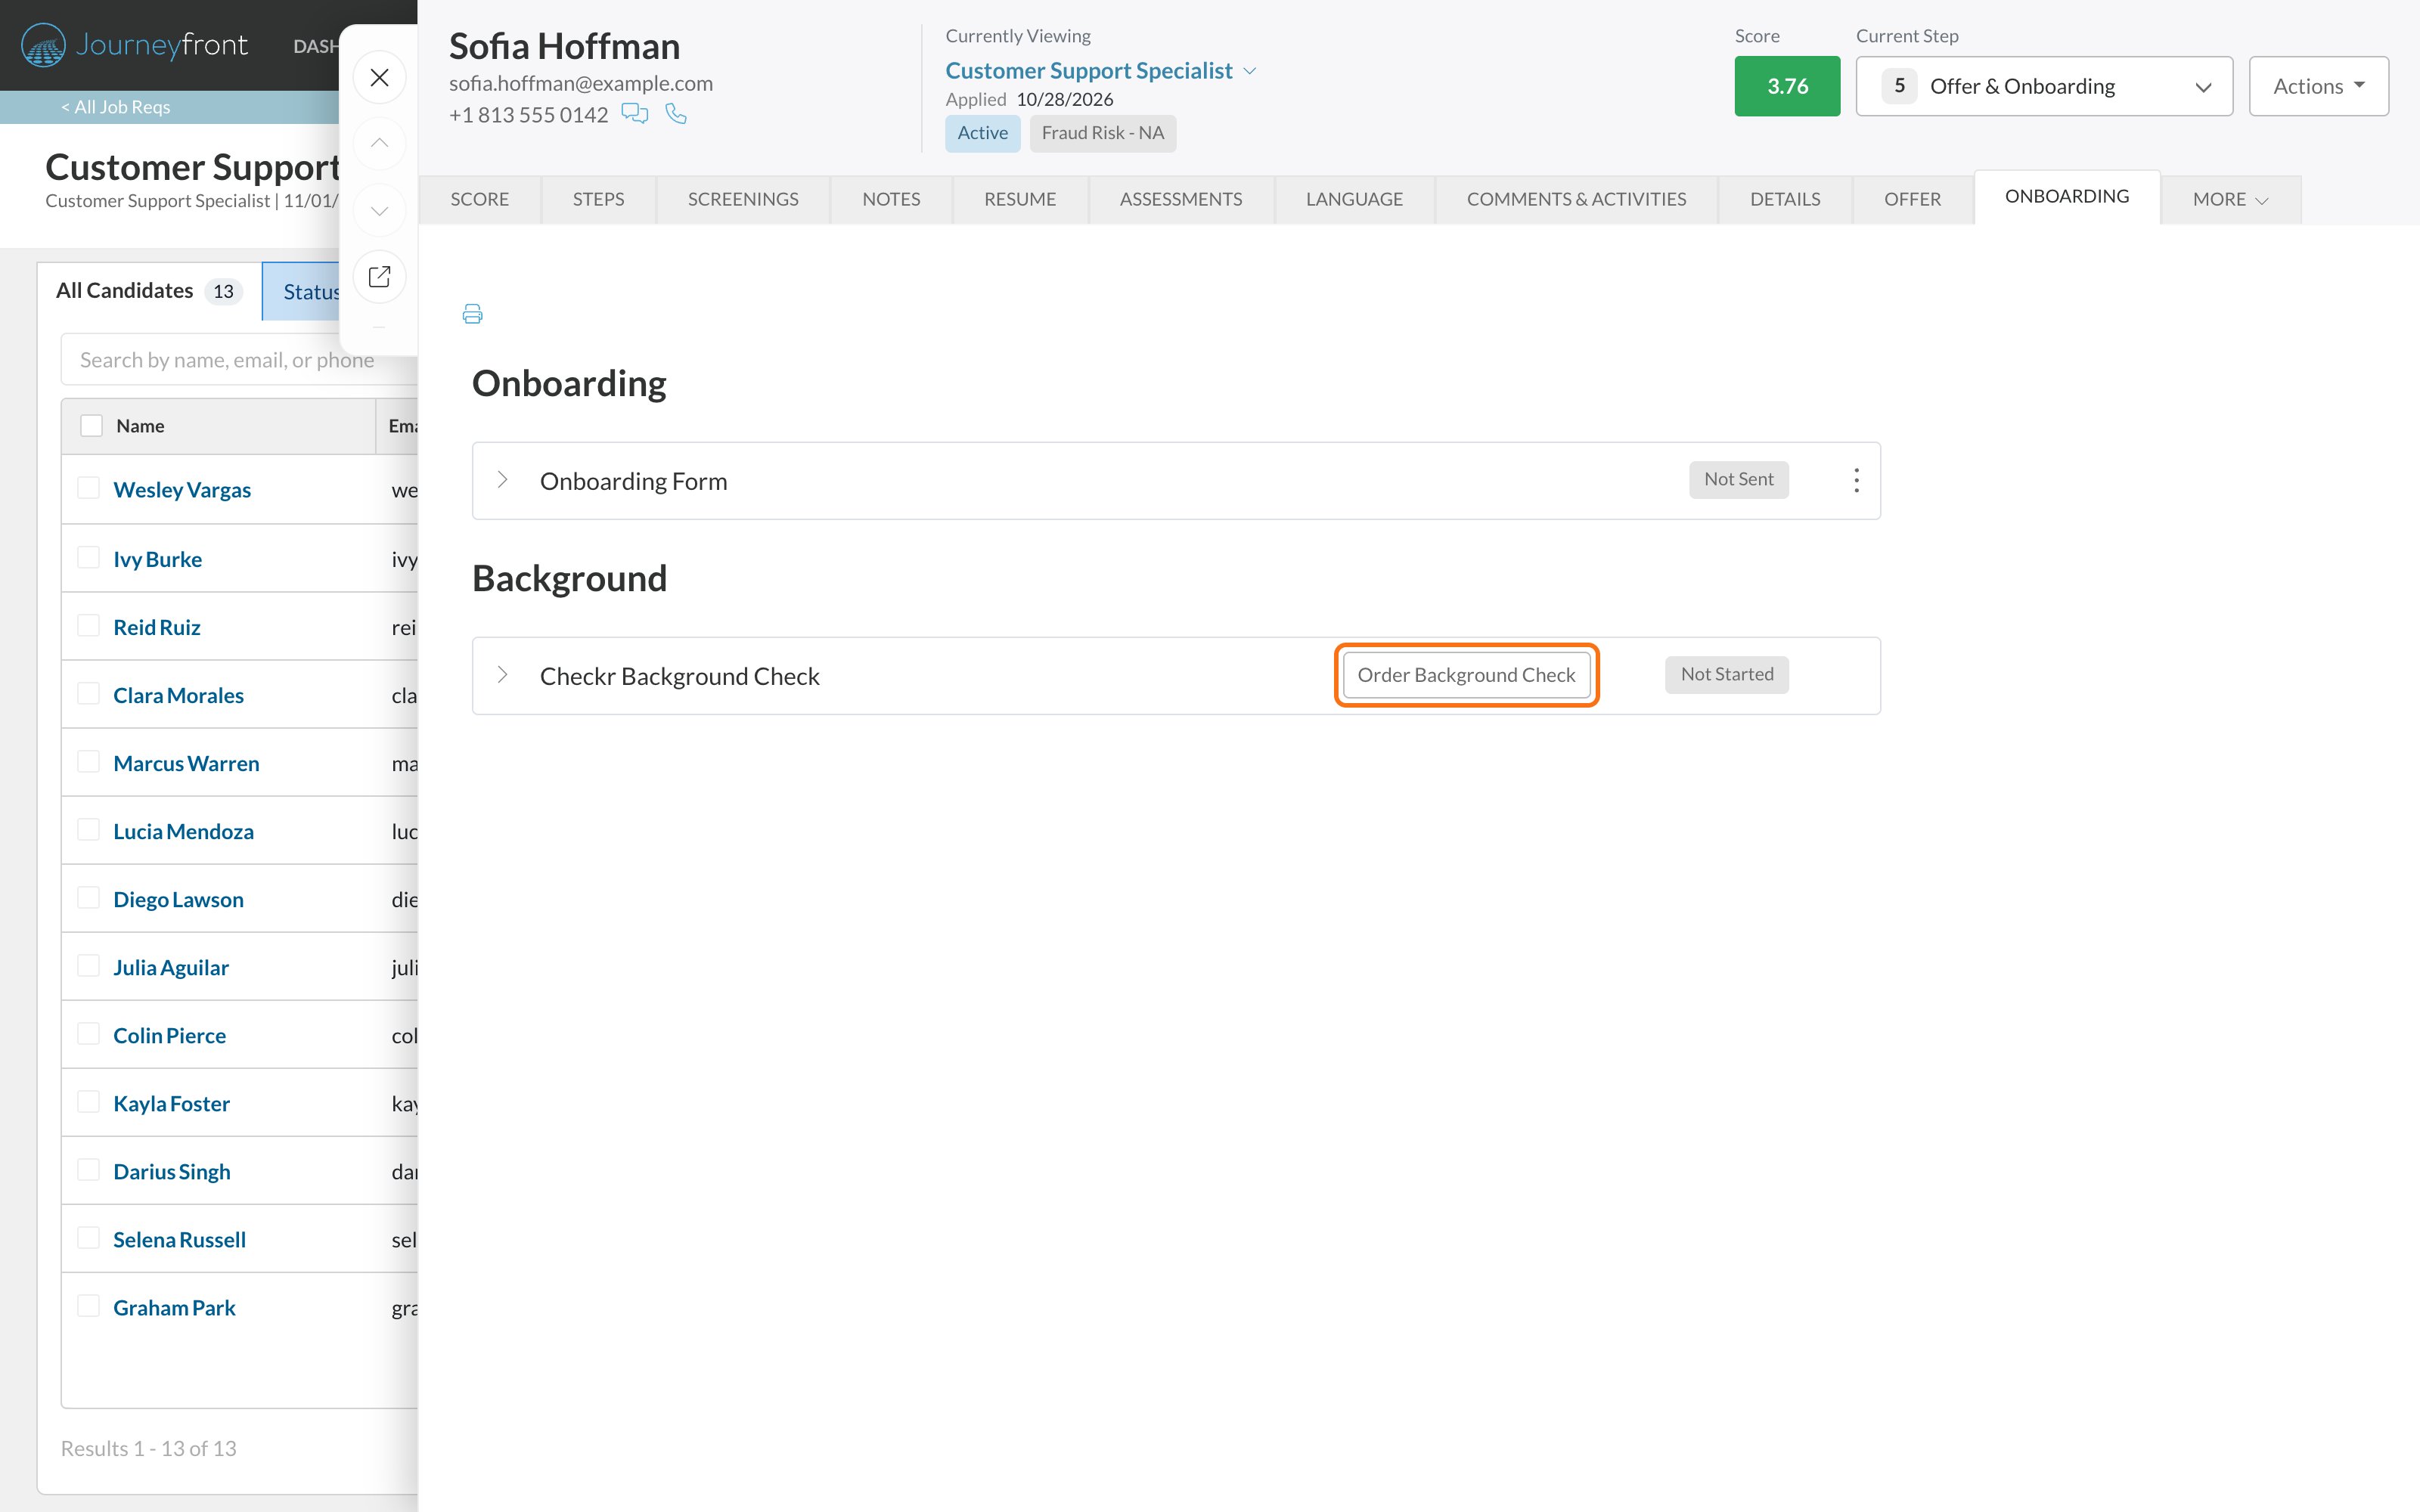
2
Order the check
Click Order Background Check. Checkr’s ordering window opens with the candidate’s email and phone number already filled in.
3
Choose a package and submit
Pick the background check package and submit the order.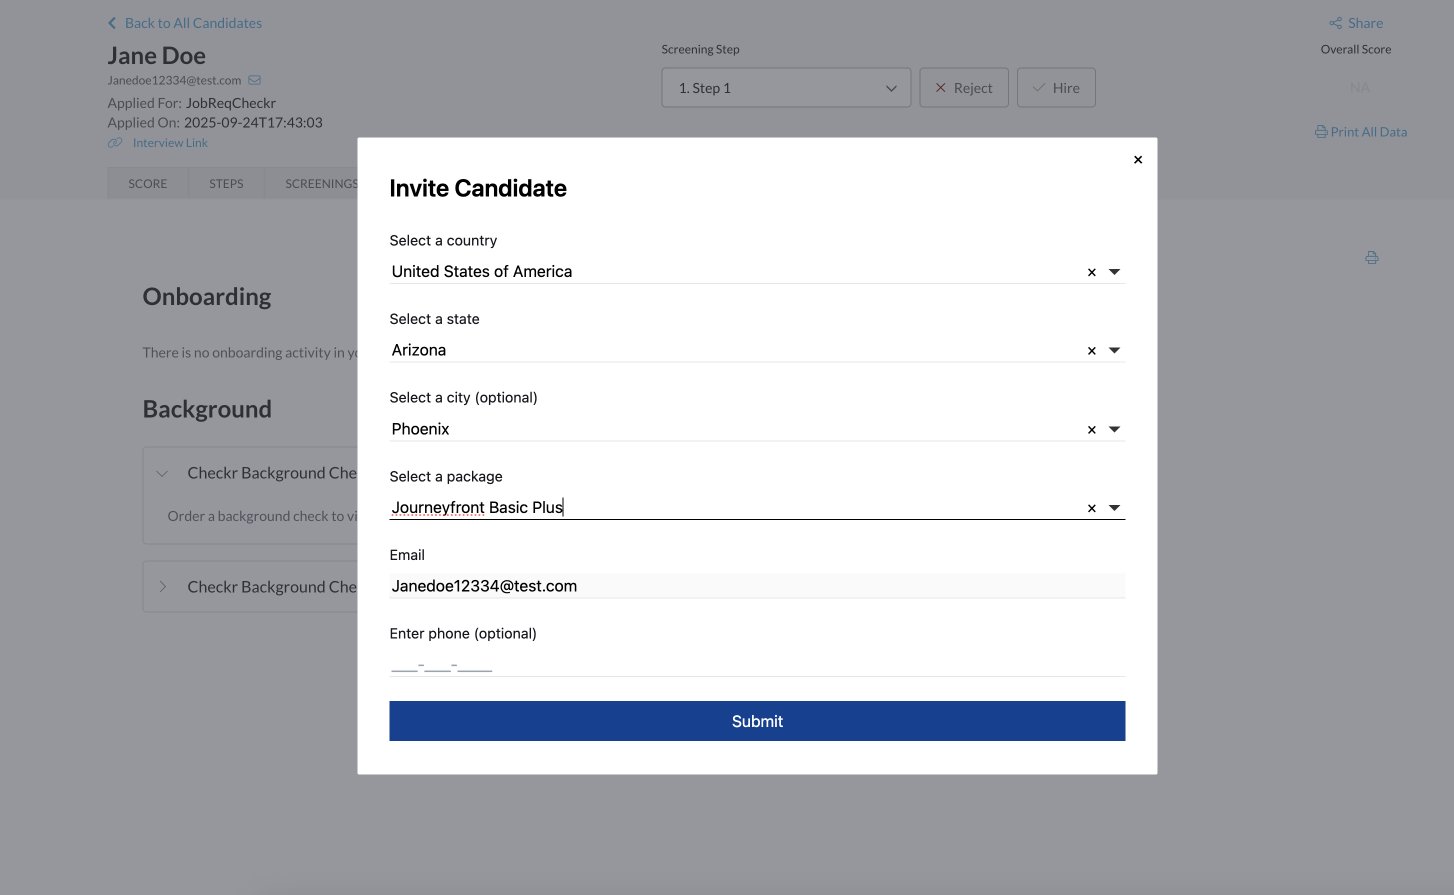
Cancel or reorder a check
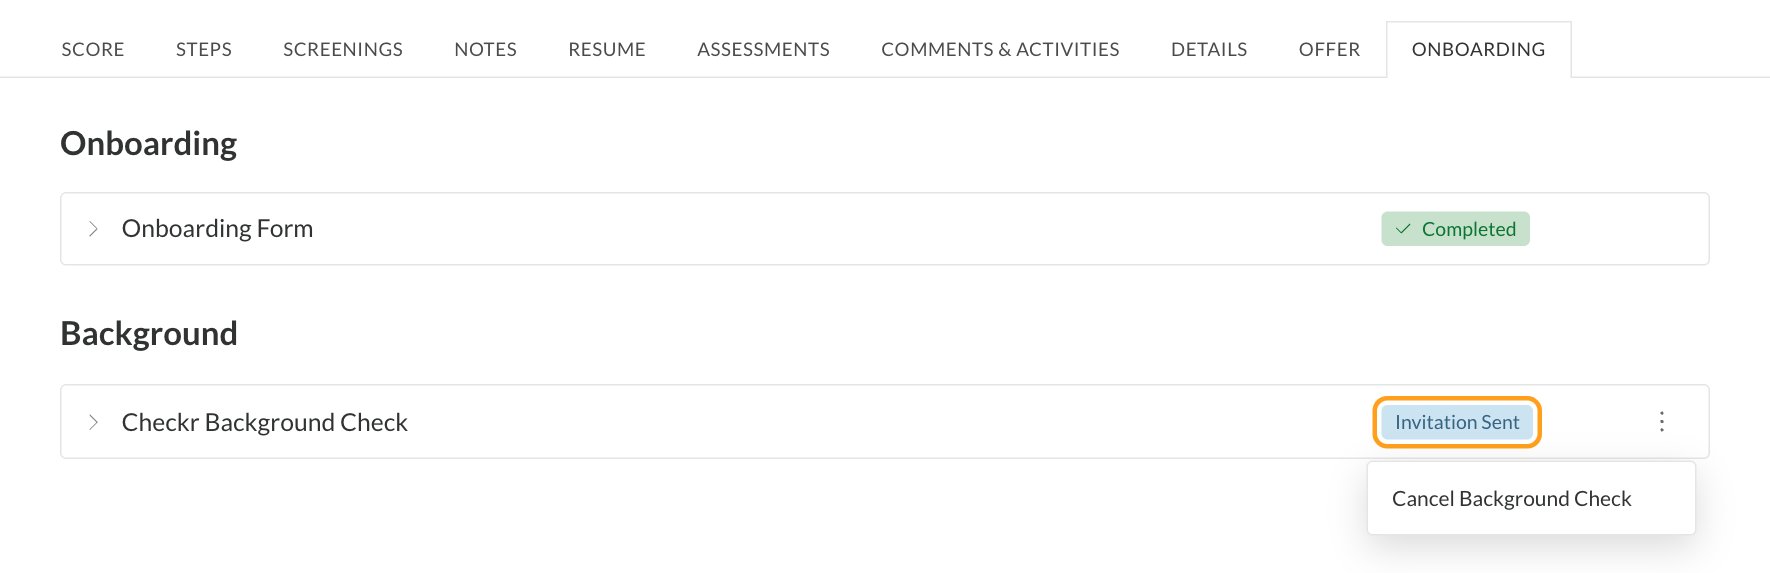
- Cancel: while the status is Invitation Sent, open the menu at the end of the row and choose Cancel Background Check, then confirm.
- Reorder: when an invitation expired or a check was canceled, click Re Order Background Check to send a new one.
Follow the status
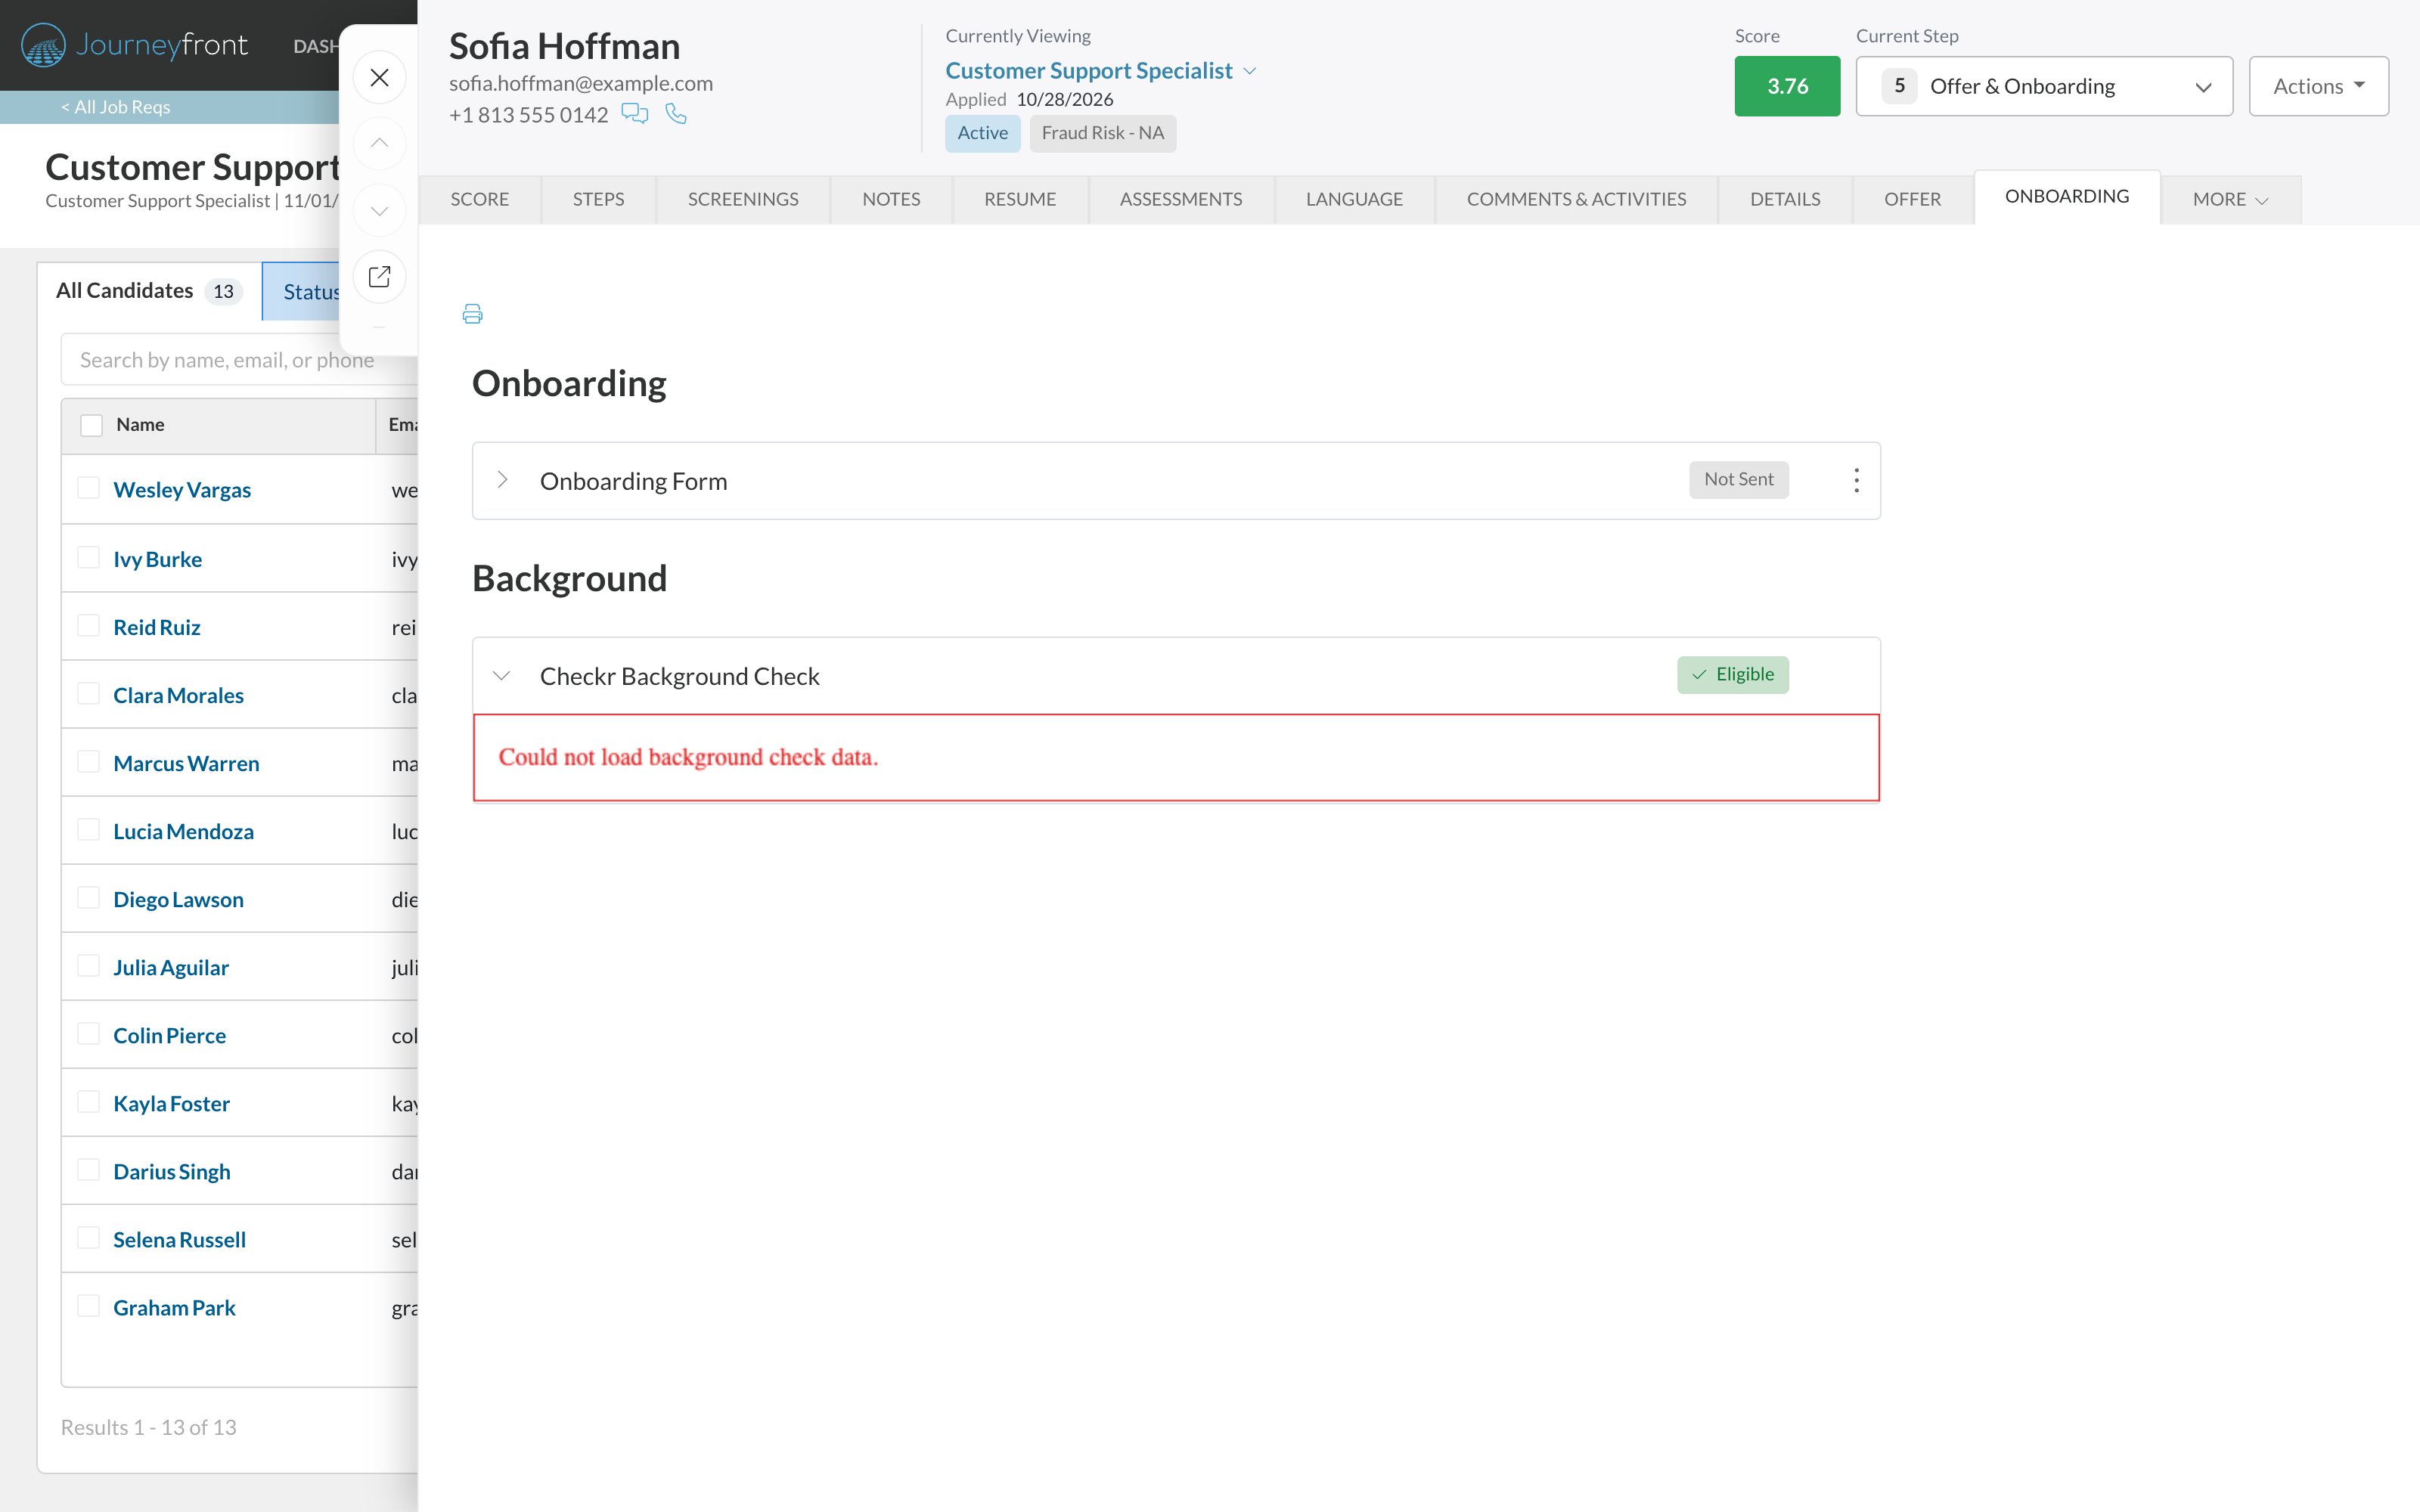
You’ll see a check’s status in two places:- The Onboarding tab on the Candidate Application. Expand the row to see the report summary from Checkr, if you have access in Checkr.
- The Candidates page, as the activity’s status, so you can see where every candidate stands at a glance.
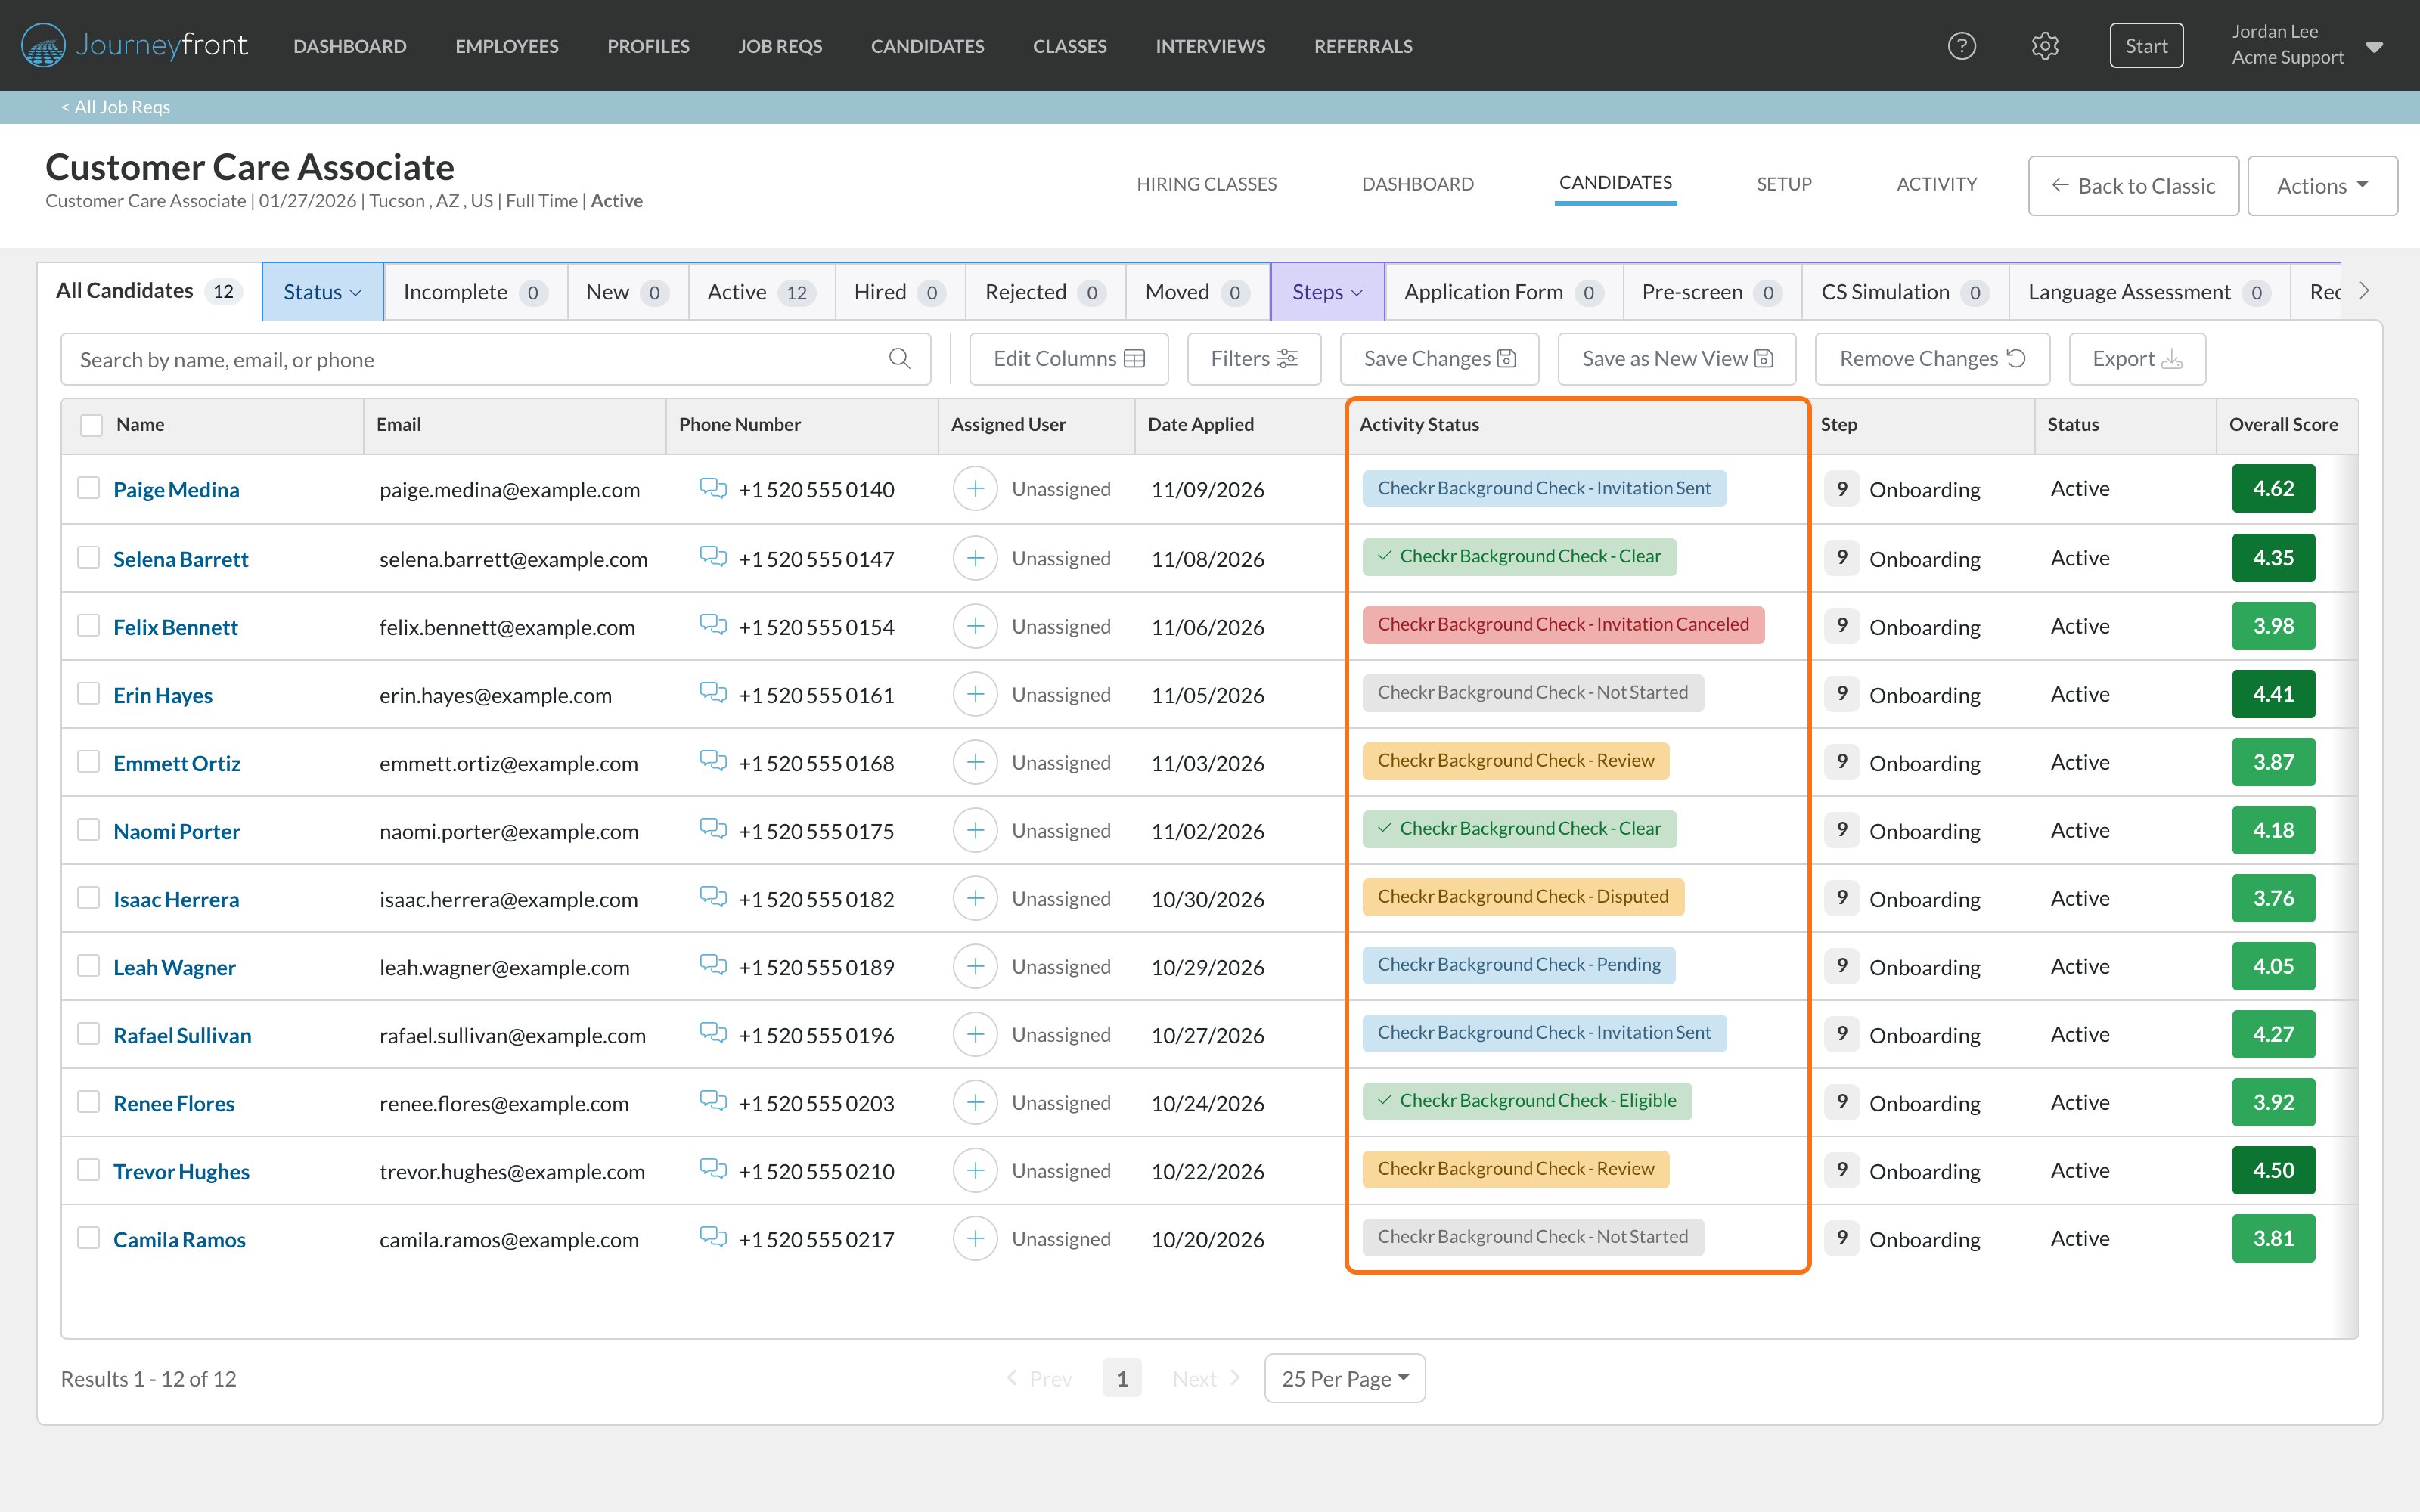
To see the full report or take compliance steps, such as an adverse action process, open the report in Checkr. People without access in Checkr see the status only.
What candidates see
- An email from Checkr, not from Journeyfront, inviting them to start their background check.
- Checkr’s secure site, where they enter their details and give consent.
- Follow-up from Checkr if anything more is needed, such as documents.
- Their report and any dispute are handled directly with Checkr.
FAQ
How long does a background check take?
How long does a background check take?
Most reports finish in two to three days. Some take longer, for example when Checkr needs documents from the candidate or a county court search is slow.
The candidate says they never got the invitation. What can I do?
The candidate says they never got the invitation. What can I do?
Check the status on the Onboarding tab. If it shows Invitation Expired, Invitation Canceled or Canceled, click Re Order Background Check. Also confirm the candidate’s email address and ask them to check their spam folder for a message from Checkr.
Why can't I see the report details?
Why can't I see the report details?
Report details are only visible to people with access in your Checkr account. Ask your Checkr admin to add you.
Can a Review status change to Clear?
Can a Review status change to Clear?
No. Review means there’s something to look at in Checkr. Make your decision there, using your own process. If you move forward with the candidate in Checkr, the status changes to Eligible; if you complete an adverse action, it changes to Not Eligible.
Does Journeyfront decide whether a candidate passes?
Does Journeyfront decide whether a candidate passes?
No. Journeyfront shows the status Checkr reports. Your team makes hiring decisions, and Checkr’s tools handle compliance steps.
Is the full report stored in Journeyfront?
Is the full report stored in Journeyfront?
No. Journeyfront keeps the status and the order details, such as the package. The report summary on the Onboarding tab is shown from Checkr, and the full report and sensitive details stay in Checkr.
Related
Checkr
Connect your Checkr account.
Workflows overview
How steps and activities fit together.