

Who can do this: Users whose security role has the Hire Candidates permission, on job reqs they can access.Availability: Creating employees in your HR system during the run needs an HRIS connection with employee creation turned on. See HRIS integrations.
Hire a group
1
Select the candidates
On the Candidates page, a job req’s Candidates tab, or a hiring class’s candidate list, tick the boxes next to the candidates. You can select up to 100, from one job req or several.
2
Click Hire
Hire is in the actions bar above the list. The Hire Candidates window opens on Hire Details.
3
Set the shared details
Under Journeyfront Group Hire Details, check the fields that apply to everyone. See Fill in the details.
4
Check each candidate
The Candidates table below shows every candidate’s values. Click a cell to change it for one person, or untick Include to leave someone out of this run.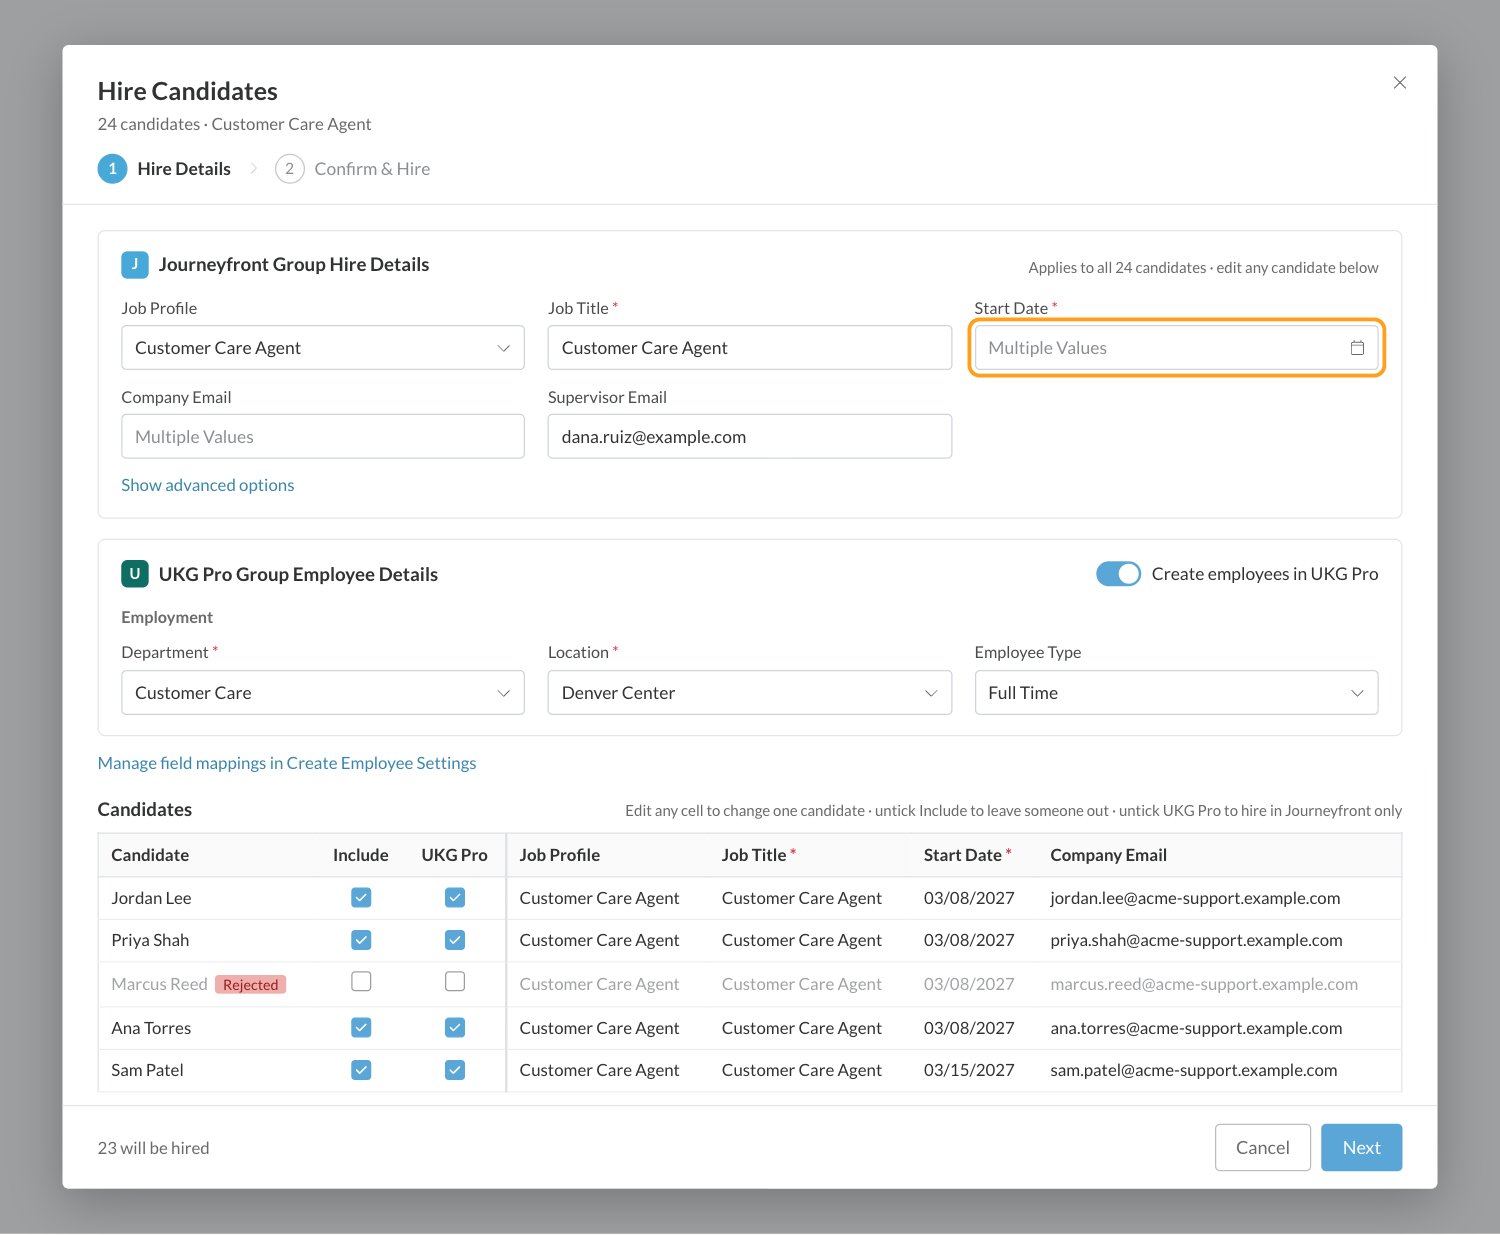
5
Click Next
Confirm & Hire shows how many candidates will be hired, and how many employees will be created in your HR system, along with every value.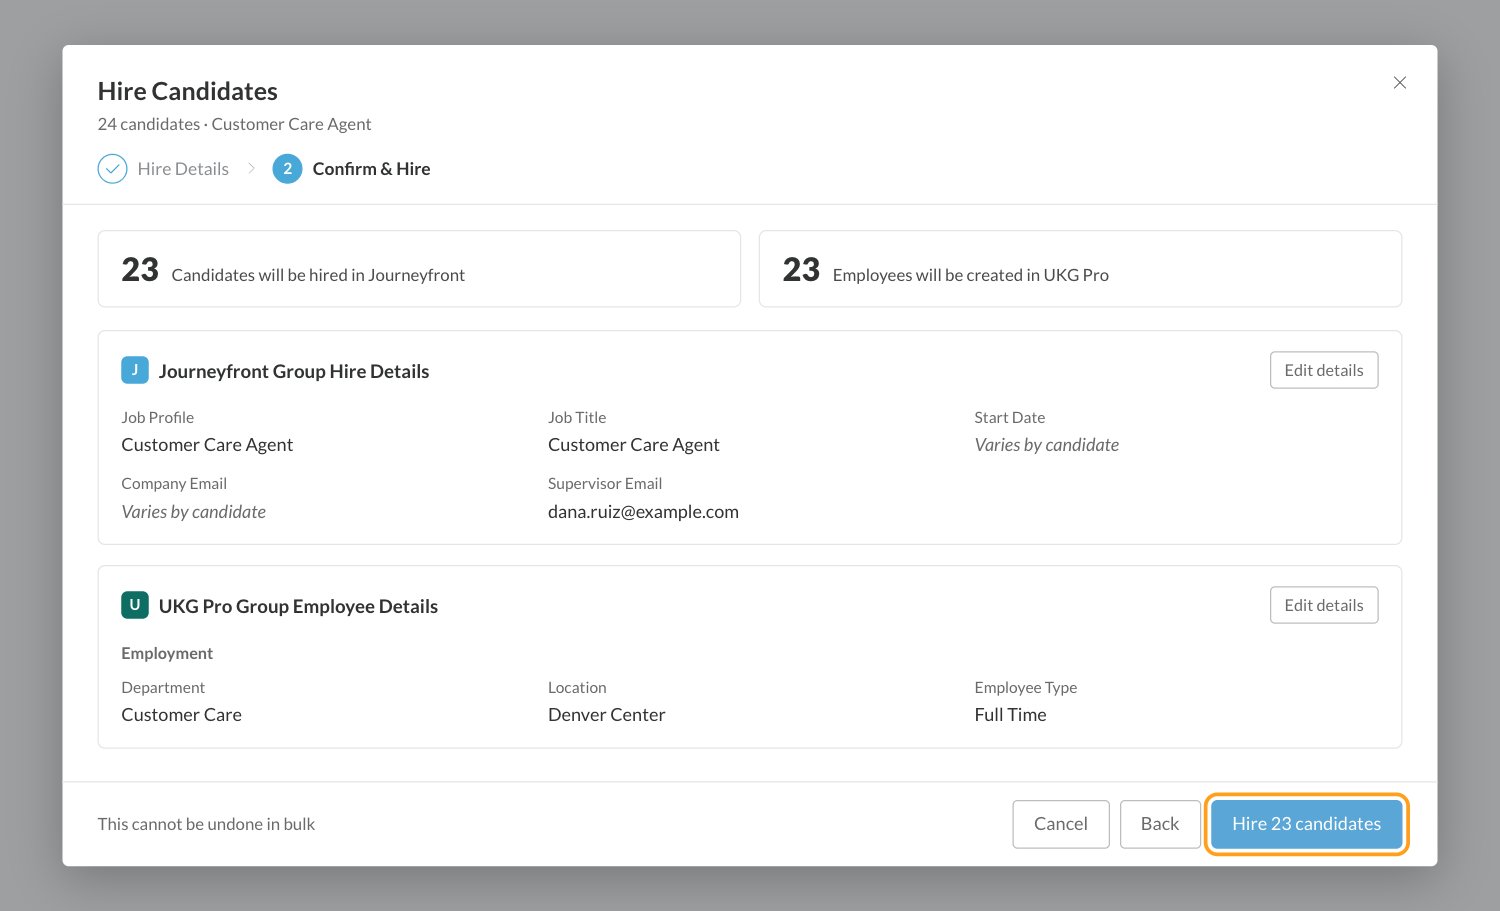
6
Hire them
Click Hire followed by the number of candidates. Watch the progress, then click Done.
Fill in the details
Each field starts with every candidate’s own value, taken from their job req or hiring class. Type in a field to set one value for the whole group. Clear it to go back to each candidate’s own value. When candidates have different values, the field reads Multiple Values.
Click Show advanced options for Additional Job Details (Job City, Job State, Job Country and Employment Type, taken from the job req) and Custom Job Fields (your account’s employee job fields).
A Company Email becomes the candidate’s main email address, which they use to sign in to Journeyfront, so every candidate needs their own. The window won’t let you continue while two candidates share one or an address isn’t valid.
Create employees in your HR system
When your HR system is connected with employee creation on, a second section appears, named after your HR system, with the switch Create employees in your HR system.- Turn it on to create everyone in your HR system as part of the run. Its fields appear, grouped the way your HR system groups them. Fill in shared values once, and edit any candidate in the table.
- Untick a candidate in your HR system’s column to hire them in Journeyfront only.
- Leave the switch off to hire the whole group in Journeyfront only.
Who’s included
- Already hired: skipped, and shown as skipped on Confirm & Hire.
- Rejected: unticked for you, with a note naming them. You can tick them back on if you really mean to hire them; Journeyfront asks you to be sure.
- Missing a required value: the run can’t continue until you fill it in or untick them. The footer tells you who and what.
- No longer on the job req: if a candidate’s application can’t be found, they’re left out and named in a note at the top.
Check the results
The run hires everyone in Journeyfront first, then creates employees in your HR system. The results show each candidate’s progress, with counts of who was hired, who was already hired and who failed.- Edit and try again: go back and fix the values for candidates who failed.
- Retry failed: send failed HR system pushes again. Candidates already hired in Journeyfront aren’t hired twice.
- Need checking in your HR system: Journeyfront couldn’t confirm whether the employee was created. Check your HR system before sending them again, so you don’t create a duplicate.
FAQ
Why is Hire greyed out?
Why is Hire greyed out?
You’ve selected more than 100 candidates. Hover over Hire to see the limit, and hire the group in batches.
Why don't I see Hire at all?
Why don't I see Hire at all?
It needs the Hire Candidates permission. Ask your Journeyfront admin to check your security role.
Can I hire candidates from different job reqs in one run?
Can I hire candidates from different job reqs in one run?
Yes. Each candidate is hired into their own job req, with values from their own job req and hiring class.
Can I undo a bulk hire?
Can I undo a bulk hire?
Not in bulk. Un-hire candidates one at a time from their Candidate Application. See Un-Hire a candidate.
Does bulk hire email the candidates?
Does bulk hire email the candidates?
No. Use E-mail or Message in the actions bar, or an automation rule with the Candidate is Hired trigger, to welcome your new hires.
What if the HR system part fails for some candidates?
What if the HR system part fails for some candidates?
They’re still hired in Journeyfront. Fix what’s missing and use Retry failed to send them again, or send them later from each Candidate Application. See Hire candidates.
Related
Hire candidates
Hire one candidate, edit a hire, or un-hire.
Hiring classes
Group hires who share a start date.
HRIS integrations
Create employees in your HR system.
Bulk actions
Everything you can do to a group of candidates.