

Who can do this: Anyone who can open the candidate’s job req. Creating offers while you move candidates needs the View and Send Offers permission.
Move one candidate
1
Open the Current Step menu
On the Candidate Application, click Current Step at the top right.With Gate Steps on, steps the candidate hasn’t reached yet have an outlined number. Hover over a step to see when it was unlocked and by whom.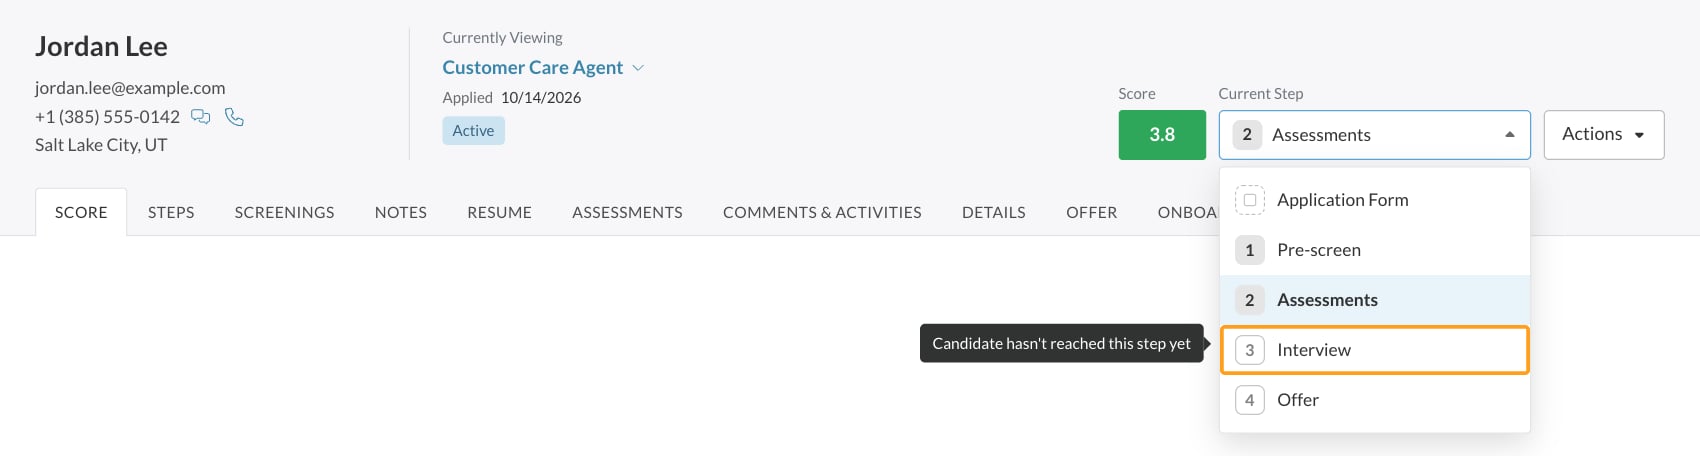
2
Pick the step
Choose the step to move them to. The Change Candidate Step window opens with that step selected.
3
Work through the moving actions
The window shows a part for each activity in the new step that needs something from you. See Moving actions below. If the step has none, you go straight to the review.
4
Move the candidate
Check the summary on Review & Execute and click Move Candidate. Click Done to close the window.
Move several candidates at once
1
Select the candidates
On the Candidates page or a job req’s Candidates tab, tick the boxes next to the candidates (1). They need to be on the same job req.
2
Click Change Step
Change Step (2) is in the actions bar above the list. The Change Candidate Step window opens.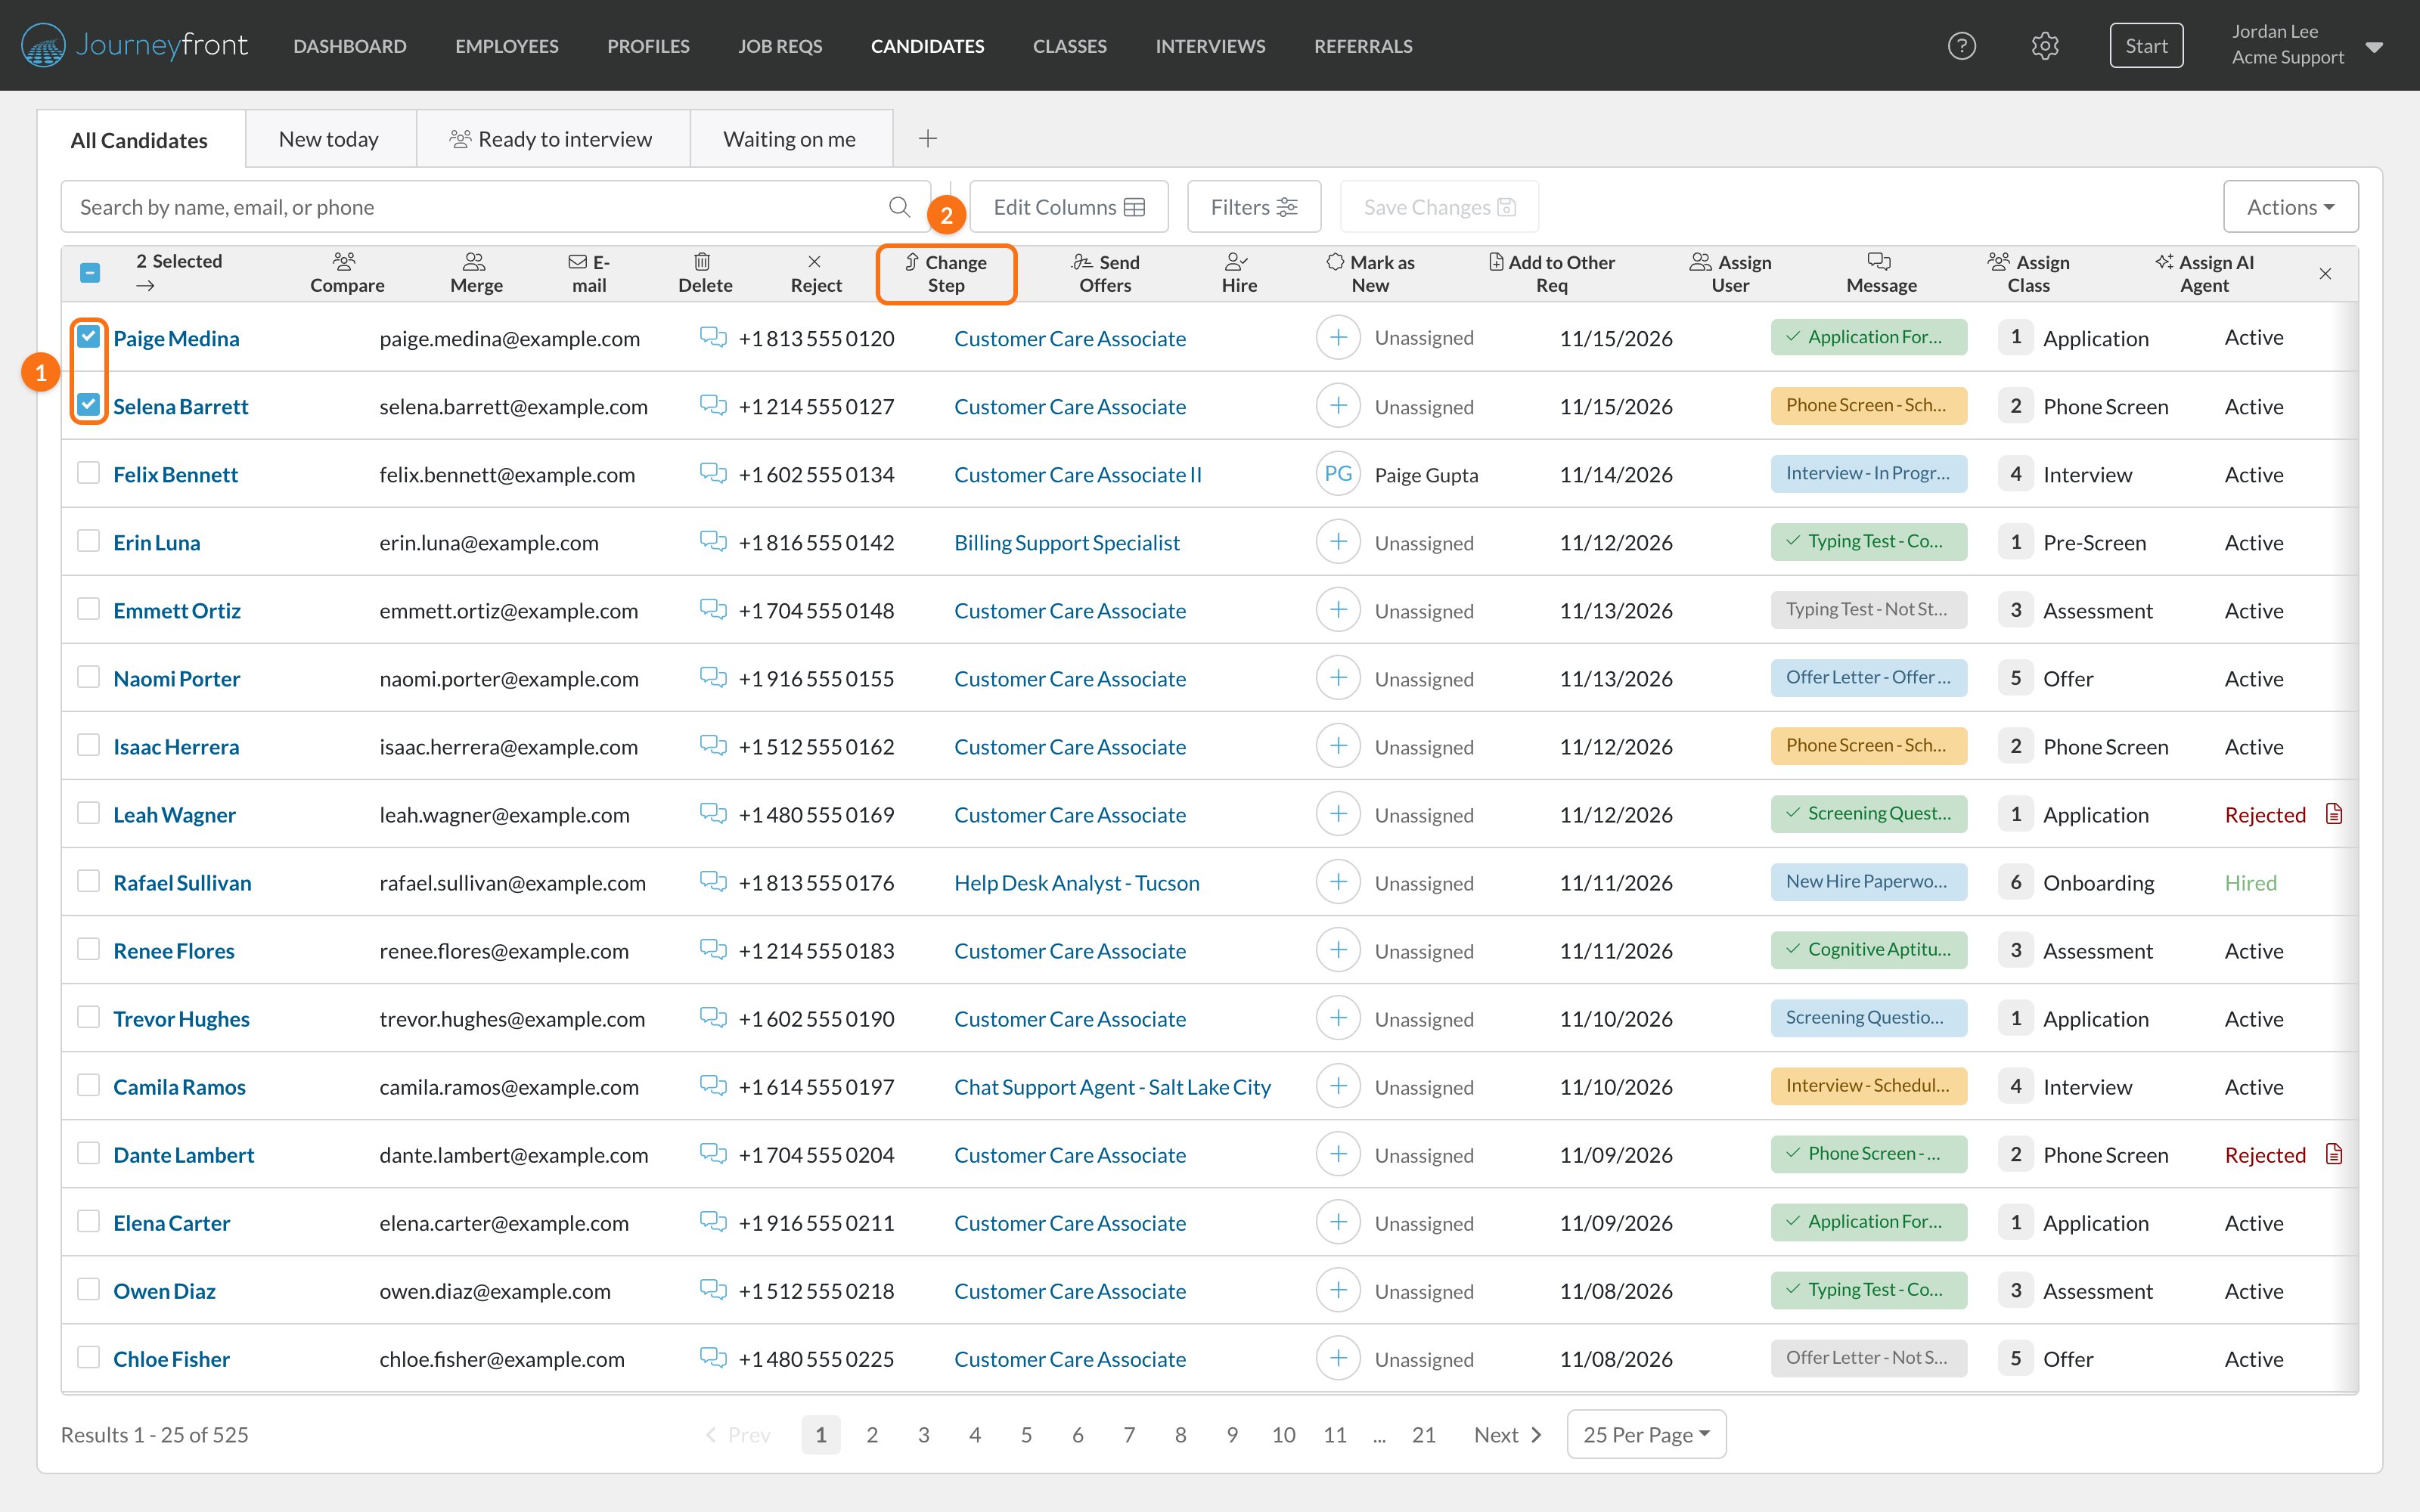
3
Choose the step
On Select Step, pick the step to move everyone to, then click Next.
4
Work through the moving actions
Your choices apply to everyone in this move.
5
Move the candidates
On Review & Execute, click Move Candidates, then Done.
Moving actions
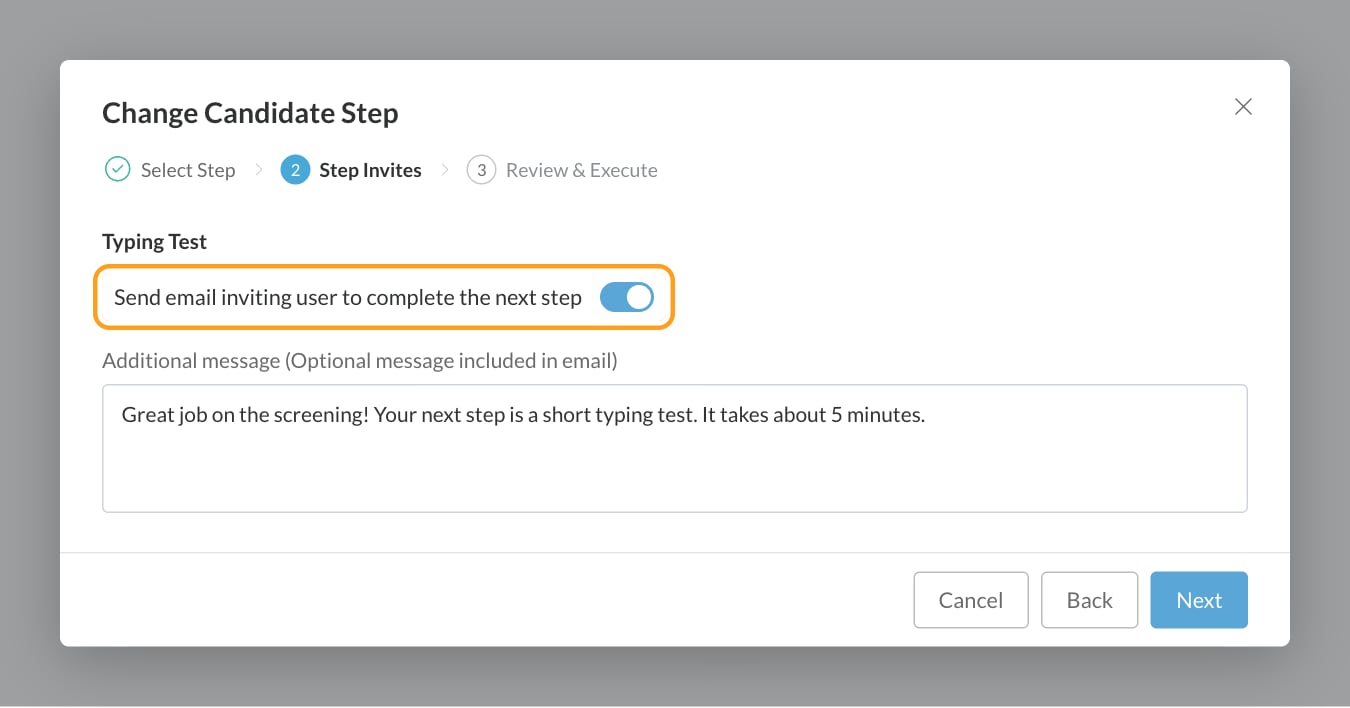
The Change Candidate Step window adds a part to its progress bar for each of these activities in the step you’re moving to:
The step invite email uses the User is moved to a new step notification system email, with your message added. You can edit it in Settings, then Templates, then E-mail Template, on the System Emails tab. See Email templates.
Interviews in the new step don’t add a part here. Candidates get a scheduling invite through the interview’s own settings. See Self-scheduling.
Move candidates automatically
Automation rules can move candidates for you, for example when they score well on screening questions. Use the Change candidate step to action, and tick Send email inviting user to complete the next step to email them. See Automation rules. Moving a candidate by hand also starts any rule with the Candidate Moved to Step trigger for that step.What candidates see
If you turned on the email, the candidate gets a message with a link to continue. When they sign in, they see the activities in their new step on their progress page. Without the email, they see the new step the next time they sign in.FAQ
Why don't I see Change Step?
Why don't I see Change Step?
Everyone you select needs to be on the same job req and the same version of its workflow. Add the Job Req and Job Version columns to spot the candidates that don’t match, then select a smaller group.
Can I skip a step or move a candidate back?
Can I skip a step or move a candidate back?
Yes. You can pick any step in the workflow, ahead or behind the candidate’s current step.
Does the candidate get an email when I change their step?
Does the candidate get an email when I change their step?
Only if you turn on Send email inviting user to complete the next step, which appears when the new step has something for them to do.
Why can't I click Next on the onboarding part?
Why can't I click Next on the onboarding part?
A step with an Onboarding Form activity needs a form assigned. Choose one under Onboarding form, then click Next.
Can I move a candidate and create their offer at the same time?
Can I move a candidate and create their offer at the same time?
Yes. Move them to the step with the Offer activity and turn on Create Offer in the window. See Send offers in bulk.
Why didn't a candidate move to the next step after finishing?
Why didn't a candidate move to the next step after finishing?
With the job req’s Gate Steps setting on, which is the default, candidates stay in their step until your team or an automation rule moves them. Set up a rule with the Candidate Completes Step trigger to move candidates as soon as they finish.
Related
Workflows overview
The steps and activities candidates move through.
Automation rules
Move candidates automatically.
Bulk actions
Everything you can do to a group of candidates.
Reject candidates
When a candidate isn’t moving forward.