

Who can do this: People whose security role has Manage Referral Settings. Without All Referral Portals Access, you only see and edit the portals you’re an admin of.Availability: Referrals need to be turned on for your account. Ask your Customer Success Manager.
Create a portal
1
Open Referral Portals
Go to Settings, then Referral Portals. The list shows each portal’s Name, Status (Active or Inactive), Access, Admins and Last Updated.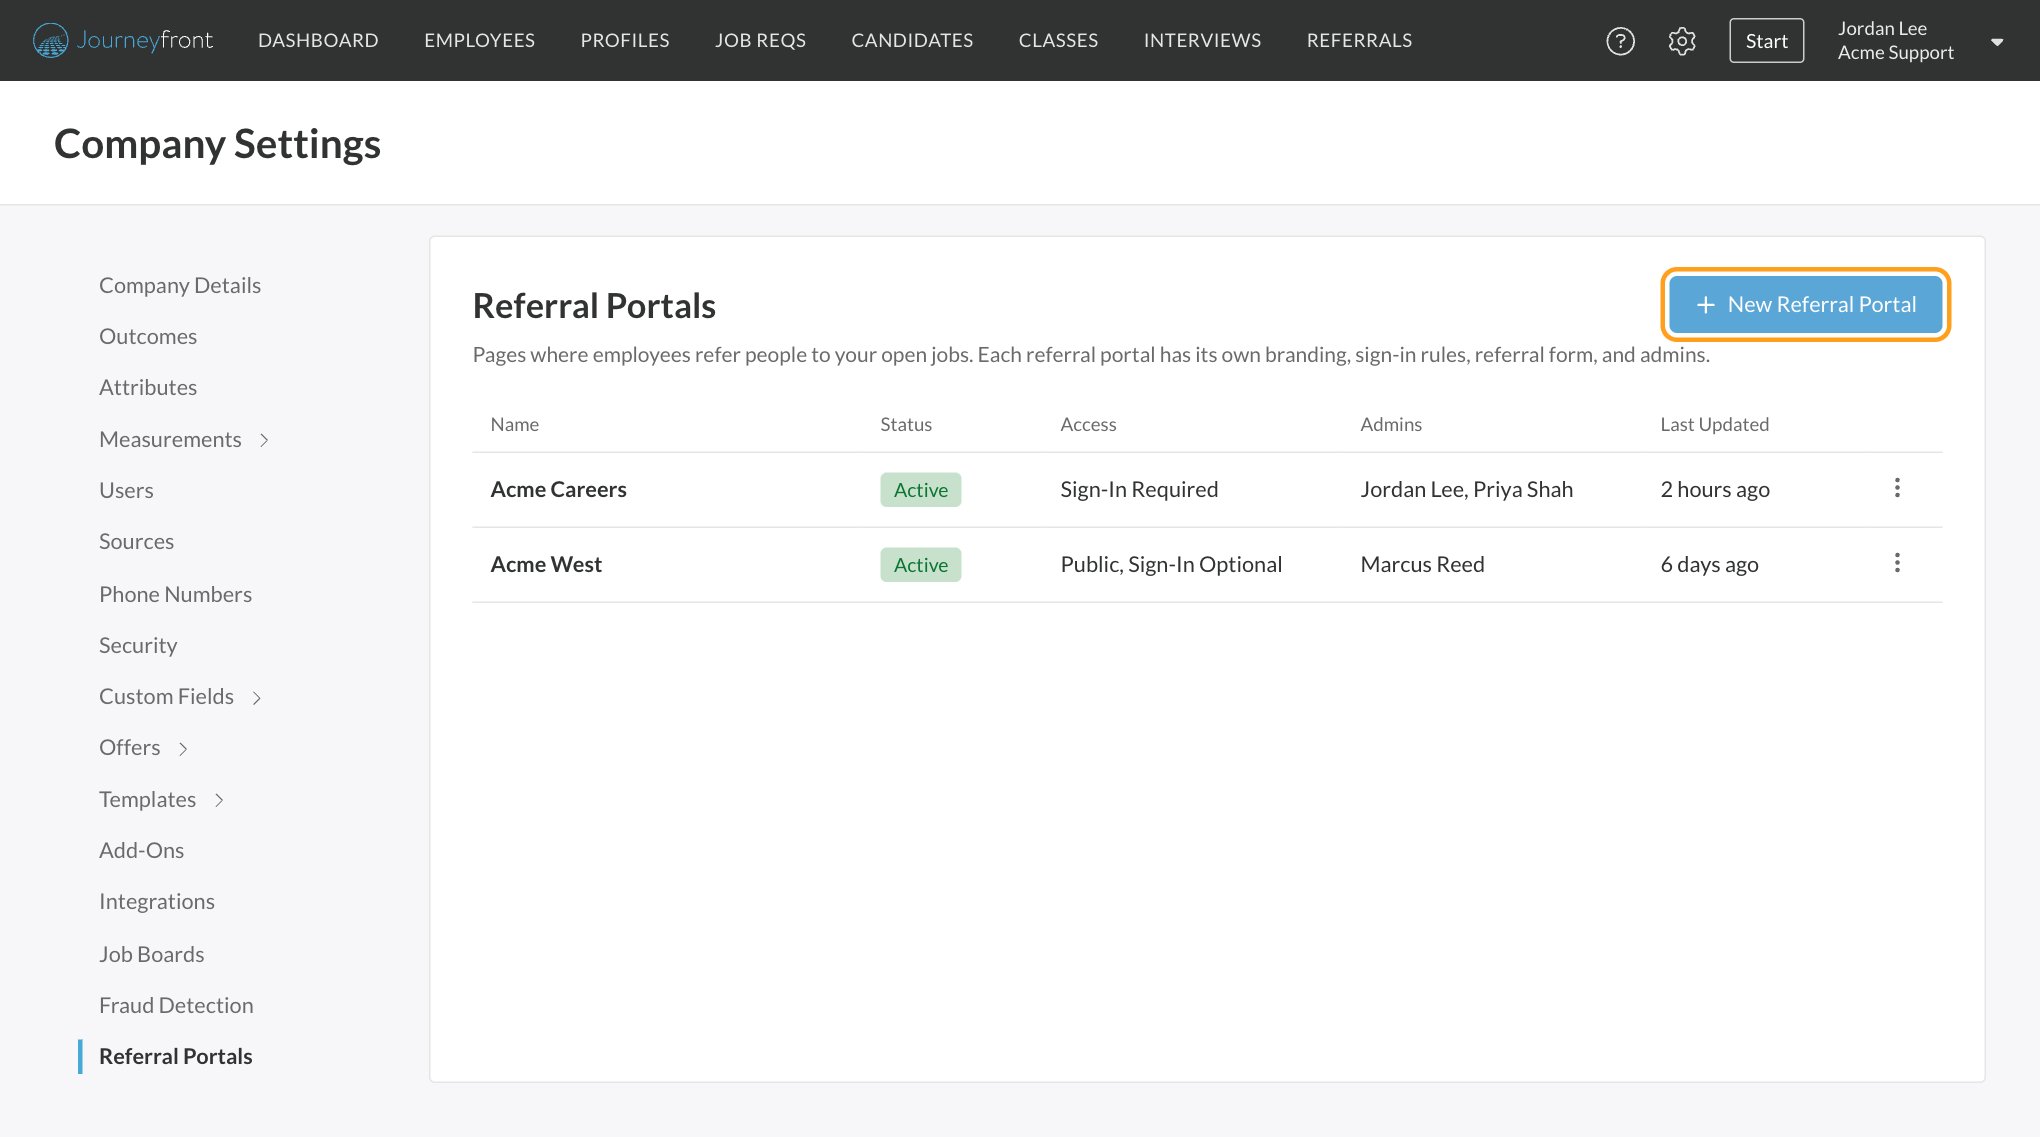
2
Name the portal
Click New Referral Portal, enter a Name and click Create Referral Portal. The portal opens in its editor.
3
Work through the sections
The editor lists its sections on the left: General, Branding, Employee Access, Referral Form, Notifications and Featured. Make your changes and click Save at the top. Save and Cancel appear as soon as something changes, and Cancel puts back the last saved version.
General
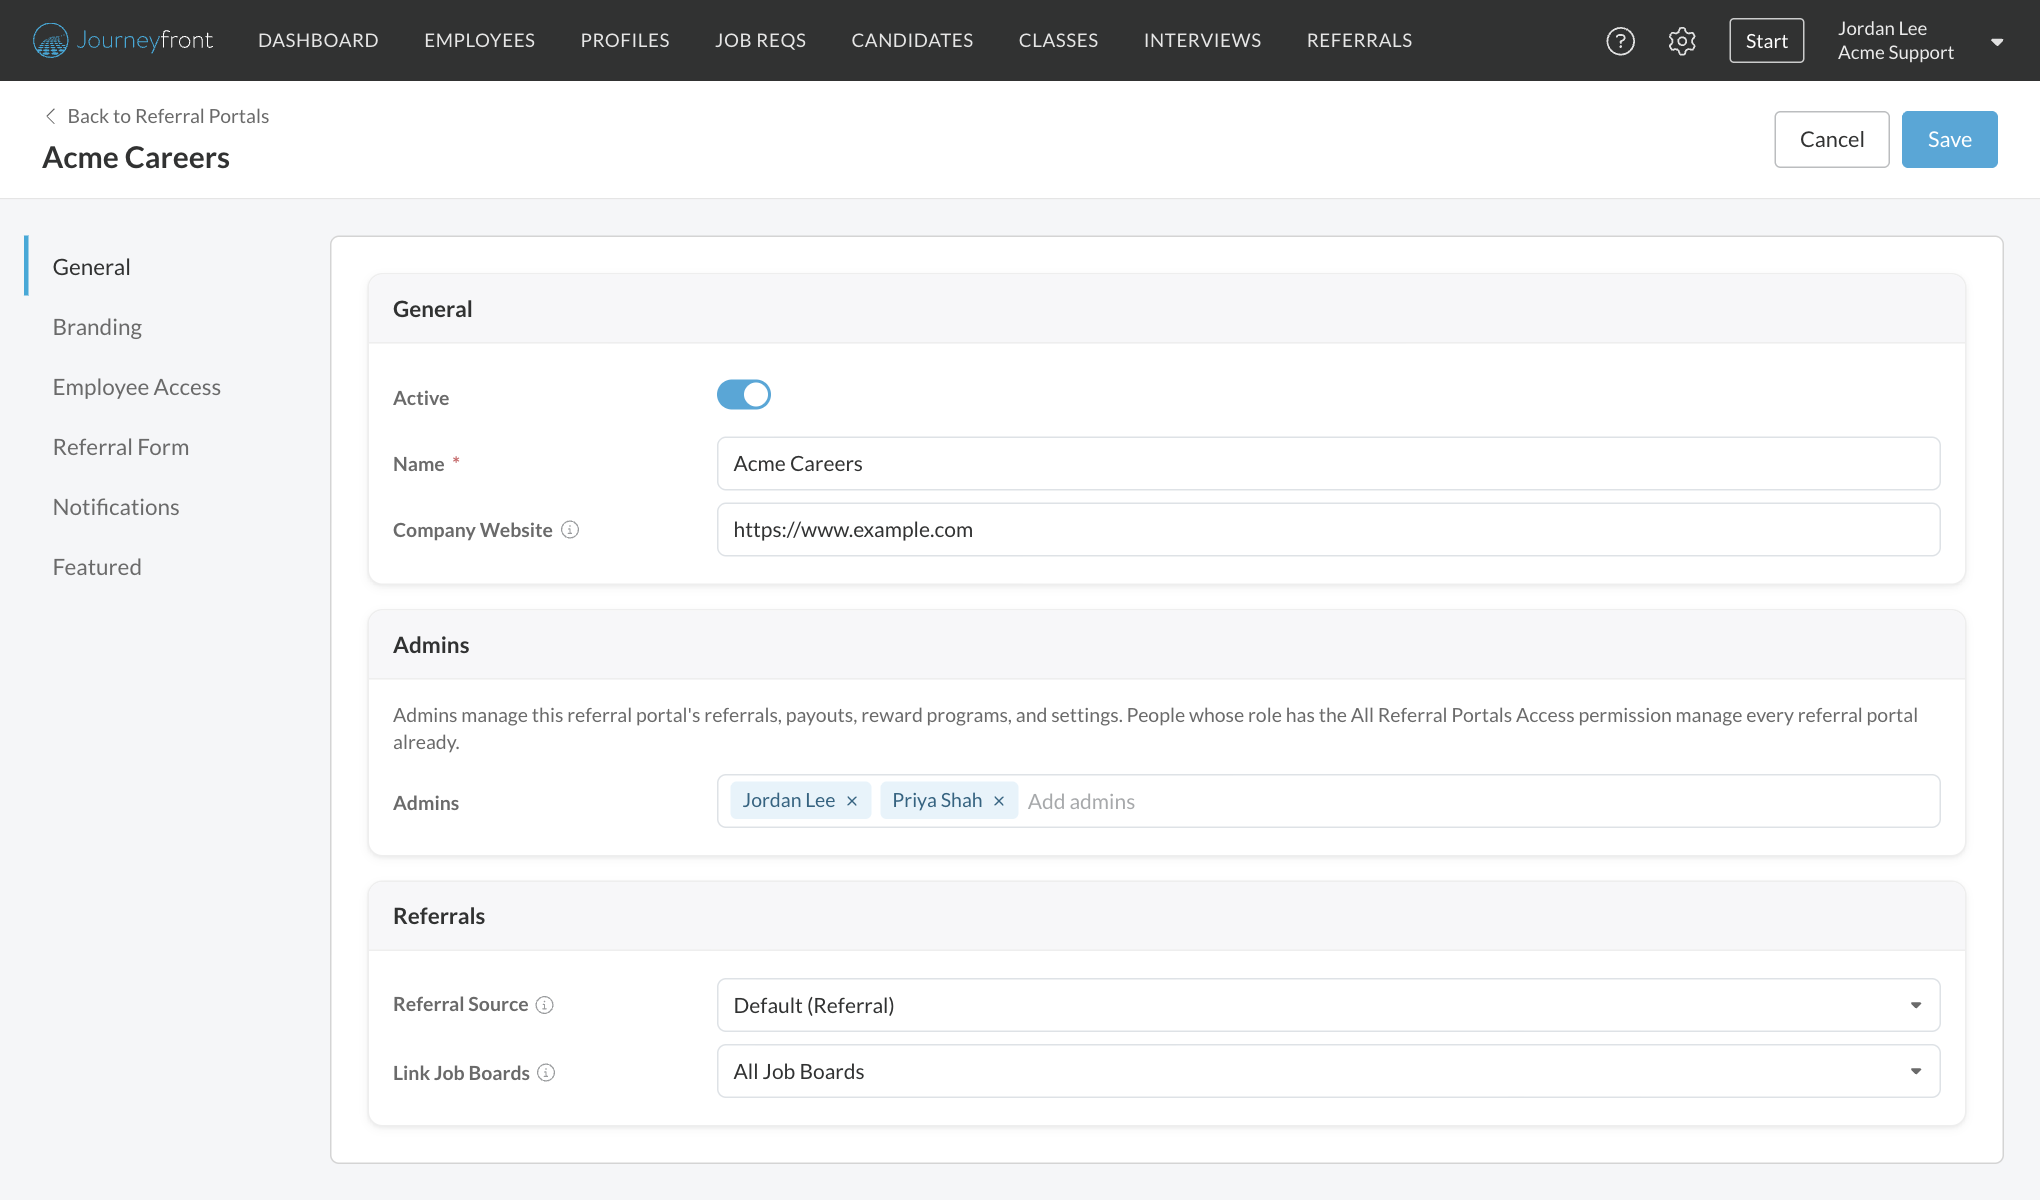
People whose role has All Referral Portals Access already manage every portal, so you only need to list admins who are limited to certain portals. See Permissions and portal admins.
The jobs a portal shows are your active job reqs that are set to show on all portals or on this one. You choose that on each job req. See Rewards on job reqs.
Share the portal
The Sharing card at the bottom of General gives you three ways to send people to the portal.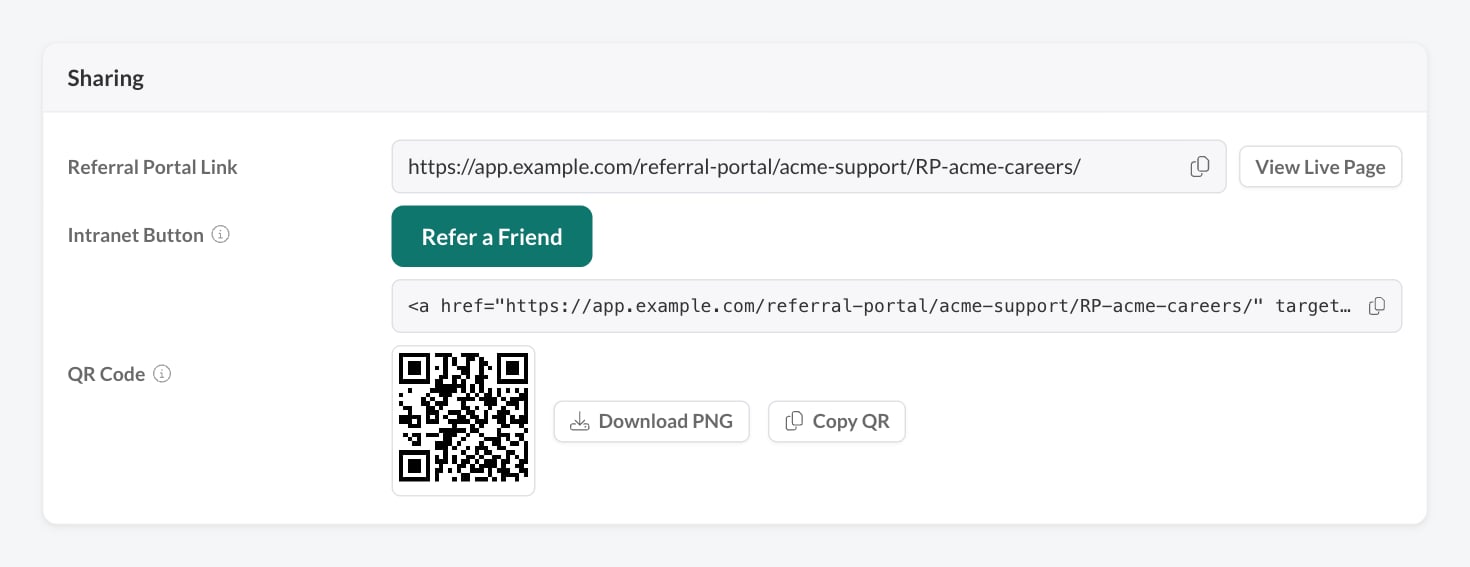
The live page always shows the last saved version. While you have unsaved changes, View Live Page reminds you of that.
Branding
Branding is a few simple choices. The portal’s layout, fonts and spacing are already designed for you.
Click Upload Logo or Upload Icon to add an image, Replace Logo or Replace Icon to change it, or the trash icon to remove it. The brand color is also used on the Refer a Friend intranet button and in the portal’s emails.
Referral Form
These settings shape the form employees fill in when they refer someone.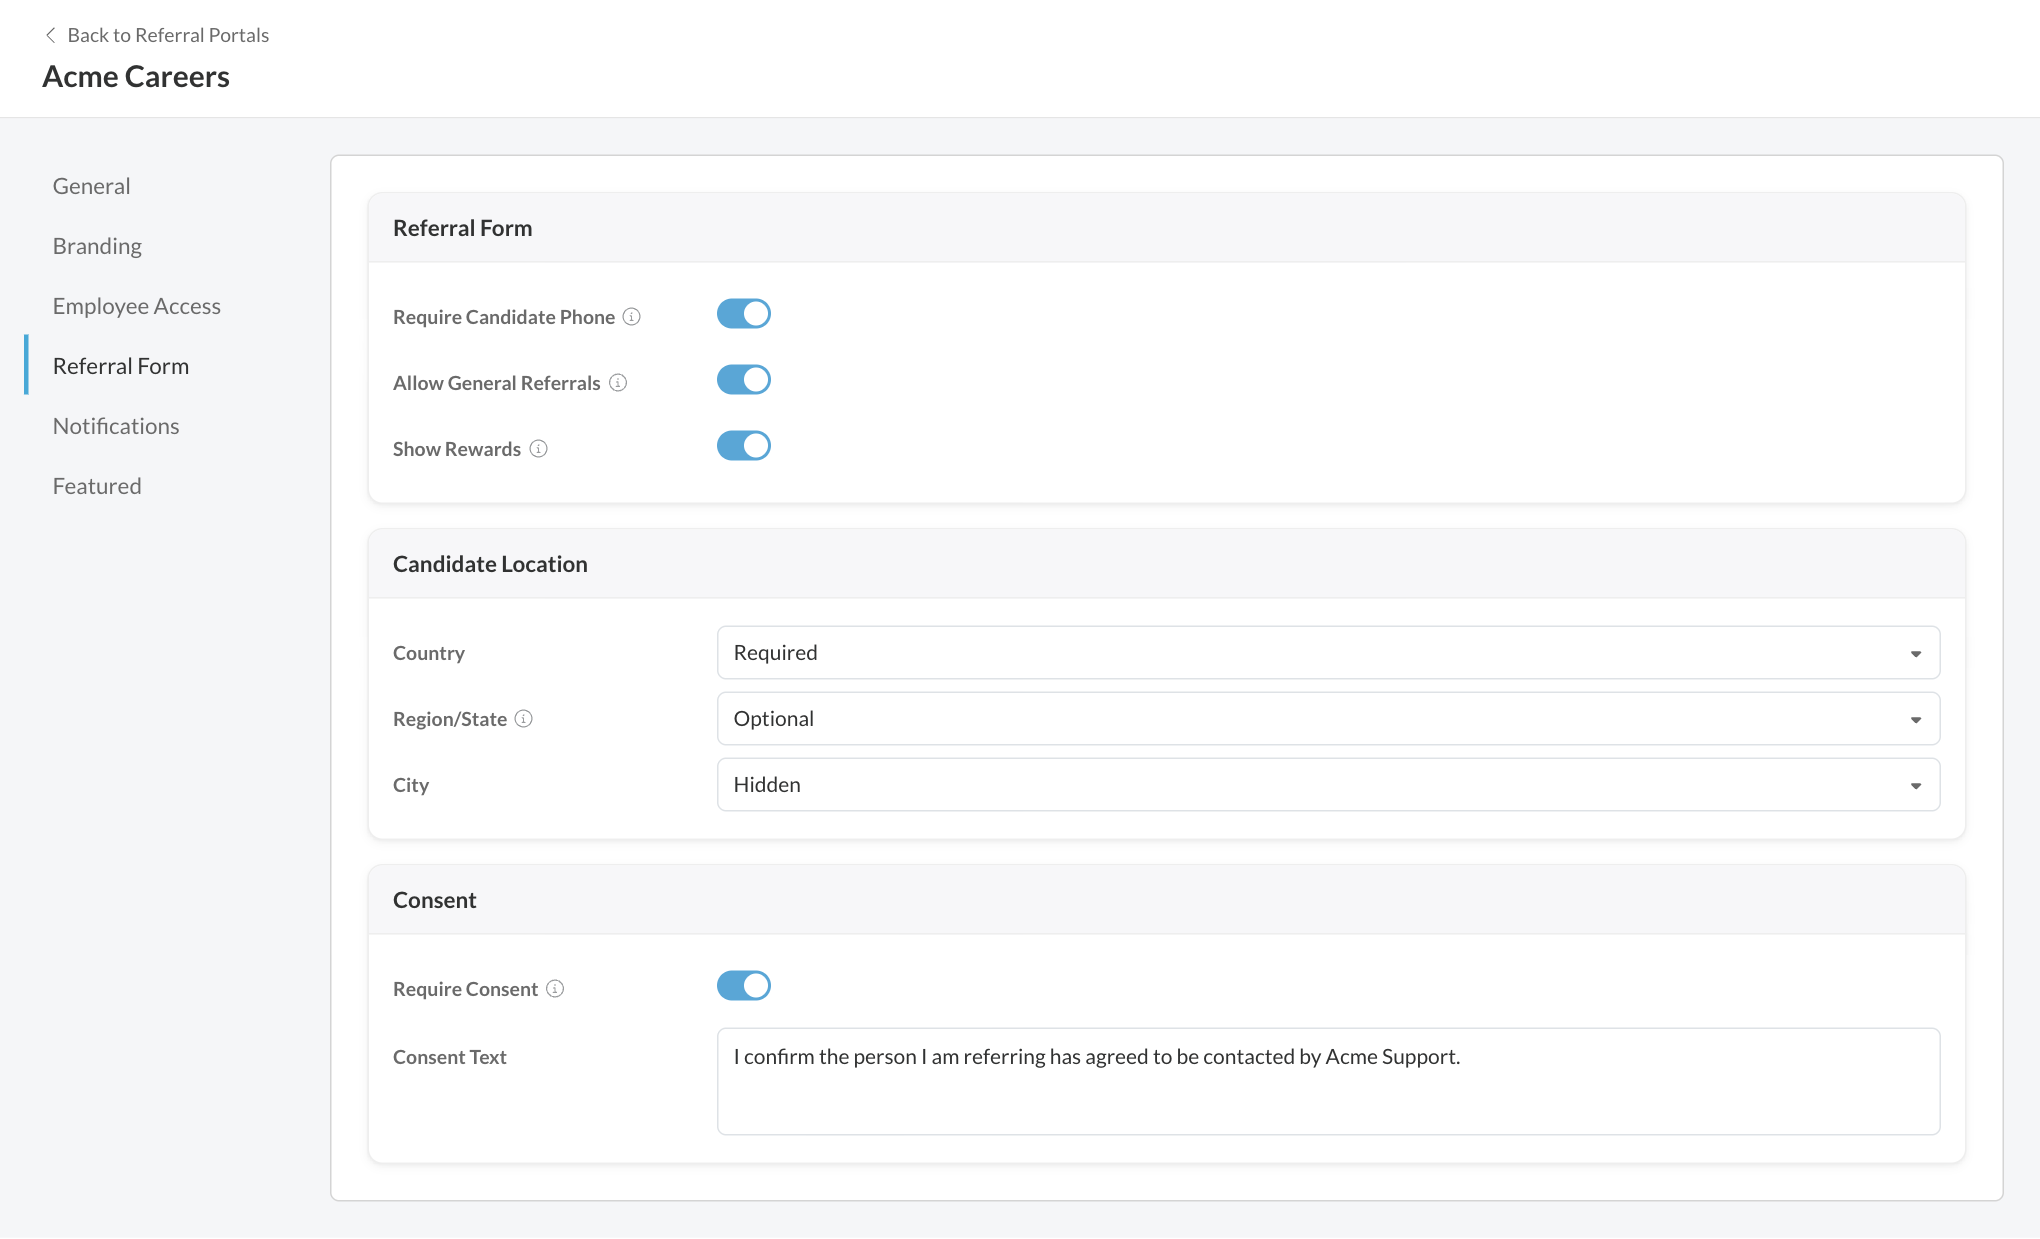
Run several portals
Create one portal per site, region or workforce when each needs its own look, sign-in rules or admins. For example, “Acme Careers” can require sign-in for your US staff while “Acme West” stays public. Each portal shows the job reqs set to show on it, and each reward program can belong to all portals or to specific ones (see Reward programs). Portal admins only see the referrals, payouts and settings of their own portals.Delete a portal
Open the menu on the portal’s row and click Delete Referral Portal, then Delete. This can’t be undone. The portal’s link stops working.FAQ
Can I embed the portal in our intranet?
Can I embed the portal in our intranet?
Use the Intranet Button on the Sharing card. Paste its code into your intranet page and it opens the portal in a new tab.
Why doesn't a job show on the portal?
Why doesn't a job show on the portal?
A portal only shows active job reqs that are set to show on all portals or on that portal. Check the job req’s referral settings. See Rewards on job reqs.
Why is Save grayed out?
Why is Save grayed out?
Something needs fixing first. Hover over Save to see what, for example a missing name on the General section.
Who can I make a portal admin?
Who can I make a portal admin?
Anyone in your account whose security role can view Referrals. Admins without All Referral Portals Access work only with the portals they’re listed on.
I created a portal but I'm not on the Admins list. Will I lose access?
I created a portal but I'm not on the Admins list. Will I lose access?
No. If your role is limited to certain portals, Journeyfront adds you as an admin of any portal you create.
Do my Featured changes need Save?
Do my Featured changes need Save?
No. Featured items save as soon as you make each change. Everything else in the editor saves with Save.
Related
Employee sign-in and access
Who can sign in, what they see and what happens when someone leaves.
Featured items and email notifications
Promote jobs and news, and choose which emails employees get.
Permissions and portal admins
The referral permissions and how portal admins work.
Using the referral portal
What your employees see and do on the portal.