

Who can do this: Users with the Manage Job Req Settings permission, on job reqs they can access. Setting up the job boards themselves needs Company Settings Access; see Job boards.
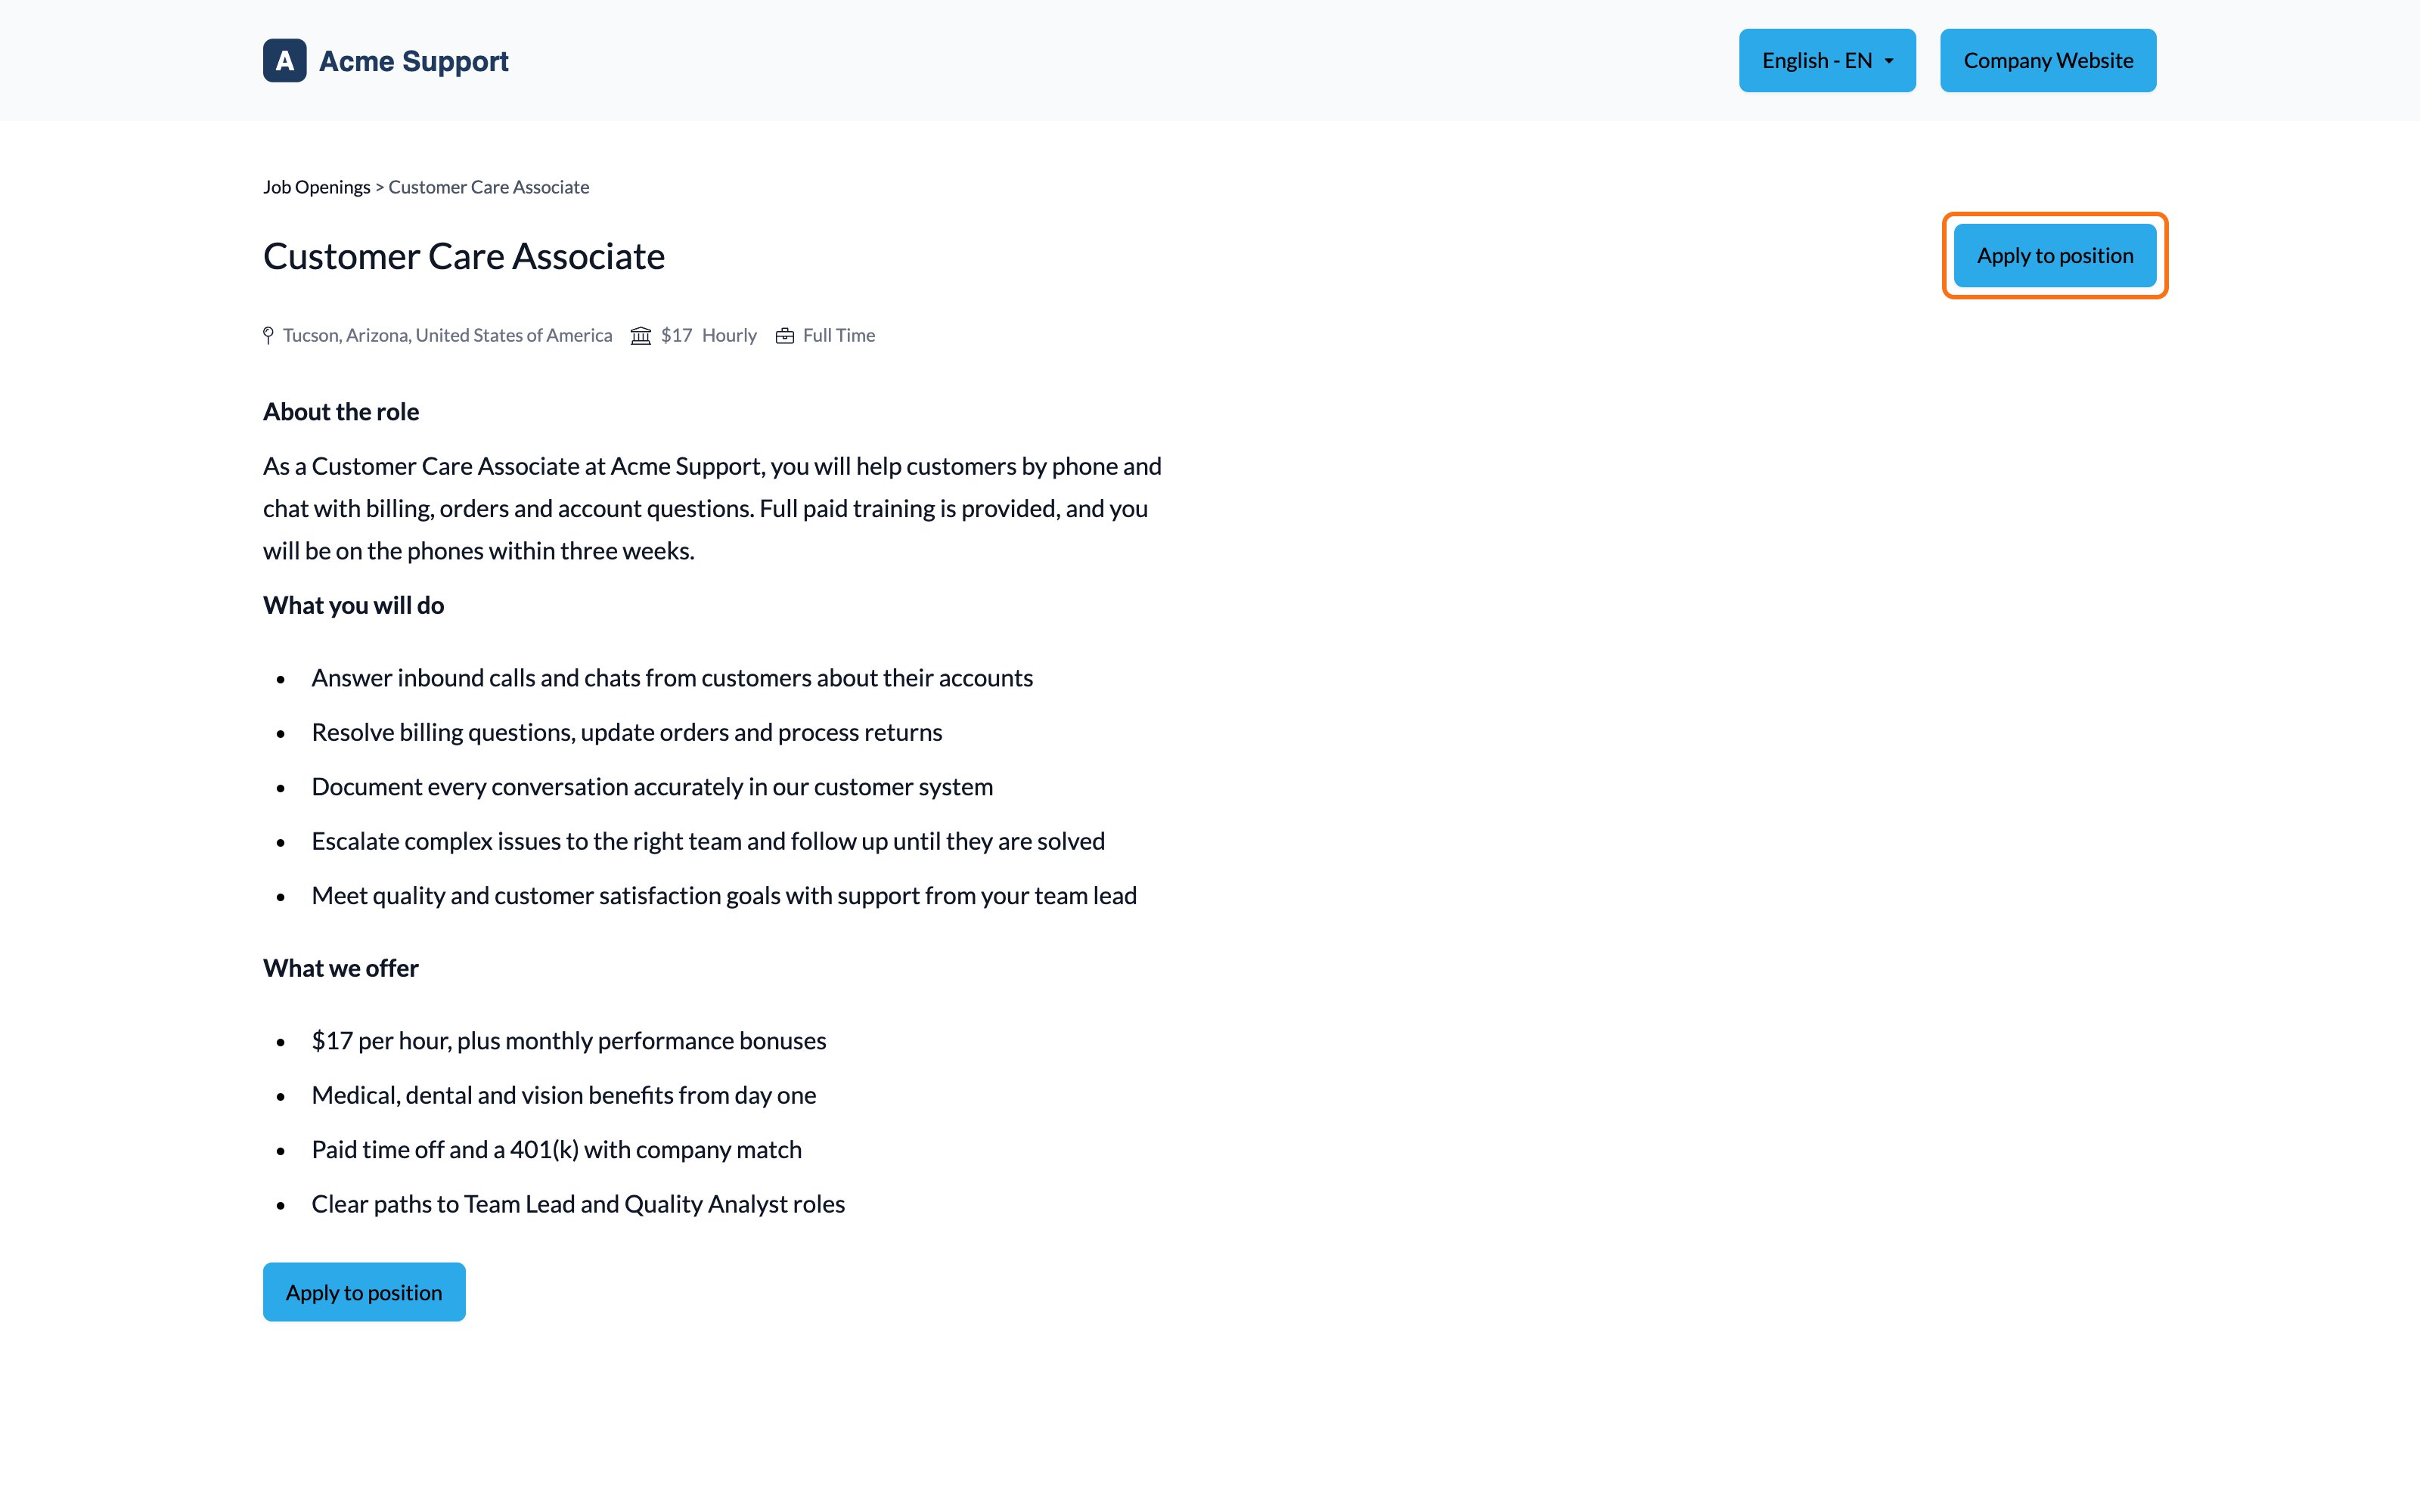
What candidates see after they click Apply
The sign-in page, then the job req’s application, the same as from an invitation link.
Before you start
You need at least one job board, set up under Settings, then Job Boards. See Job boards.Create a job posting
1
Open Job Postings
Open the job req and go to Setup, then Job Postings. Click New Job Posting.
2
Name it and pick a job board
Enter a Job Post Name. Only your team sees it, so make it easy to tell postings apart, like “Customer Service Rep, Dallas, Indeed”. Choose the job board under Link to Job Board.
3
Choose who can see it
Set Make job posting page active and Post job to job board (see the table below).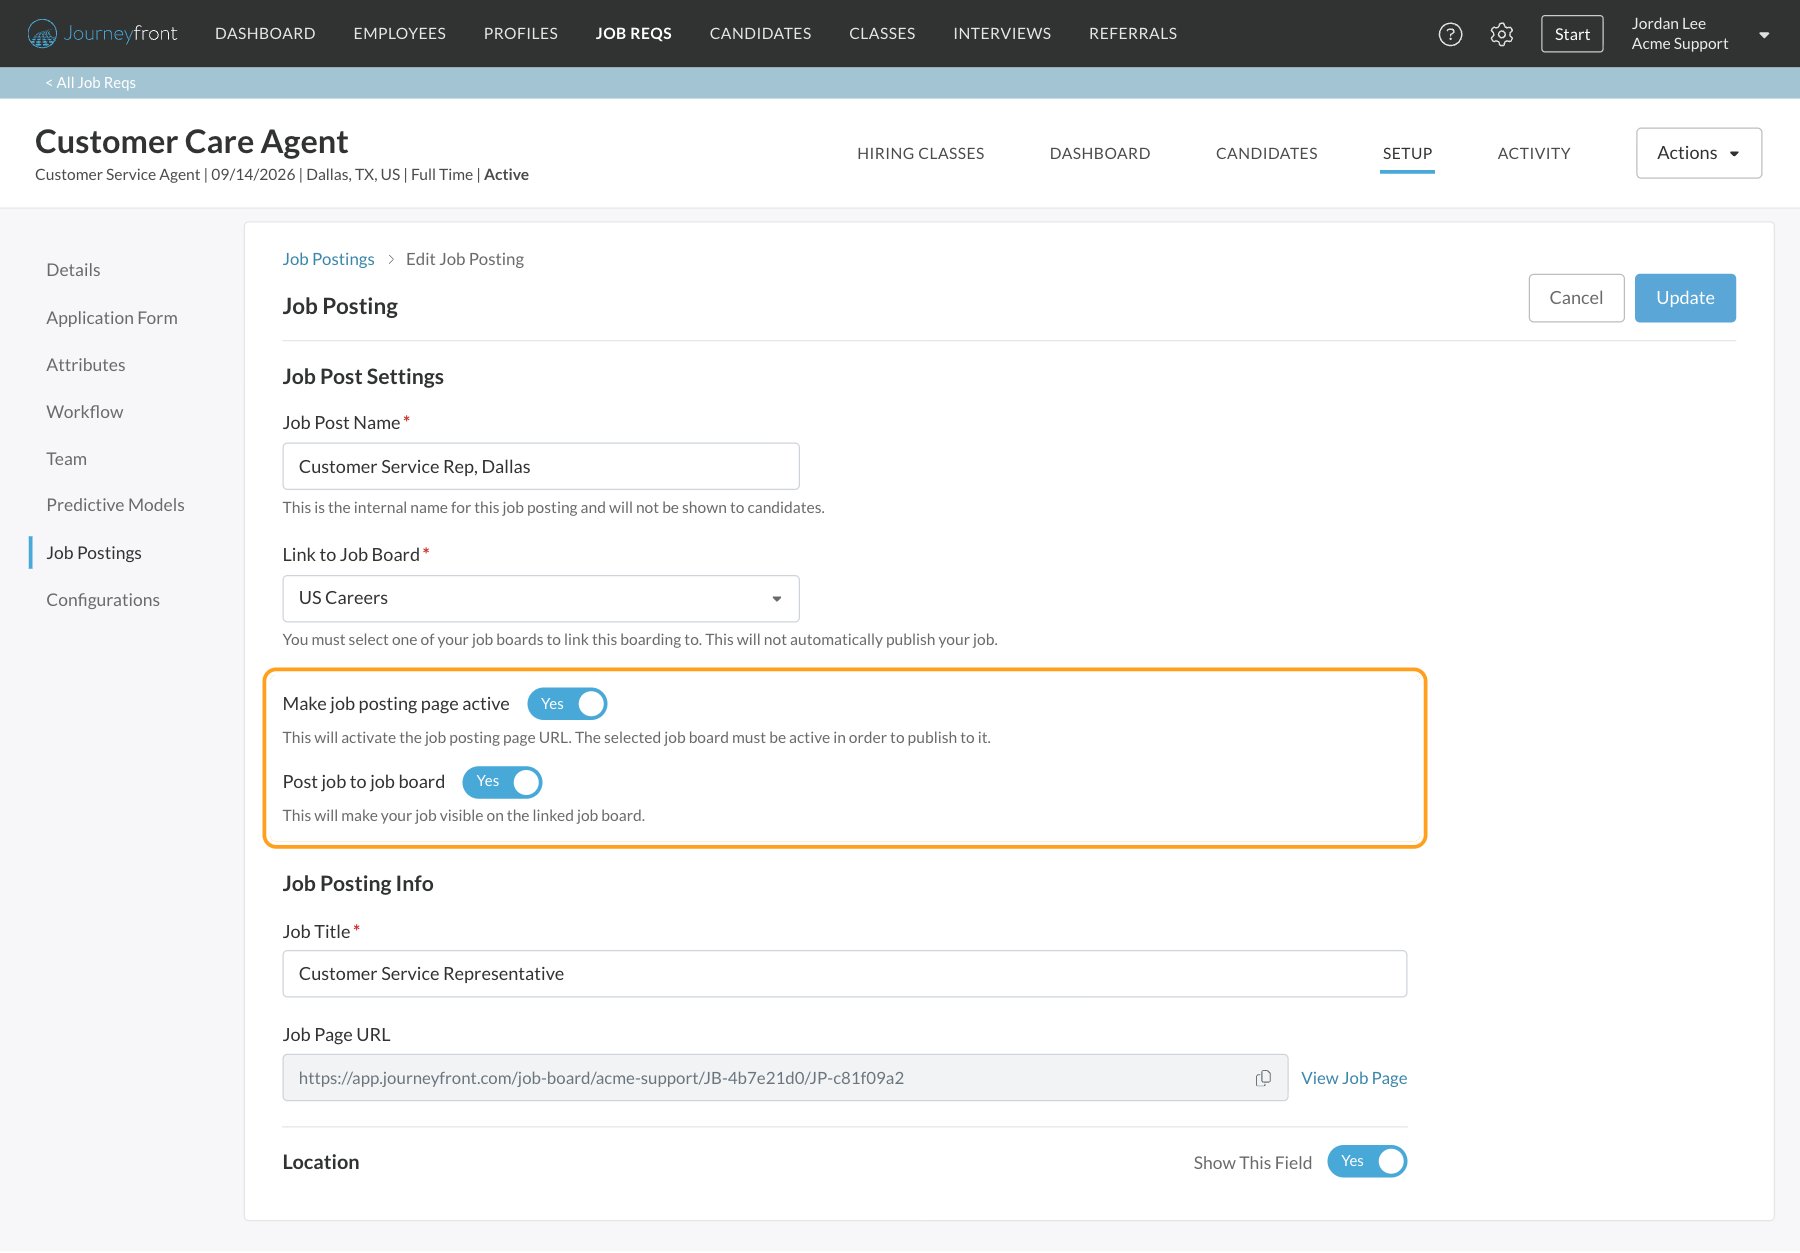
4
Fill in the job details
Enter the Job Title candidates will see. It can be different from the job req’s name. Then fill in the location, remote option, pay, employment type and posted date (see Job details).
5
Write the description
Write the job description under Job Page Body. A posting can’t be saved without one.
6
Save
Click Save. You go back to the list of postings. To make changes later, open the posting and click Update.
Who can see a posting
Two switches decide whether candidates can reach a posting.
The job board itself must be turned on for candidates to see any of its postings.
Job details
Each section except the body has a Show This Field switch. When it’s set to No, Journeyfront keeps the value but doesn’t show it on the posting. All of them start at No, so turn on the ones you want candidates to see.
Pay is still shared in your job board’s feed when Show This Field is off. See Share a job feed.
Write the description with AI
The Job Page Body editor has an AI menu (the sparkles button). Use AI Generate to draft text, or select text first to Shorten it, Lengthen it, fix spelling and grammar, or give your own instruction with Write Prompt. Always read the result before you save.The job page URL
Once the posting is saved, Job Page URL shows its public address. Click the copy icon to copy it, or View Job Page to open it. The address is created once and doesn’t change when you edit the title.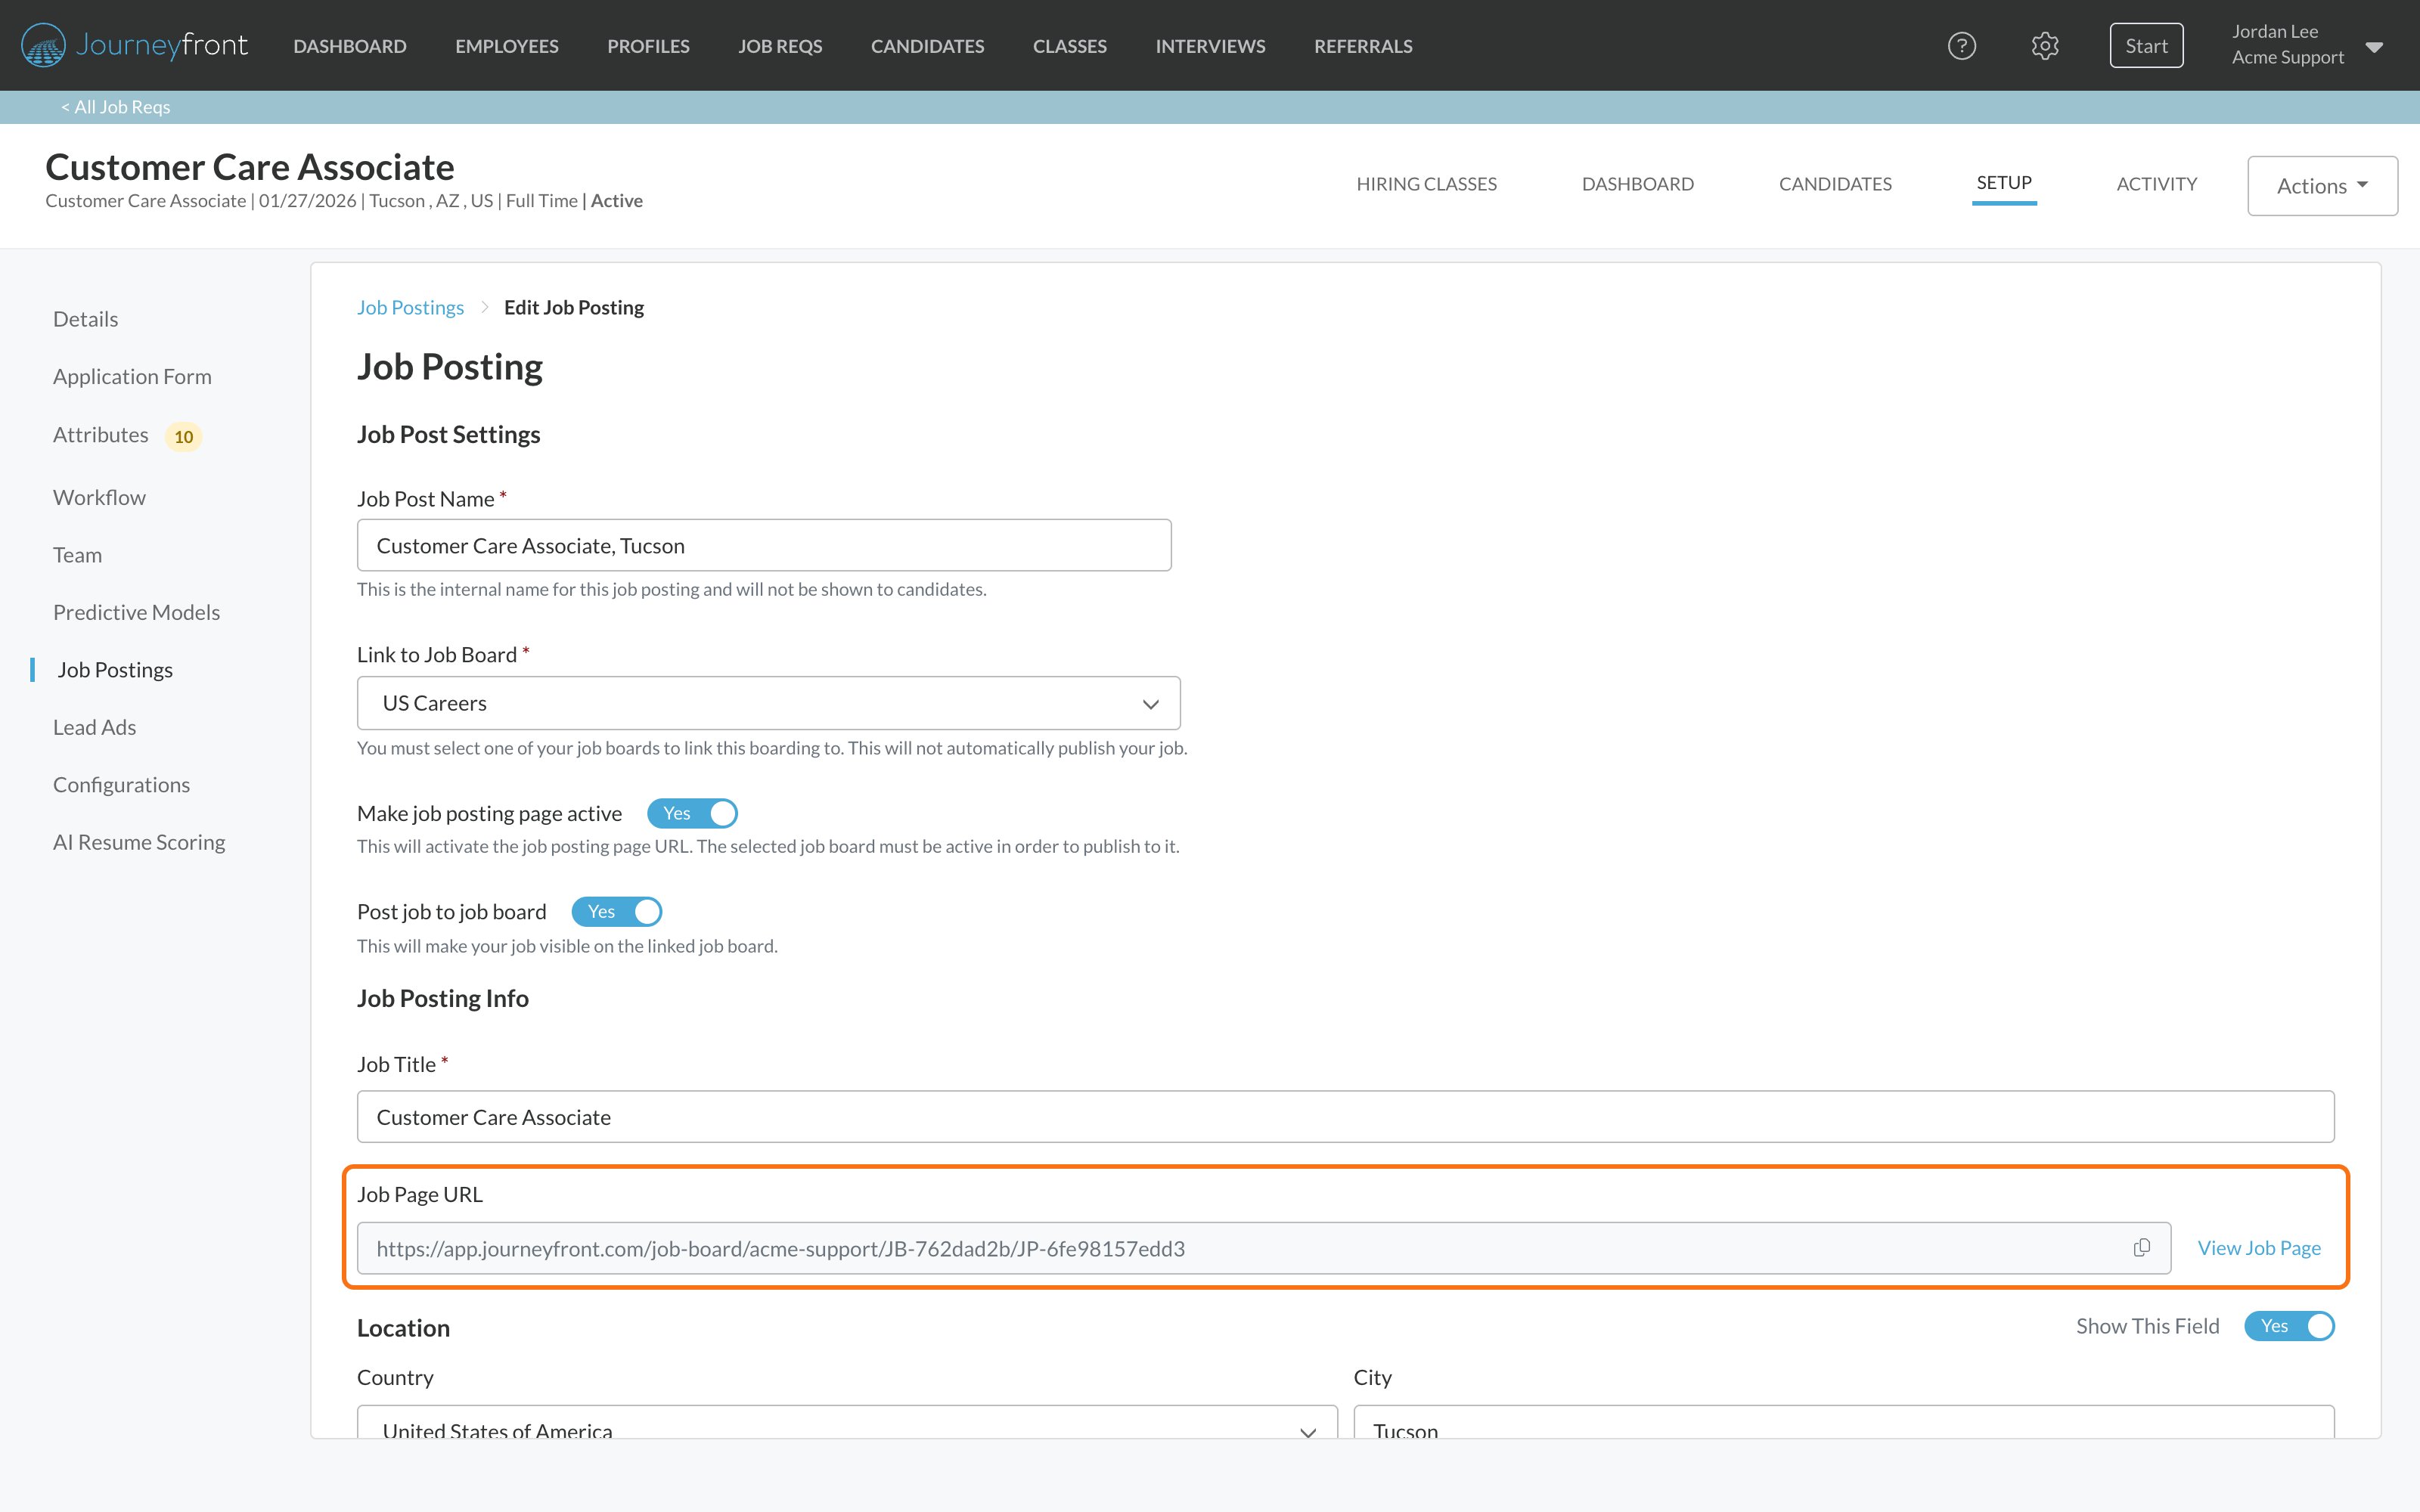
Manage your postings
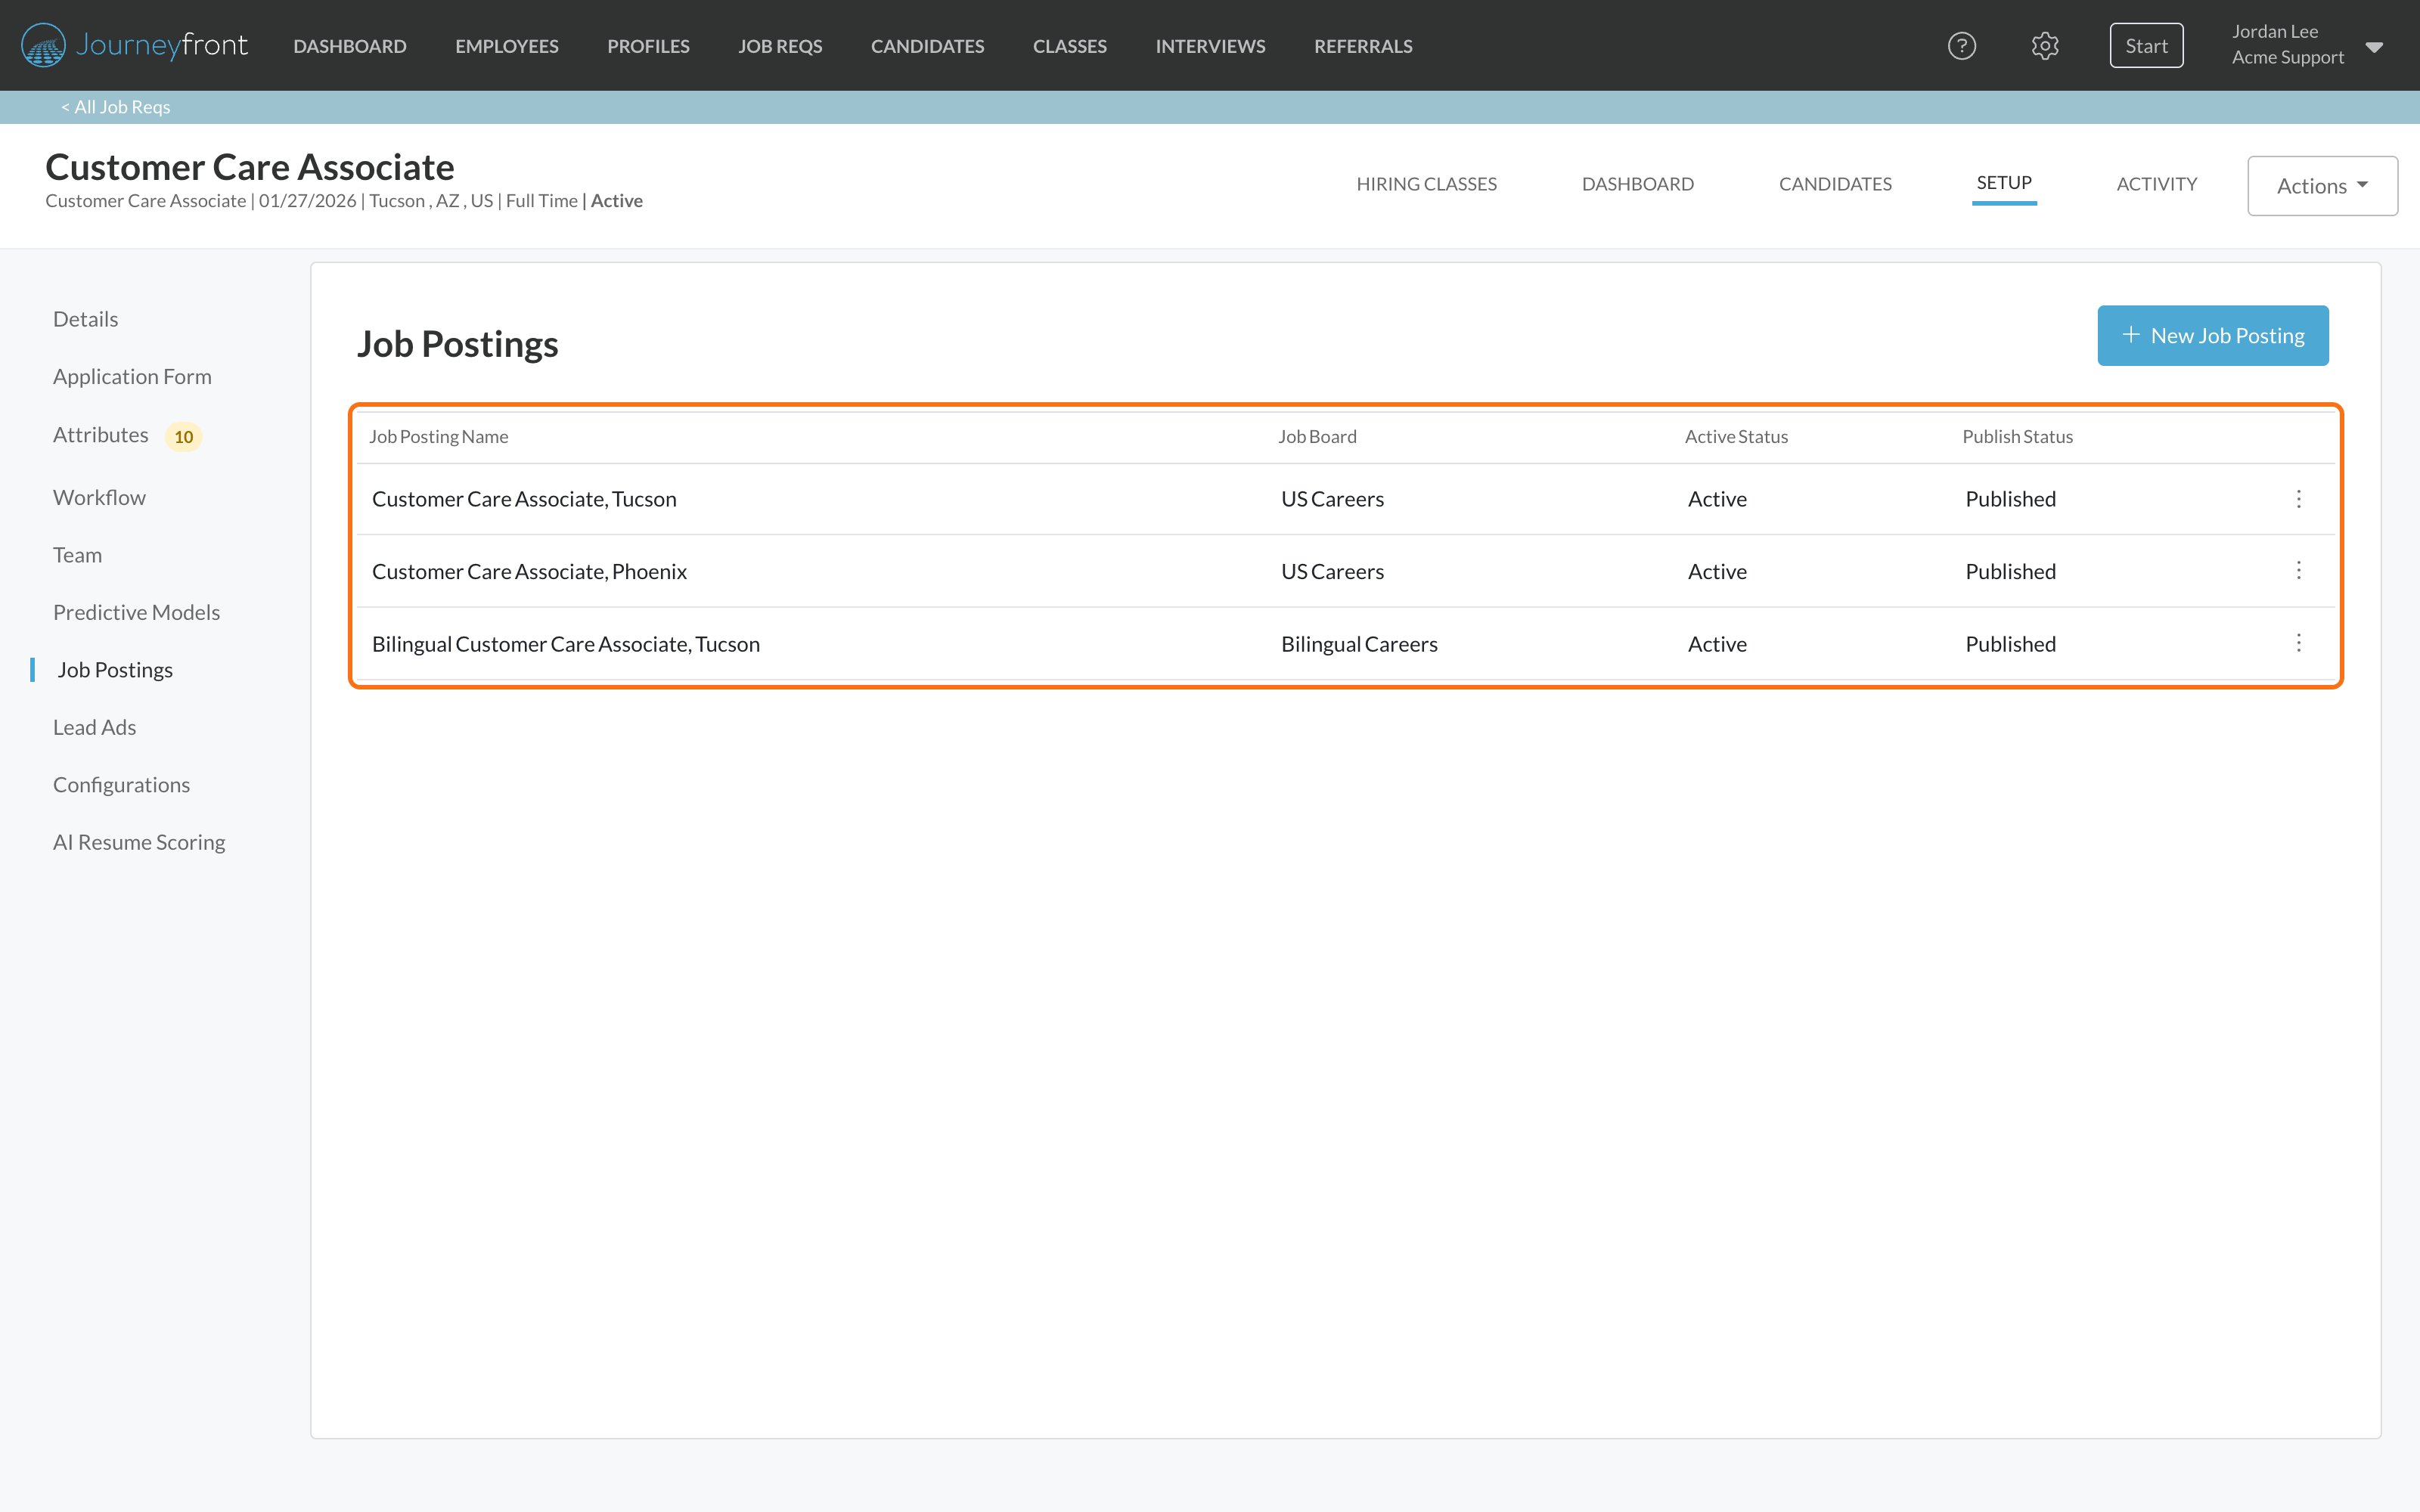
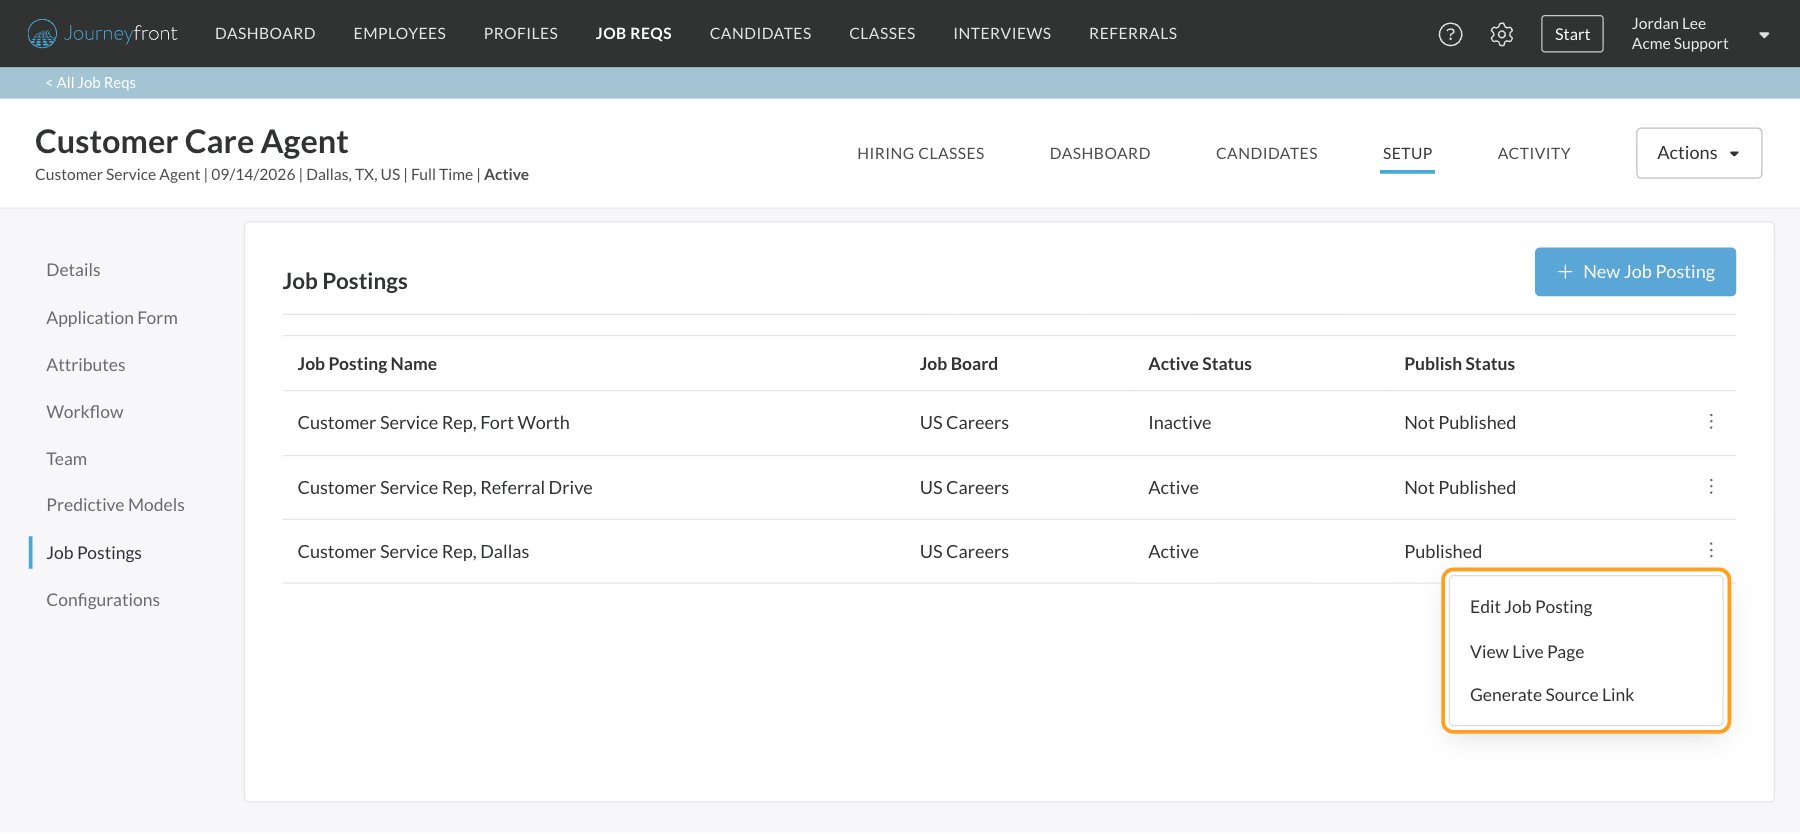
Setup, then Job Postings lists every posting on the job req with its Job Board, Active Status (Active or Inactive) and Publish Status (Published or Not Published). Click the ⋮ menu on a posting to:- Edit Job Posting
- View Live Page
- Generate Source Link: a link that records where applicants came from. See Magic links.
When the job req’s status changes
Deactivating, closing or archiving a job req turns off all of its postings and takes them down from job boards. Reactivating the job req doesn’t turn them back on: open each posting and turn on Make job posting page active and Post job to job board again. See Job req statuses. Duplicating a job req doesn’t copy its postings. Create new ones on the copy.What candidates see
A posting shows the job title, the sections you’ve chosen to show, the description and an Apply to position button. Clicking it starts the job req’s application. If your job board has more than one language turned on, the posting uses the language the candidate chose on the board. After someone applies, their Candidate Application shows the Job Board and Job Post they came through on its Details tab.FAQ
What's the difference between a job req and a job posting?
What's the difference between a job req and a job posting?
The job req runs your hiring process: its workflow, team and candidates. The posting is the public ad for it. Every applicant from any of a job req’s postings goes into the same job req.
Why isn't my job showing on the job board?
Why isn't my job showing on the job board?
Check that Make job posting page active and Post job to job board are both Yes, that the posting is linked to the right board, and that the job board is turned on. If the job req was deactivated, closed or archived, its postings were turned off; turn them back on after you reactivate it.
Can I change the posted date?
Can I change the posted date?
Yes. Job Posted Date only changes the date candidates see. It doesn’t change when the posting or the job req was created.
Can I tell which posting a candidate applied through?
Can I tell which posting a candidate applied through?
Yes. The Job Post field on the Details tab of their Candidate Application shows it.
Can I delete a posting?
Can I delete a posting?
There’s no delete option. Set Make job posting page active to No to take it down.
Why can't I save my posting?
Why can't I save my posting?
Job Post Name, Link to Job Board, Job Title, Compensation Currency, Employment Type and the Job Page Body are required. When you use a pay range, both the minimum and maximum are required too.
I don't see the Setup tab on my job req.
I don't see the Setup tab on my job req.
The Setup tab needs the Manage Job Req Settings permission. Ask your Journeyfront admin to check your security role.
Related
Job boards (career site)
Set up and brand the job boards your postings appear on.
Magic links
Tag applicants with the channel they came from.
Job board integrations
Send postings to Indeed, JobTarget and Appcast.
Job req statuses
What deactivating, closing and archiving do to your postings.