

Who can do this: Anyone can export the lists they can see. Exports only include the job reqs and candidates you have access to, and values in private fields only for users with Private Data Access.
What you can export
Export candidates
1
Set up the list
On the Candidates page or a job req’s Candidates tab, pick the tab or saved view, search, filters and columns you want in the file. See The Candidates page.
2
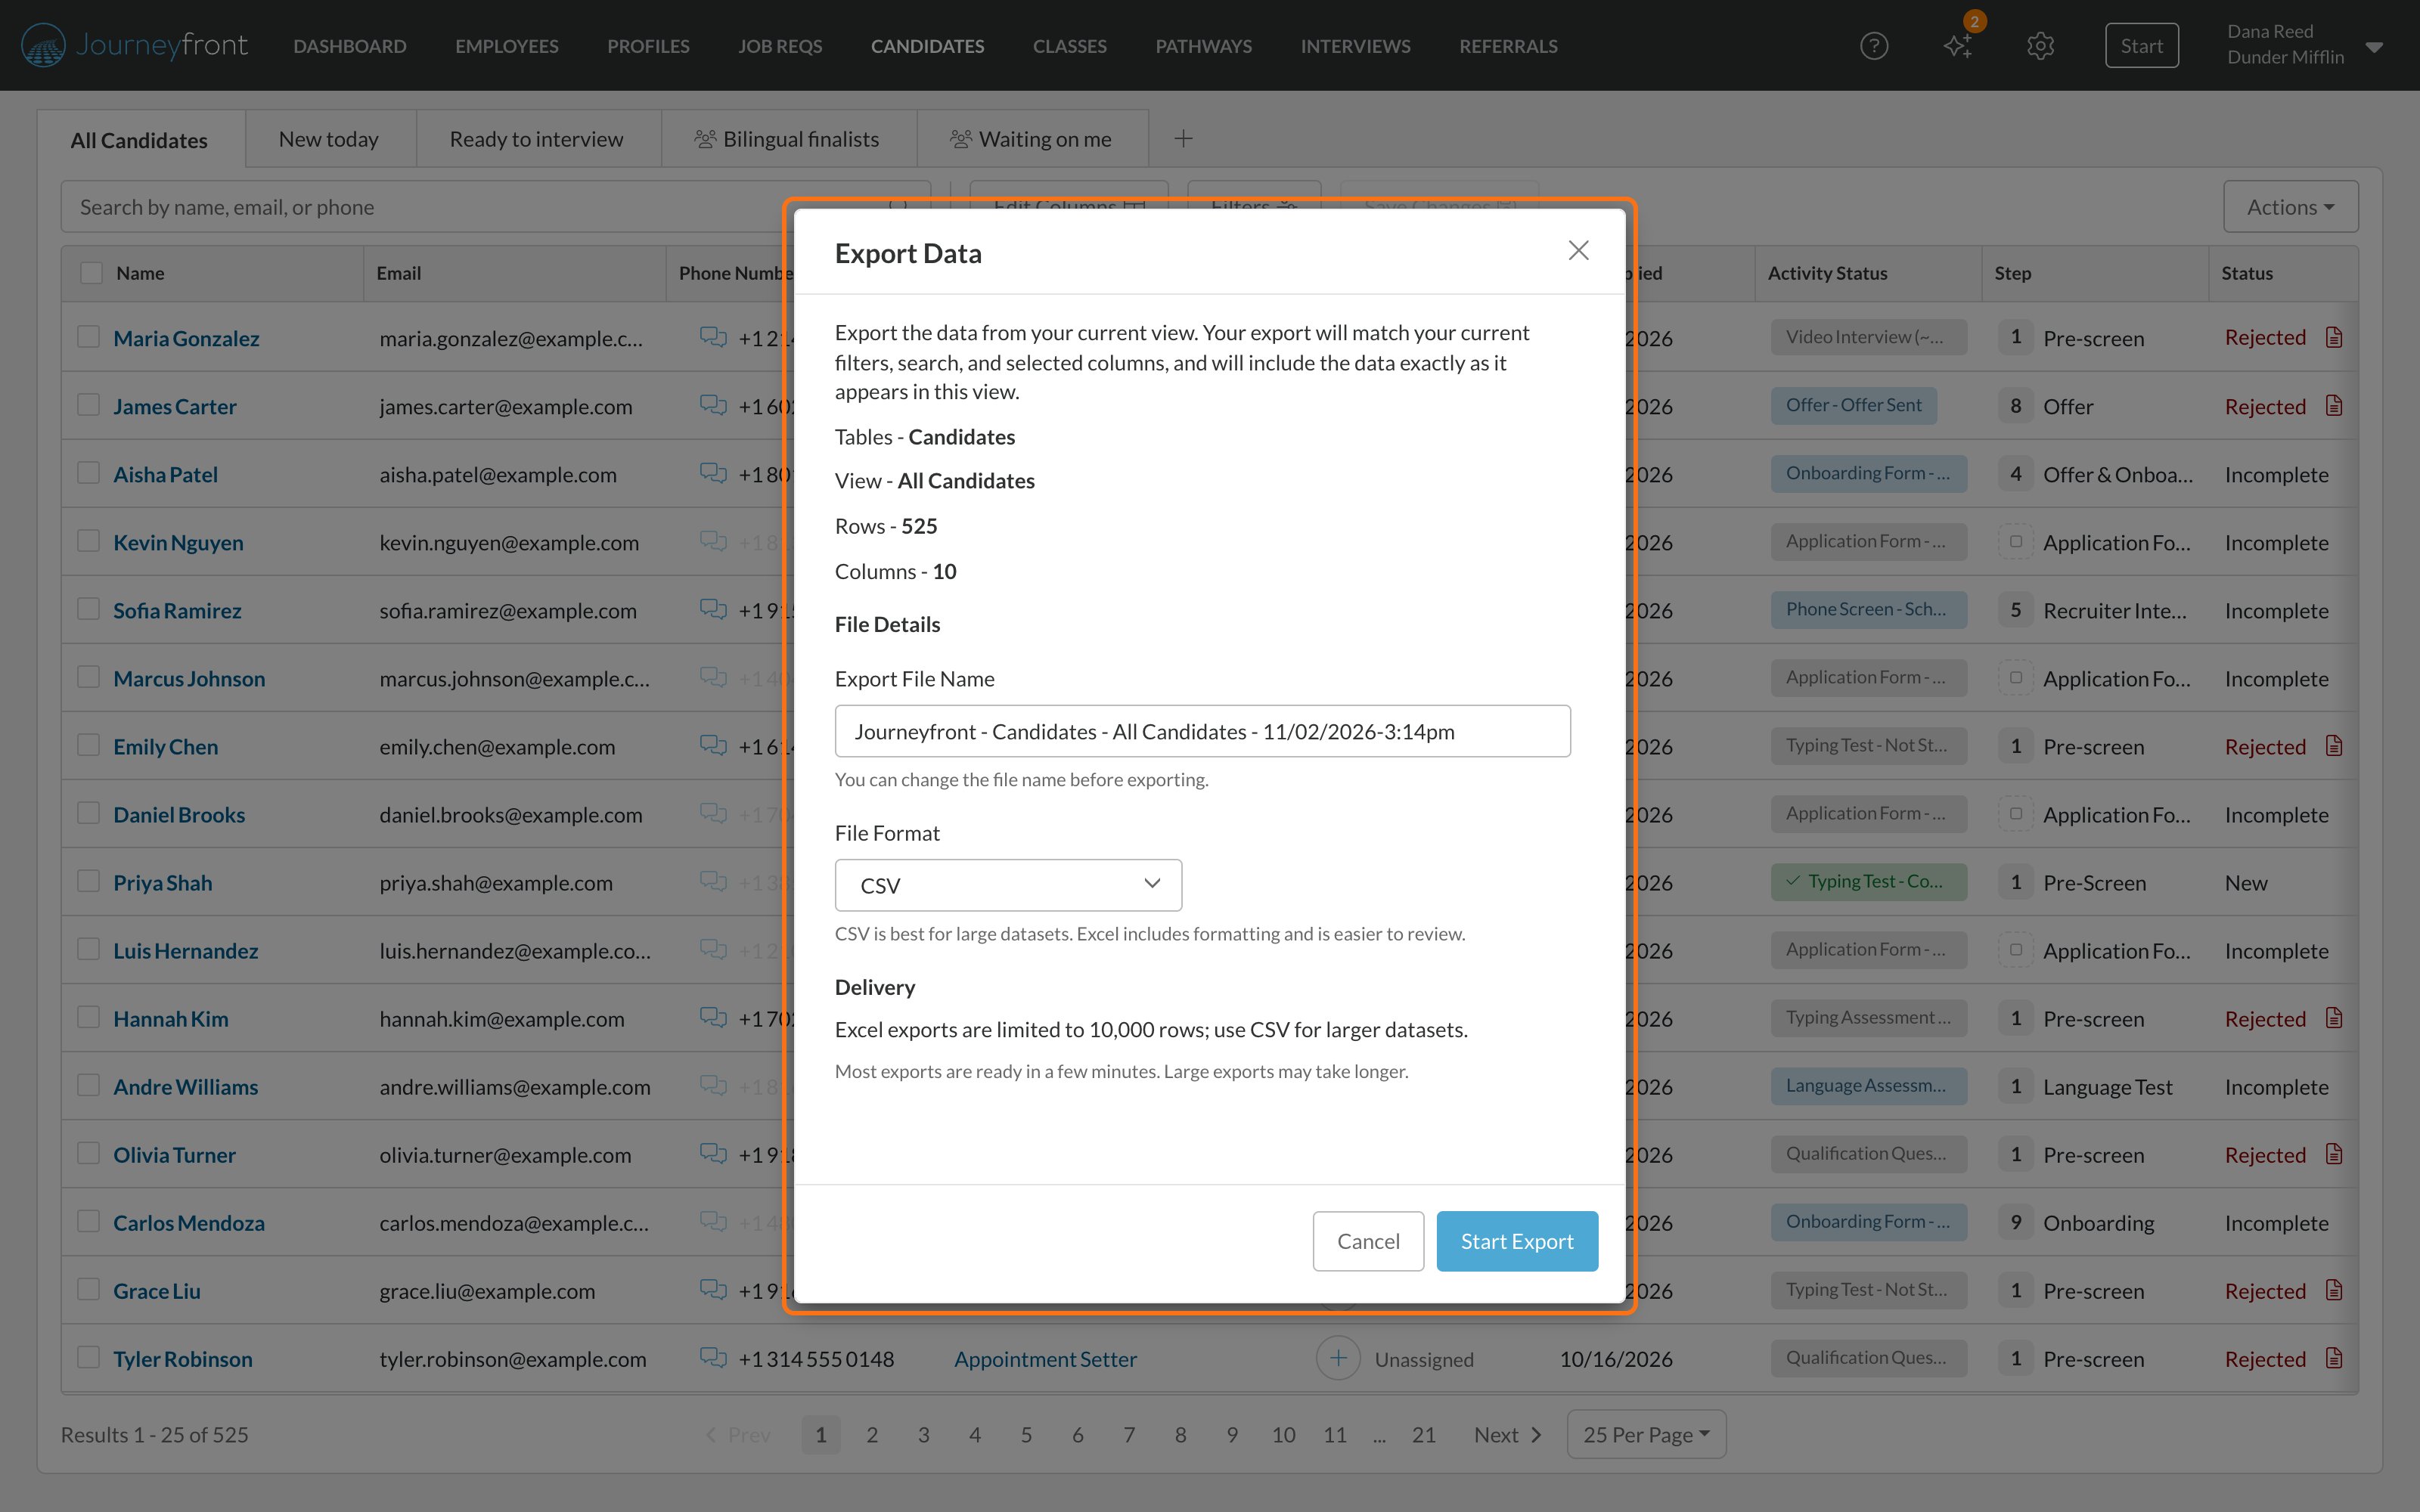
Click Actions, then Export Data
The Export Data window shows the view you’re exporting and how many rows and columns the file will have.
3
Name the file and pick a format
Change the Export File Name if you like, and choose CSV or Excel under File Format.
4
Click Start Export
The file downloads when it’s ready. Click Done to close the window.
What’s in the file
- Application ID is always the first column, then Name, then your columns in the order they appear on screen.
- The Interview and AI Agent columns are actions rather than data, so they aren’t exported.
- Screening question, score, custom field, job req field and hiring class field columns export like any other column. Columns from the job req or hiring class are headed with where they come from, like “Hiring Class: Location”.
- File upload fields export as a link to the file.
- Values in fields marked private are only included if your security role has Private Data Access.
Large exports
Excel files are limited to 10,000 rows. To export more, choose CSV: Journeyfront prepares the file in the background and emails you a download link when it’s ready. The file is compressed (a.csv.gz file; most computers open it with a double-click) and the link expires after two days.
Export job reqs
On the Job Reqs page, set up your view, then click Actions, then Export Data. Change the Export File Name if you like, choose CSV or Excel, and click Start Export. The file has the columns you’ve chosen, including custom job req fields. An export includes up to 10,000 job reqs; if you have more, filter the list first. See The Job Reqs page.Export hiring classes
On the Classes page, or a job req’s Hiring Classes tab, click Actions, then Export Data, then choose the file name and format and click Start Export. The file matches your view, up to 10,000 hiring classes. If your view has more, the window warns you that only the first 10,000 rows will be exported.Export a job req’s candidates
To download every candidate on one job req with a standard set of columns, open the job req and click Actions, then Export Data. A CSV file downloads right away, named after the job req and the date. It has one row per candidate, newest first, with these columns: first and last name, email, gender, date of birth, city, state, application date, status, job req title, overall score, rejection reason and rejection note, percent of the application completed, and assigned user.The columns in this file are fixed. For other columns, like custom fields, screening answers or step, export from the job req’s Candidates tab instead. The gender column is an older profile field, not the candidate’s EEOC answer; EEOC answers aren’t included in any export. See EEOC reporting.
Other exports
- Employees: on the Employees page, click Actions, then Export Data, to download your employees as a CSV file. See Employee records.
- E-consent signatures: see E-consent forms.
- Dashboards: company and job req dashboards don’t have a print or PDF option. See Dashboards overview.
FAQ
Which fields can I export?
Which fields can I export?
Any column you can add with Edit Columns on the Candidates page, except Interview and AI Agent. That includes your personal and application fields, screening question answers, scores, job req fields and hiring class fields. Add the column to your view, then export.
Why is my export missing some candidates?
Why is my export missing some candidates?
The export matches your current tab, search and filters, and only includes job reqs you have access to. Clear your filters, or check that you’re on the right tab, and export again.
Why did my export come by email?
Why did my export come by email?
Candidate exports over 10,000 rows are prepared in the background as a compressed CSV file, and you get an email with a download link. The link expires after two days.
Why can't I export to Excel?
Why can't I export to Excel?
Excel exports are limited to 10,000 rows. Filter your view to fewer rows, or choose CSV.
Why are some columns blank in my file?
Why are some columns blank in my file?
Values in private fields are only exported for users with Private Data Access. Otherwise, a blank cell usually means the candidate has no value for that field.
Can I schedule a recurring export?
Can I schedule a recurring export?
Not from these pages. Save a view for the report you need and export it when you need it. To send data to another system automatically, see Integrations overview.
Related
Saved views
Save and share the view you want to export.
The Candidates page
Build the view you want to export.
The Job Reqs page
Filter and export your job reqs.
Dashboards overview
Charts and trends without leaving Journeyfront.