

Who can do this: Creating typing tests in Settings needs Company Settings Access. Adding a typing test to a job req needs the Manage Job Req Settings permission. Anyone who can open a Candidate Application can see the results.
Create a typing test
Your typing tests live in your company settings, ready to add to any job req.1
Open your typing tests
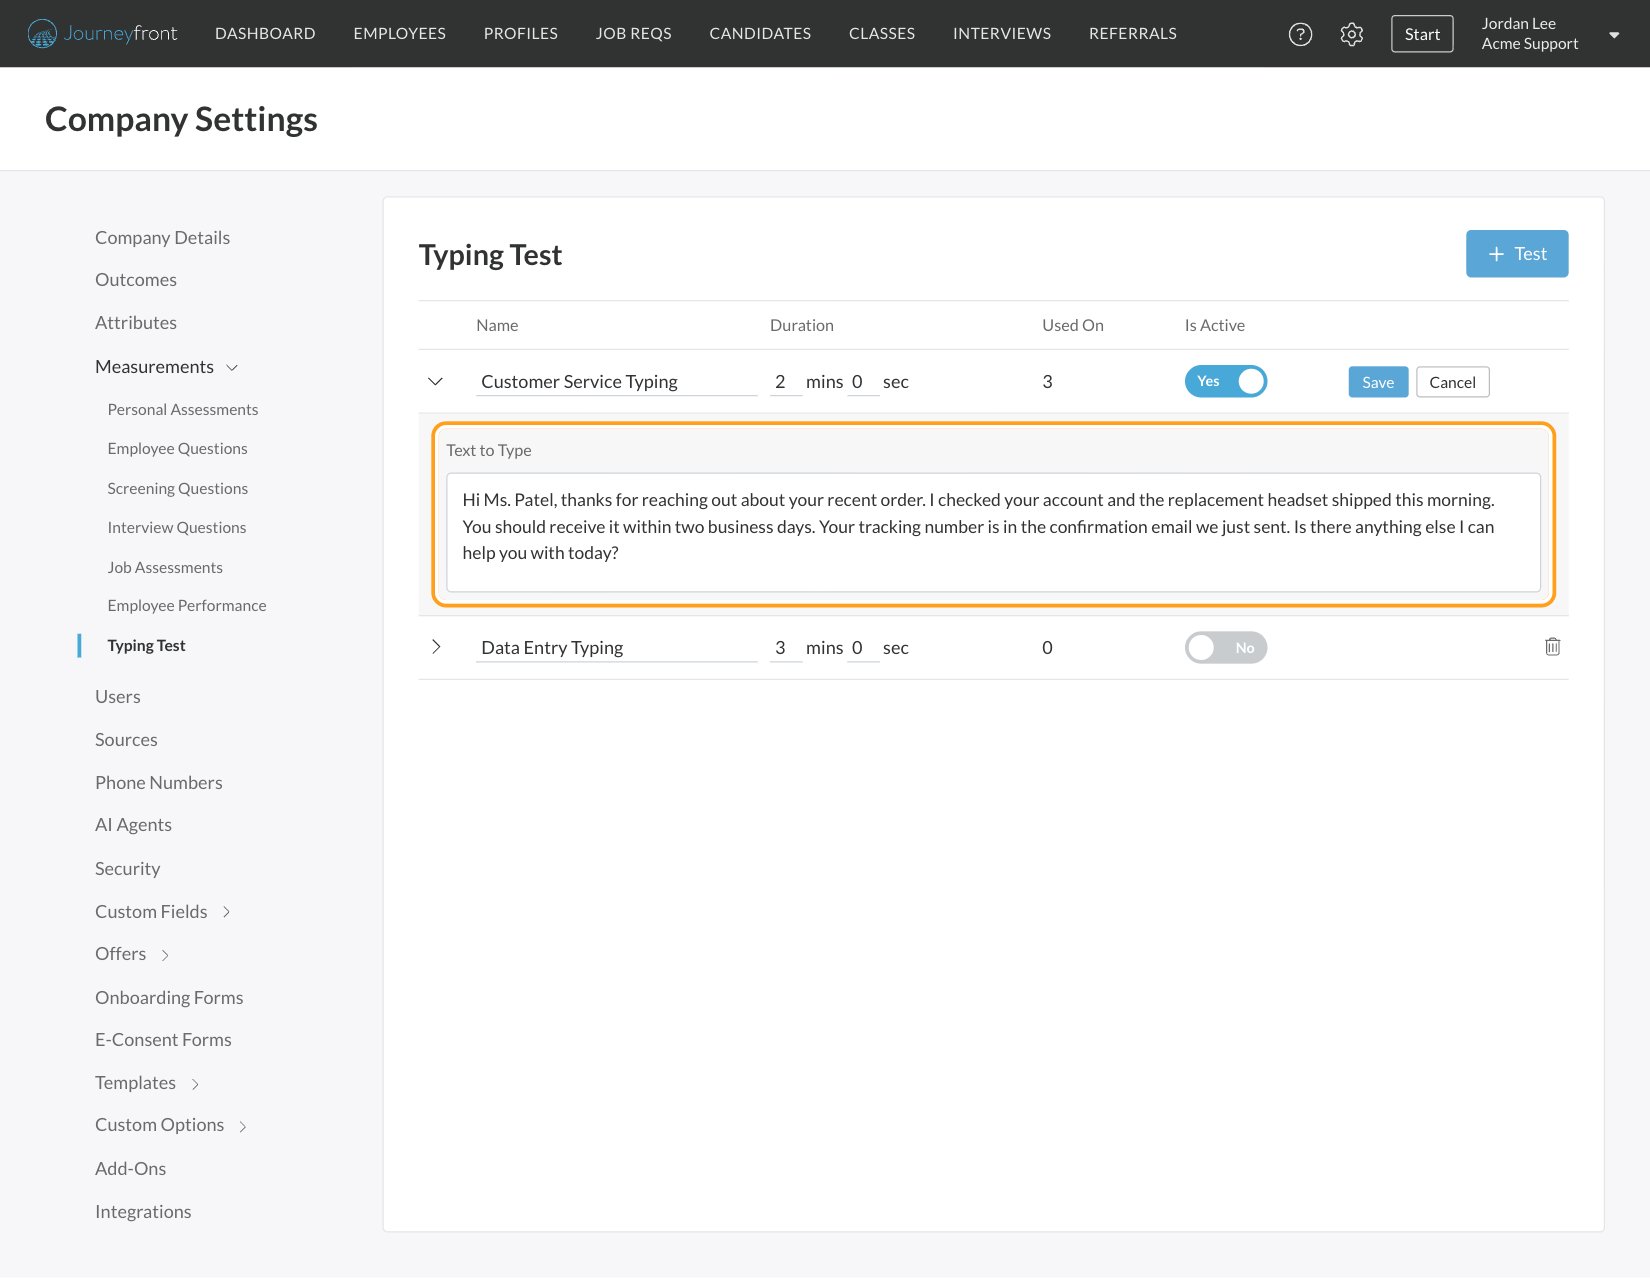
Go to Settings, then Measurements, then Typing Test. The list shows each test’s Name, Duration, Used On and Is Active.
2
Add a test
Click Test. A new row appears. Type a Name and set the Duration in minutes and seconds.
3
Add the text
Expand the row and type or paste the passage into Text to Type.
4
Turn it on and save
Set Is Active to Yes, then click Save. Only active tests can be added to job reqs.
Add a typing test to a job req
1
Open the workflow editor
Open the job req and go to Setup, then Workflow. Click Create New Version (or Edit Draft if there’s already a draft).
2
Add the activity
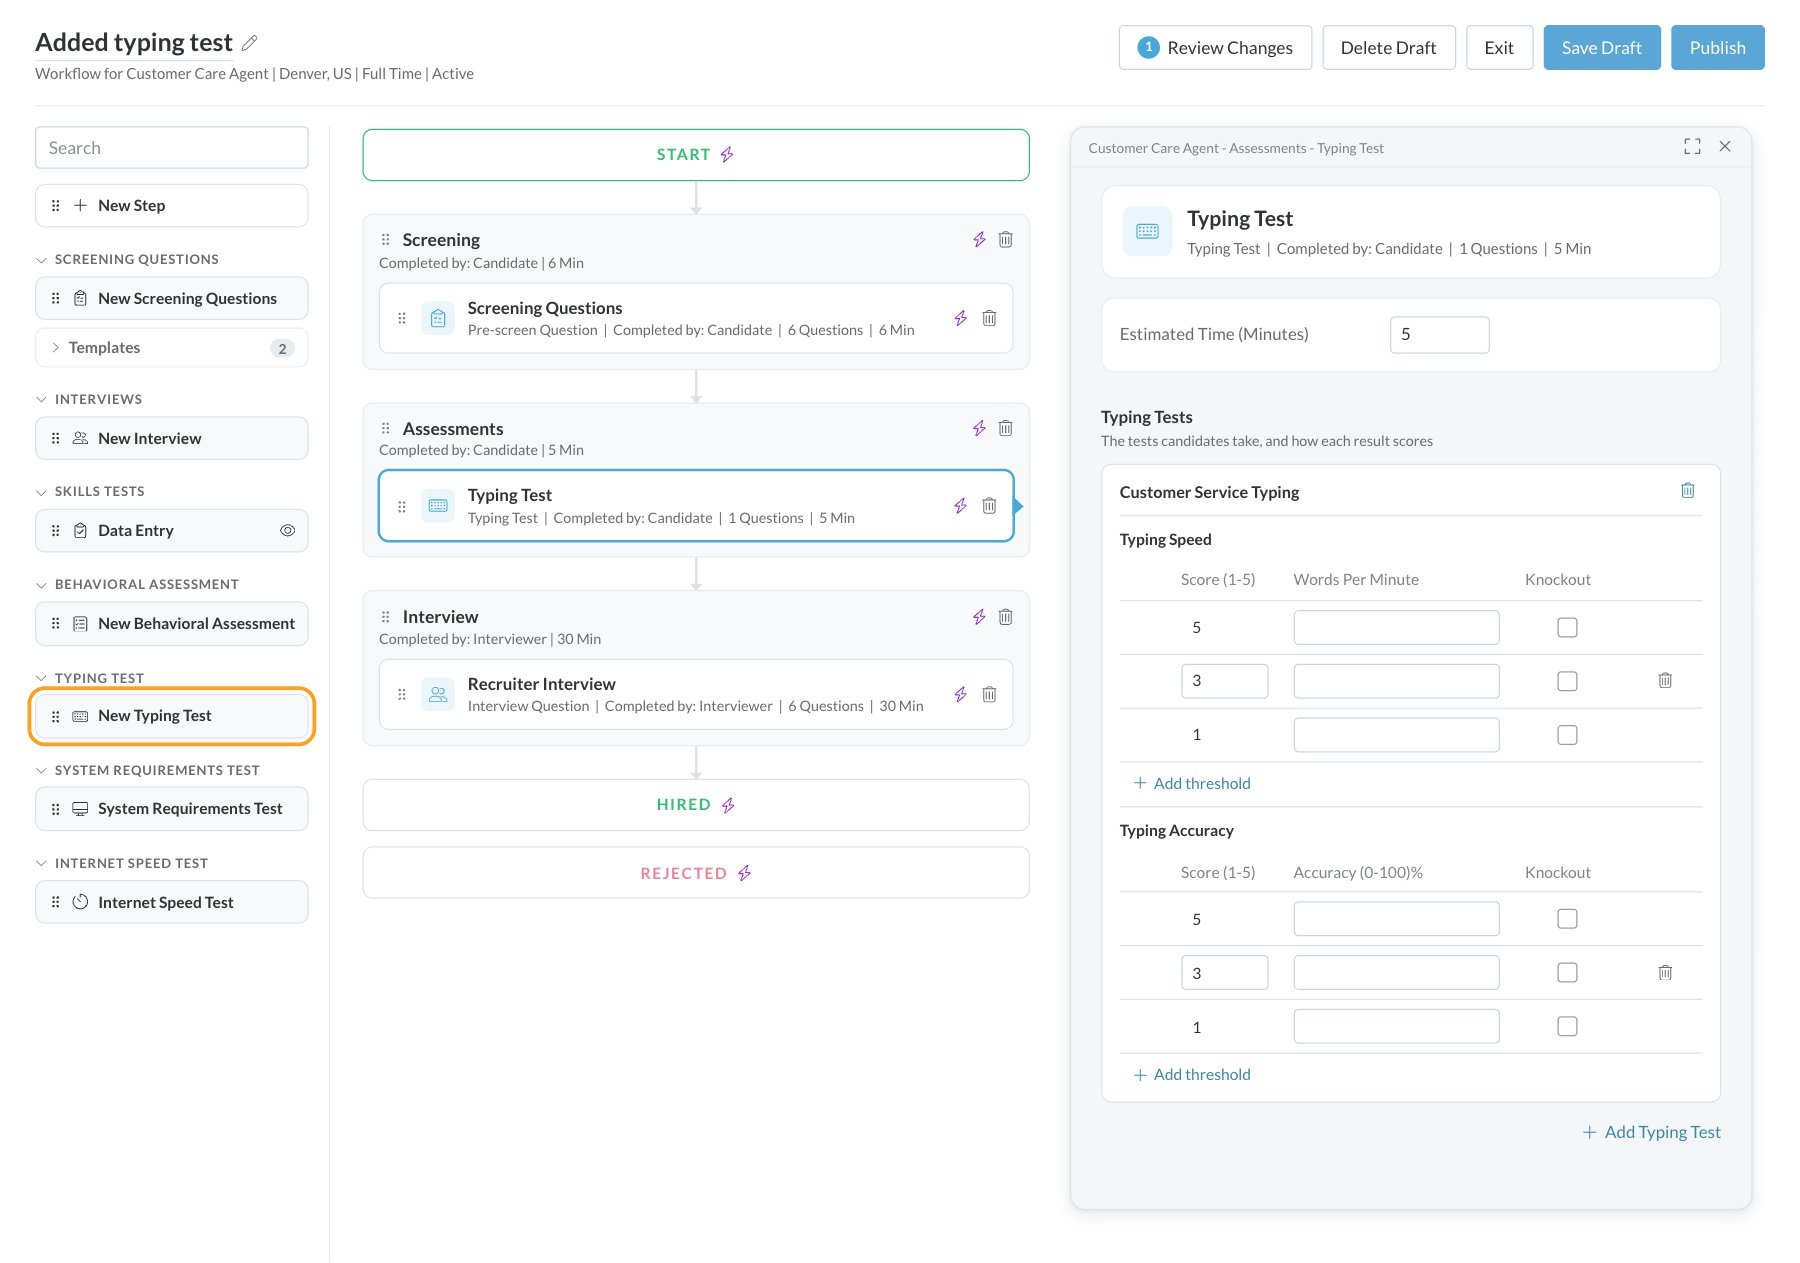
In the building blocks on the left, open TYPING TEST and drag New Typing Test into the step where candidates should take it.
3
Choose the test
Click the activity to open its settings on the right. Under Typing Tests, click Add Typing Test, then click Add next to the test you want in Select Typing Test to Add. You can add more than one; candidates take them one after another.
4
Check the scoring
Each test shows Typing Speed and Typing Accuracy, with score settings for this job req: which results earn which 1 to 5 score, and whether a result can knock a candidate out. Adjust them if this job needs a different bar.
5
Save, then publish
Set Estimated Time (Minutes) and click Save Draft; you stay in the editor. When you’re ready for candidates to see it, click Publish. See Publish workflow changes.
What candidates see
- A computer check. On a phone or small tablet, candidates first see Mobile Device Detected: the test is meant for a computer with a full keyboard, and the on-screen keyboard doesn’t work for it. They can Go Back or Continue Anyway with an attached keyboard.
- Instructions, then Begin Typing Test. The text appears in light grey and they type over it, pressing the space bar to move to the next word. Correct letters turn black, mistakes turn red, and they can use backspace to fix errors as they go.
- A timer that starts when they start typing, and runs for the duration you set.
- Their result. When time runs out, or they reach the end of the text, they see their WPM and Accuracy, then Next Typing Text if there’s another test, or Continue to Next Step.
See the results
Open the candidate’s Candidate Application and select the Steps or Score tab. The typing test shows a score for Typing Speed and Typing Accuracy, with the raw result under each: words per minute and percent accuracy. See Reading a candidate’s scores.FAQ
Can candidates take the typing test on a phone?
Can candidates take the typing test on a phone?
Only with a physical keyboard attached. The on-screen keyboard is turned off for the test, and phones and small tablets show a warning before it starts. A computer works best.
When does the timer start?
When does the timer start?
When the candidate starts typing, not when the page opens. They can read the instructions first without losing time.
A candidate had a problem during the test. Can they take it again?
A candidate had a problem during the test. Can they take it again?
Yes. Someone with Can Delete Scores can delete the typing test’s score on the Steps tab, and the candidate can then take it again from their application. See Retakes and resetting scores.
Why can't I delete a typing test in Settings?
Why can't I delete a typing test in Settings?
It’s used on at least one job req (see Used On). Set Is Active to No instead, so it can’t be added to new job reqs.
Why isn't my typing test in the Add Typing Test list?
Why isn't my typing test in the Add Typing Test list?
Only active tests are listed. In Settings, then Measurements, then Typing Test, set its Is Active to Yes and click Save.
Do candidates see their score?
Do candidates see their score?
They see their words per minute and accuracy when they finish each text. They don’t see the 1 to 5 score your team uses.
Related
Assessments overview
Every assessment, what it measures and what candidates need.
Retakes and resetting scores
Let a candidate take a test again.
How scoring works
Raw results and the Job Adaptive Score.
Build a workflow
Add steps and activities to a job req.