

Who can do this: Anyone on the job req’s hiring team, or with the All Job Req Access permission. Setting up custom hiring class fields needs Company Settings Access.
Create a class
1
Open the job req's Hiring Classes tab
Open the job req and click the Hiring Classes tab.
2
Click Create Class
Click Create Class at the right of the toolbar. The Create Hiring Class window opens.
3
Fill in the details
Enter a Class Name, which is the only required field, and anything else you know now. See Class details.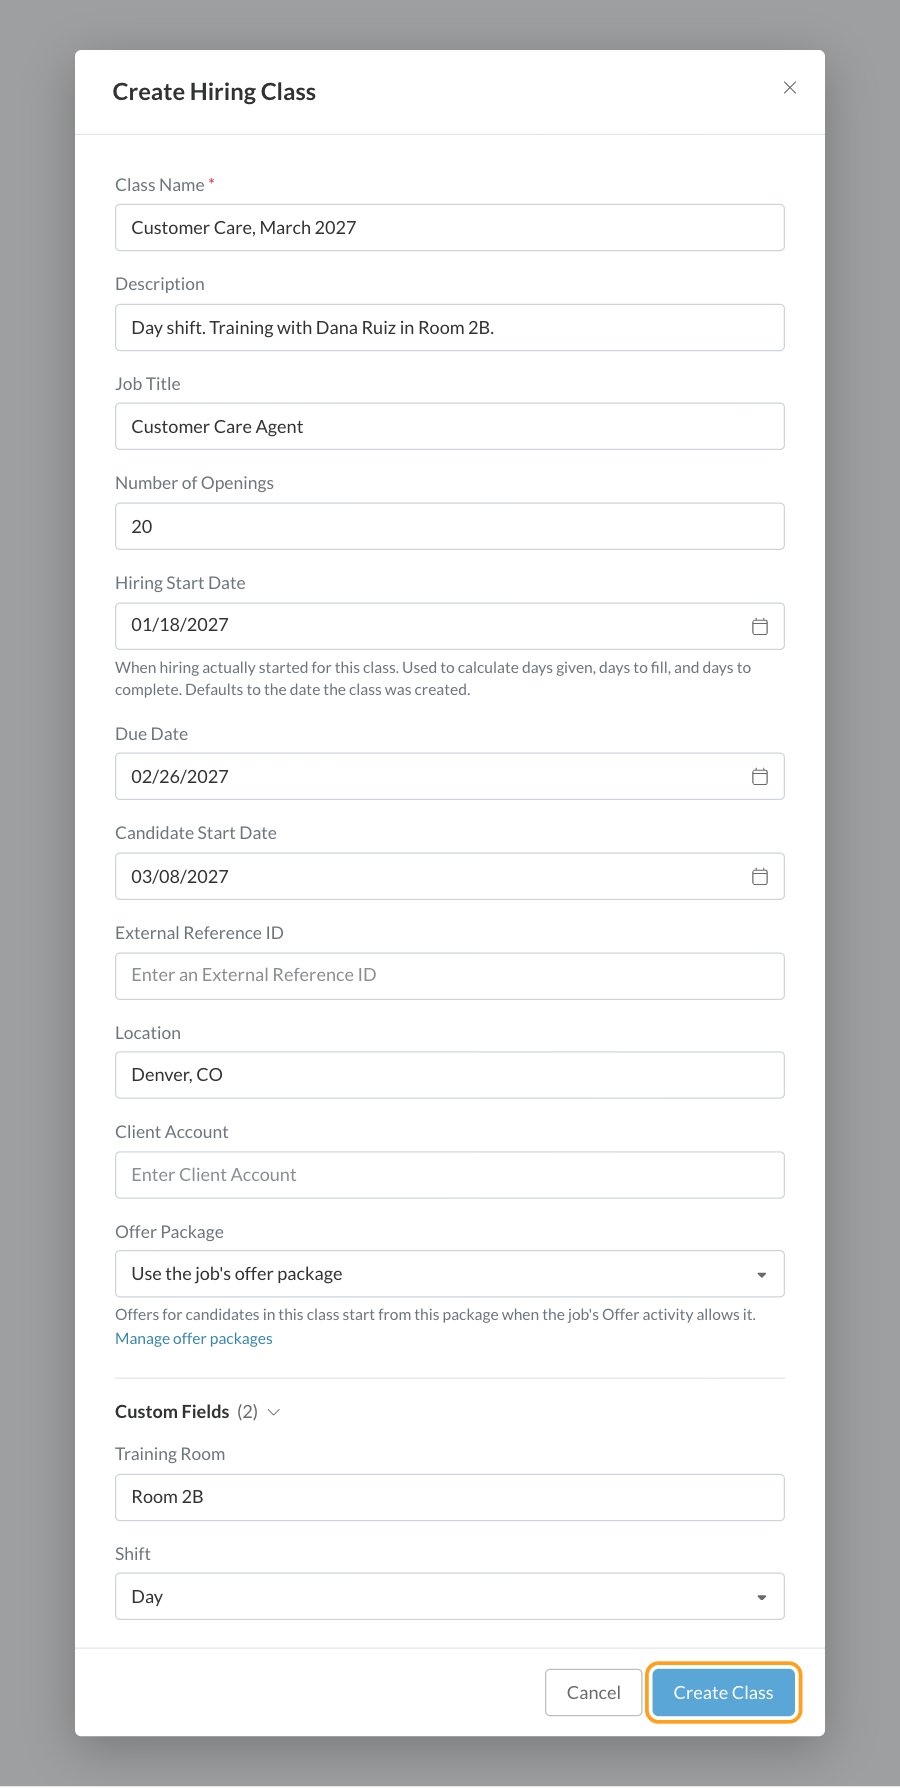
4
Click Create Class
The class is created as a Draft.
5
Make it active
Click the class’s Draft status and choose Active, or open the menu next to its name and click Set To Active. Candidates can only be added to active classes.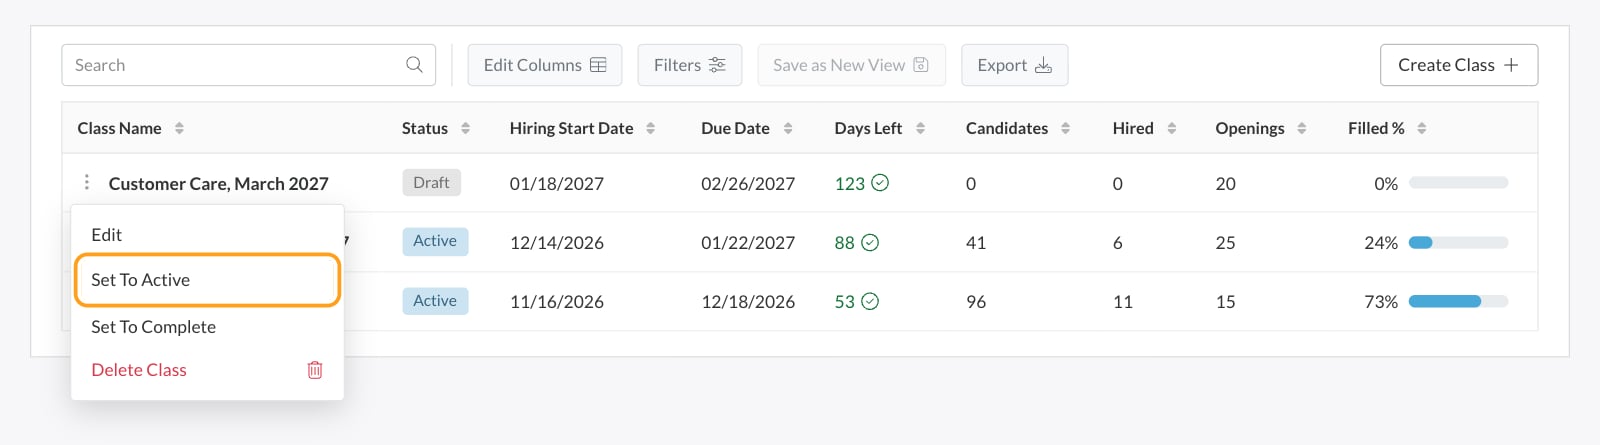
Class details
A class’s Offer Package is only used when the job req’s Offer activity allows it, with Use the candidate’s hiring class offer package turned on in the workflow. See Offer packages.
Class statuses
To change a status, click the status on the class’s row and pick another one, or use Set To Active, Set To Complete or Set To Draft in the menu next to the class name.
Edit or delete a class
Open the menu next to the class’s name:- Edit opens the Edit Hiring Class window with every field. Click Update Class to save.
- Delete Class deletes it, after you confirm. You can only delete a class with no candidates in it; remove or move its candidates first. Deleting can’t be undone.
The Hiring Classes tab
The tab shows the job req’s classes, with summary tiles above the list:
Each class’s row shows its Status, Created date, Hiring Start Date, Due Date, Days Given, Days Left, Candidates, Hired, Openings and Filled %, and you can edit Client Account right in the list. Use Edit Columns to add more, like Candidate Start Date, Date Filled, Days to Fill, Rejected, Offer Package or your custom hiring class fields.
Filters and saved views work the same way as on the Candidates page, including sharing views with your team. To download the list, click Actions, then Export Data. Classes in the top navigation shows the same list for every job req at once, with a Job Req column.
Custom hiring class fields
To track something every class needs, like a training room or a client’s cost center, add a hiring class field: go to Settings, then Custom Fields, then Hiring Class Fields. Your active fields appear in the Custom Fields section of the create and edit windows, as columns and filters on the hiring classes list, and as merge keys for offer documents. See Custom fields.FAQ
Why can't I add candidates to my new class?
Why can't I add candidates to my new class?
New classes start as Draft. Set the class to Active, and it appears when you assign candidates.
Why is Delete Class greyed out?
Why is Delete Class greyed out?
The class still has candidates in it. Remove them, or move them to another class, first.
What's the difference between Hiring Start Date and Candidate Start Date?
What's the difference between Hiring Start Date and Candidate Start Date?
Hiring Start Date is when you started recruiting for the class, and drives the time-to-fill numbers. Candidate Start Date is the hires’ first day of work, and is used as their start date when you hire them.
Does a class close itself when it's full?
Does a class close itself when it's full?
No. When hires reach the number of openings, the class records its Date Filled, but it stays Active until you set it to Complete.
Why can't I see some classes on the Classes page?
Why can't I see some classes on the Classes page?
Without the All Hiring Class Access permission, you see classes for the job reqs you’re on. Ask your Journeyfront admin.
Related
Working with a class
Add candidates, message them and hire the class.
Hiring classes overview
When to use classes, and where to find them.
Offer packages
Give each class its own offer terms.
Custom fields
Add your own hiring class fields.