Action Menu
- Sign in at https://app.journeyfront.com/login
-
Click the “JOB REQS" tab in the top navigation bar.
-
From the list of job reqs, click on one to make changes.
- Now click on the Actions Menu, which is where all the actions for job reqs are.
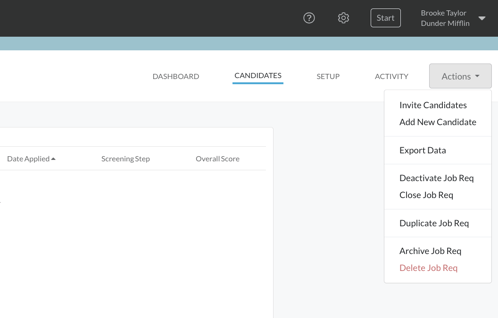
- Click on these underlined links to learn about Inviting Candidates and Adding New Candidates.
- Export Data: Choose this option to get a file containing information about candidates in this job req.
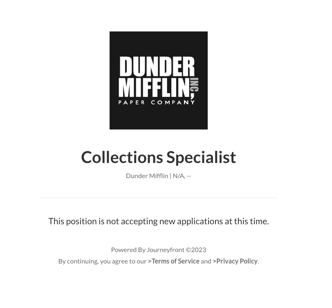
- Deactivate Job Req: Choose this option to temporarily stop candidates from applying for the position. Candidates who apply to Job Reqs that are deactivated will receive the following message:
- Close Job Req: Choose this option to officially close the job. Hiring team members will not be able to add any candidates to the job req at this point.
- Duplicate Job Req: Choose this option to create a copy of the job req. This is helpful if you want to use the same screening plan for different roles or hiring classes. (Click on the underlined link for further details.)
- Archive Job Req: Choose this option to hide this job req from the list. It will not delete the req.
- Delete Job Req: Choose this option to permanently delete the job req and all candidate data within it. This cannot be undone.
Please watch the following video to lean more about the Job Req Tab